

First Time Thatching
Sam Hall, a member of our education and public engagement team, reflects on his experiences learning to thatch on our new Danebury CS20 Iron Age Roundhouse.
Sam Hall is a dedicated member of our education and public engagement team here at the farm, but as with all jobs at Butser there is always the opportunity to learn a new skill and get stuck in to one of the many projects taking place at the farm.
Here Sam reflects on his experience learning to thatch and helping out on the construction of our latest Iron Age Roundhouse- Danebury CS20.
Thanks Sam!
Butser Ancient Farm resonates with a long-lost past and all its traditions in many ways. From its own history of extensive archaeological research to the experimental structures which exist on site, the commitment of the Farm to expanding our own understanding of British prehistory (including, of course, Roman and beyond!) is clear for all to see.
Something else at the Farm which resonates with a deep-rooted practice of human society is the idea of skill-sharing. In many ways this is of course practiced today, although for entirely different reasons: usually it is in working multiple apps, devices, and machines. But what about when the machines disappear? The skill-sharing at the Farm instead focuses on traditional hand-crafts that are both physically and mentally demanding, in which you, and the small team with whom you work, become the determining agents as to whether it goes particularly well or not so much (no pressure!).
Luckily, in my first week thatching, the pressure was almost nonexistent, as I was working under the supervision of Paul Corrie. This meant that not only could I take the time to focus on all the aspects of thatching itself, but also that I could have that time to assimilate and learn the skills I would need to pick up. All of this is necessary to ensure that the reed roof of the new Iron Age roundhouse actually stays on - wouldn’t that be a good start?

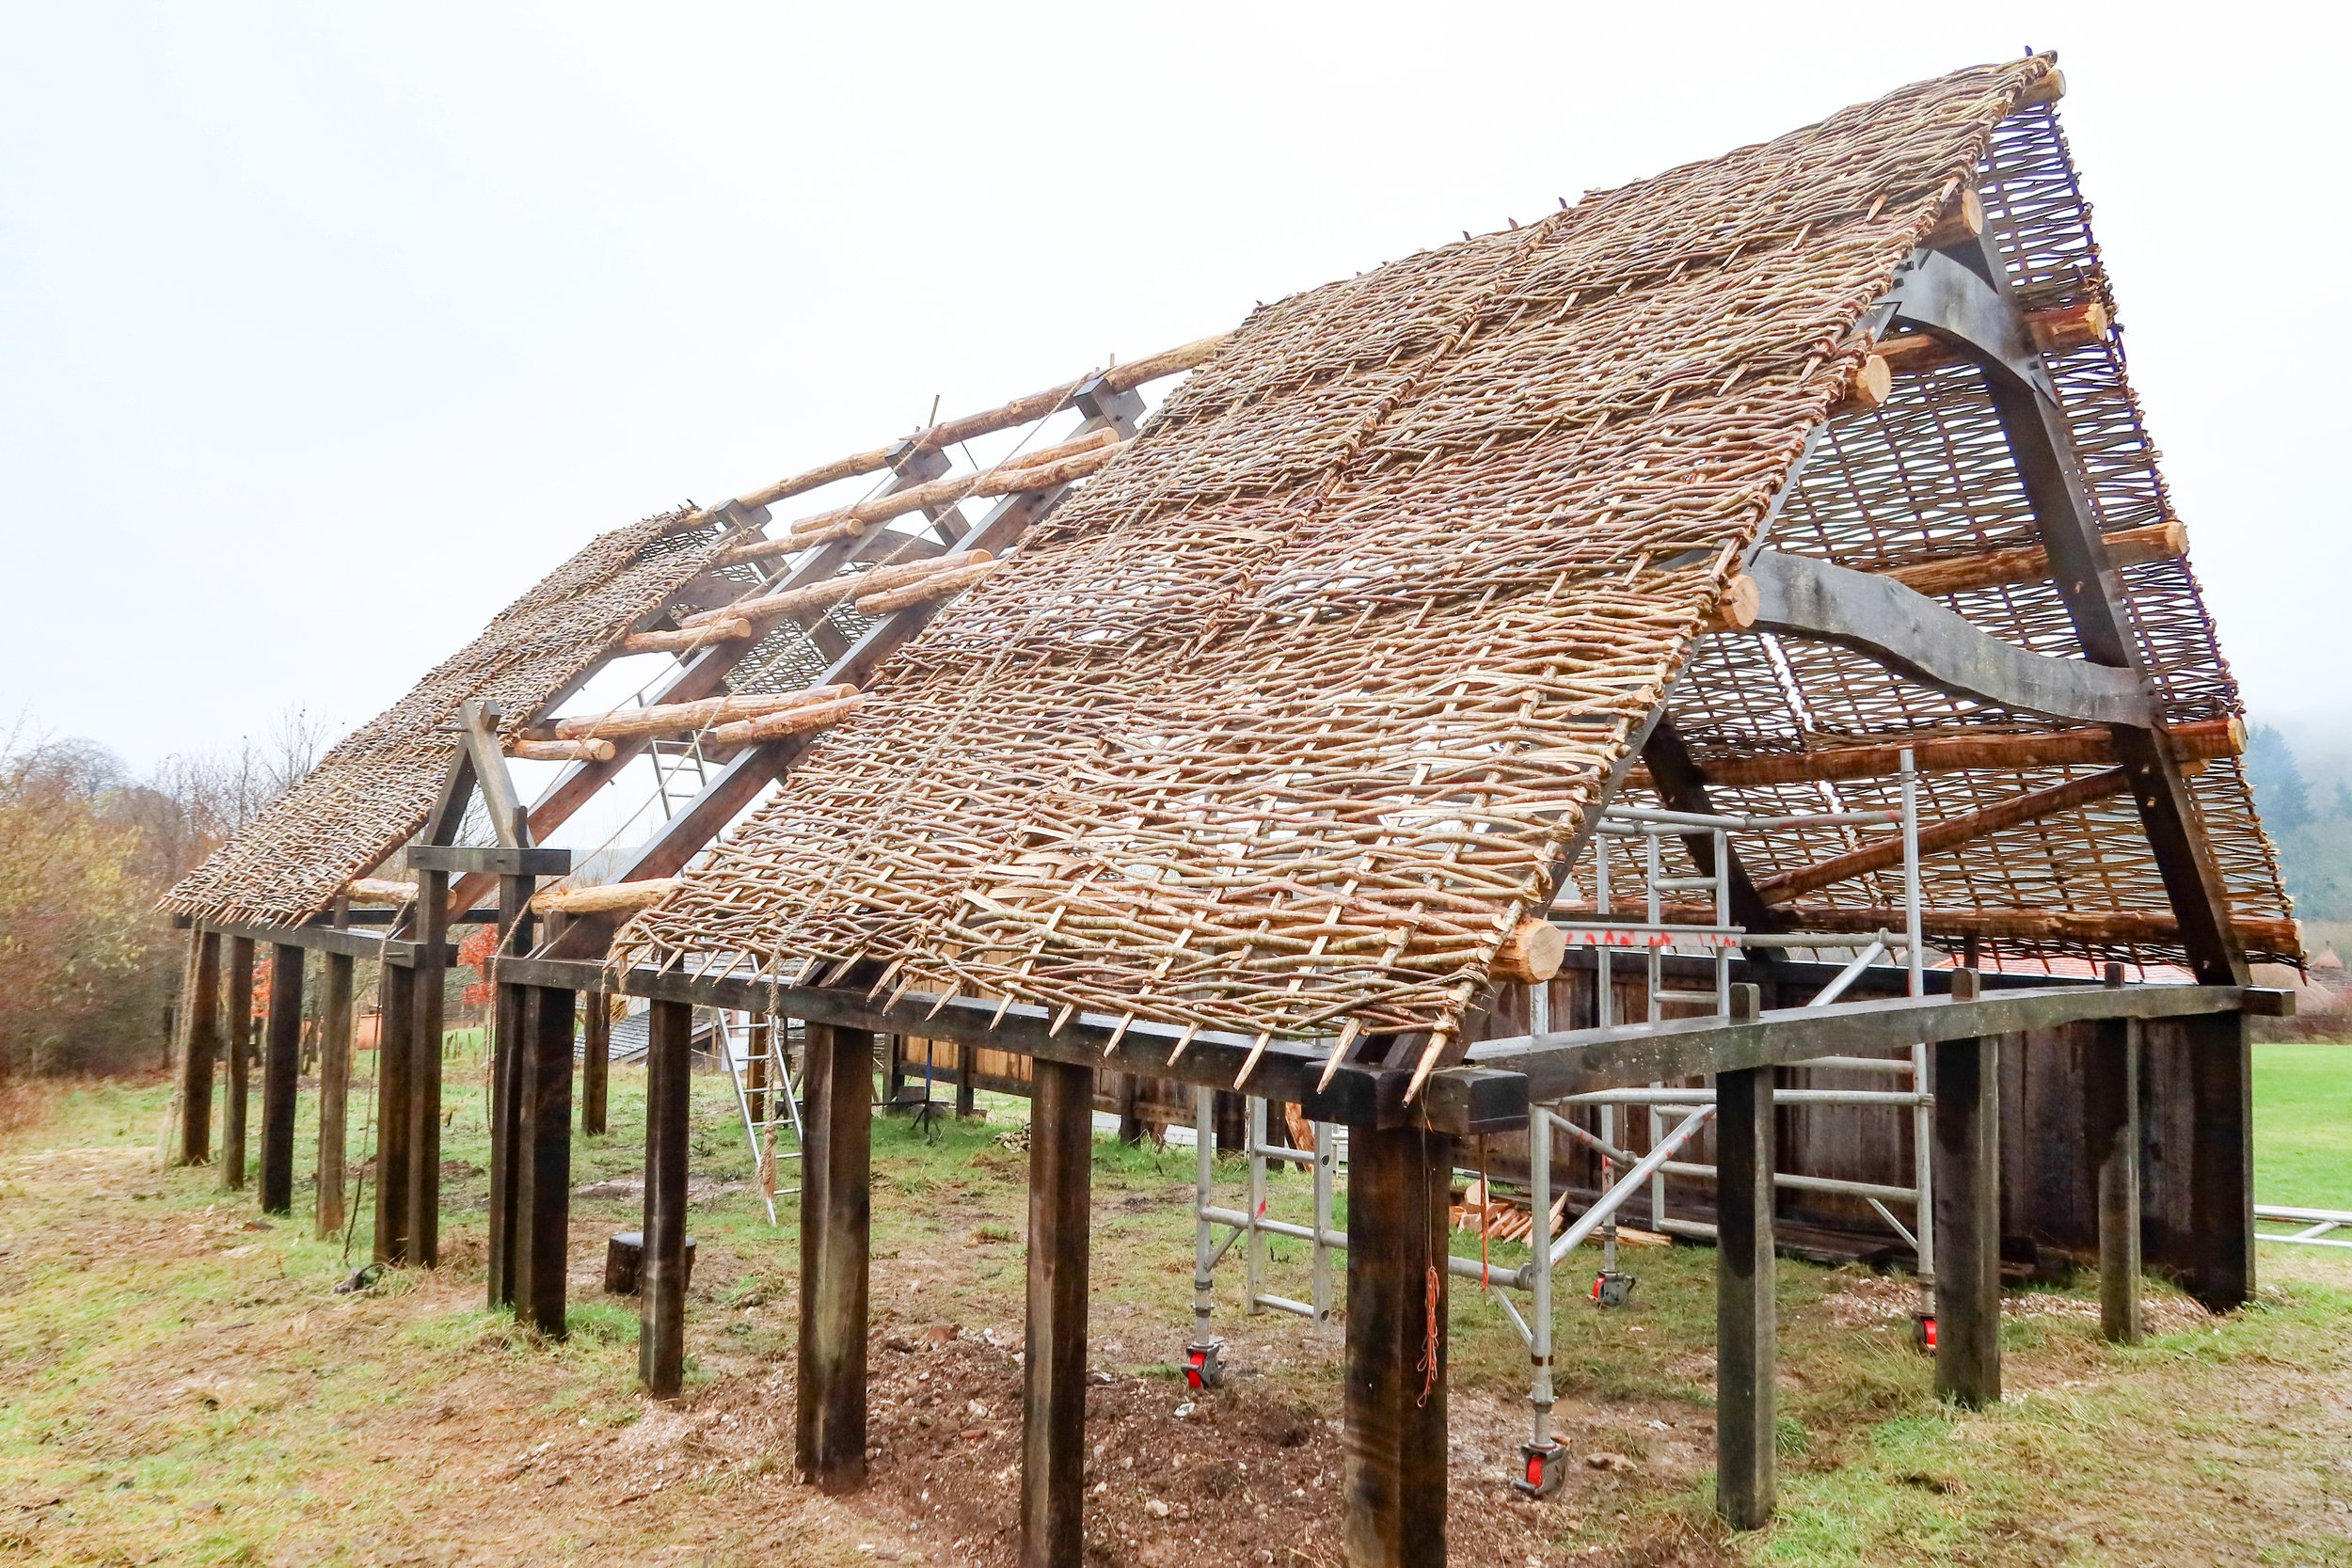
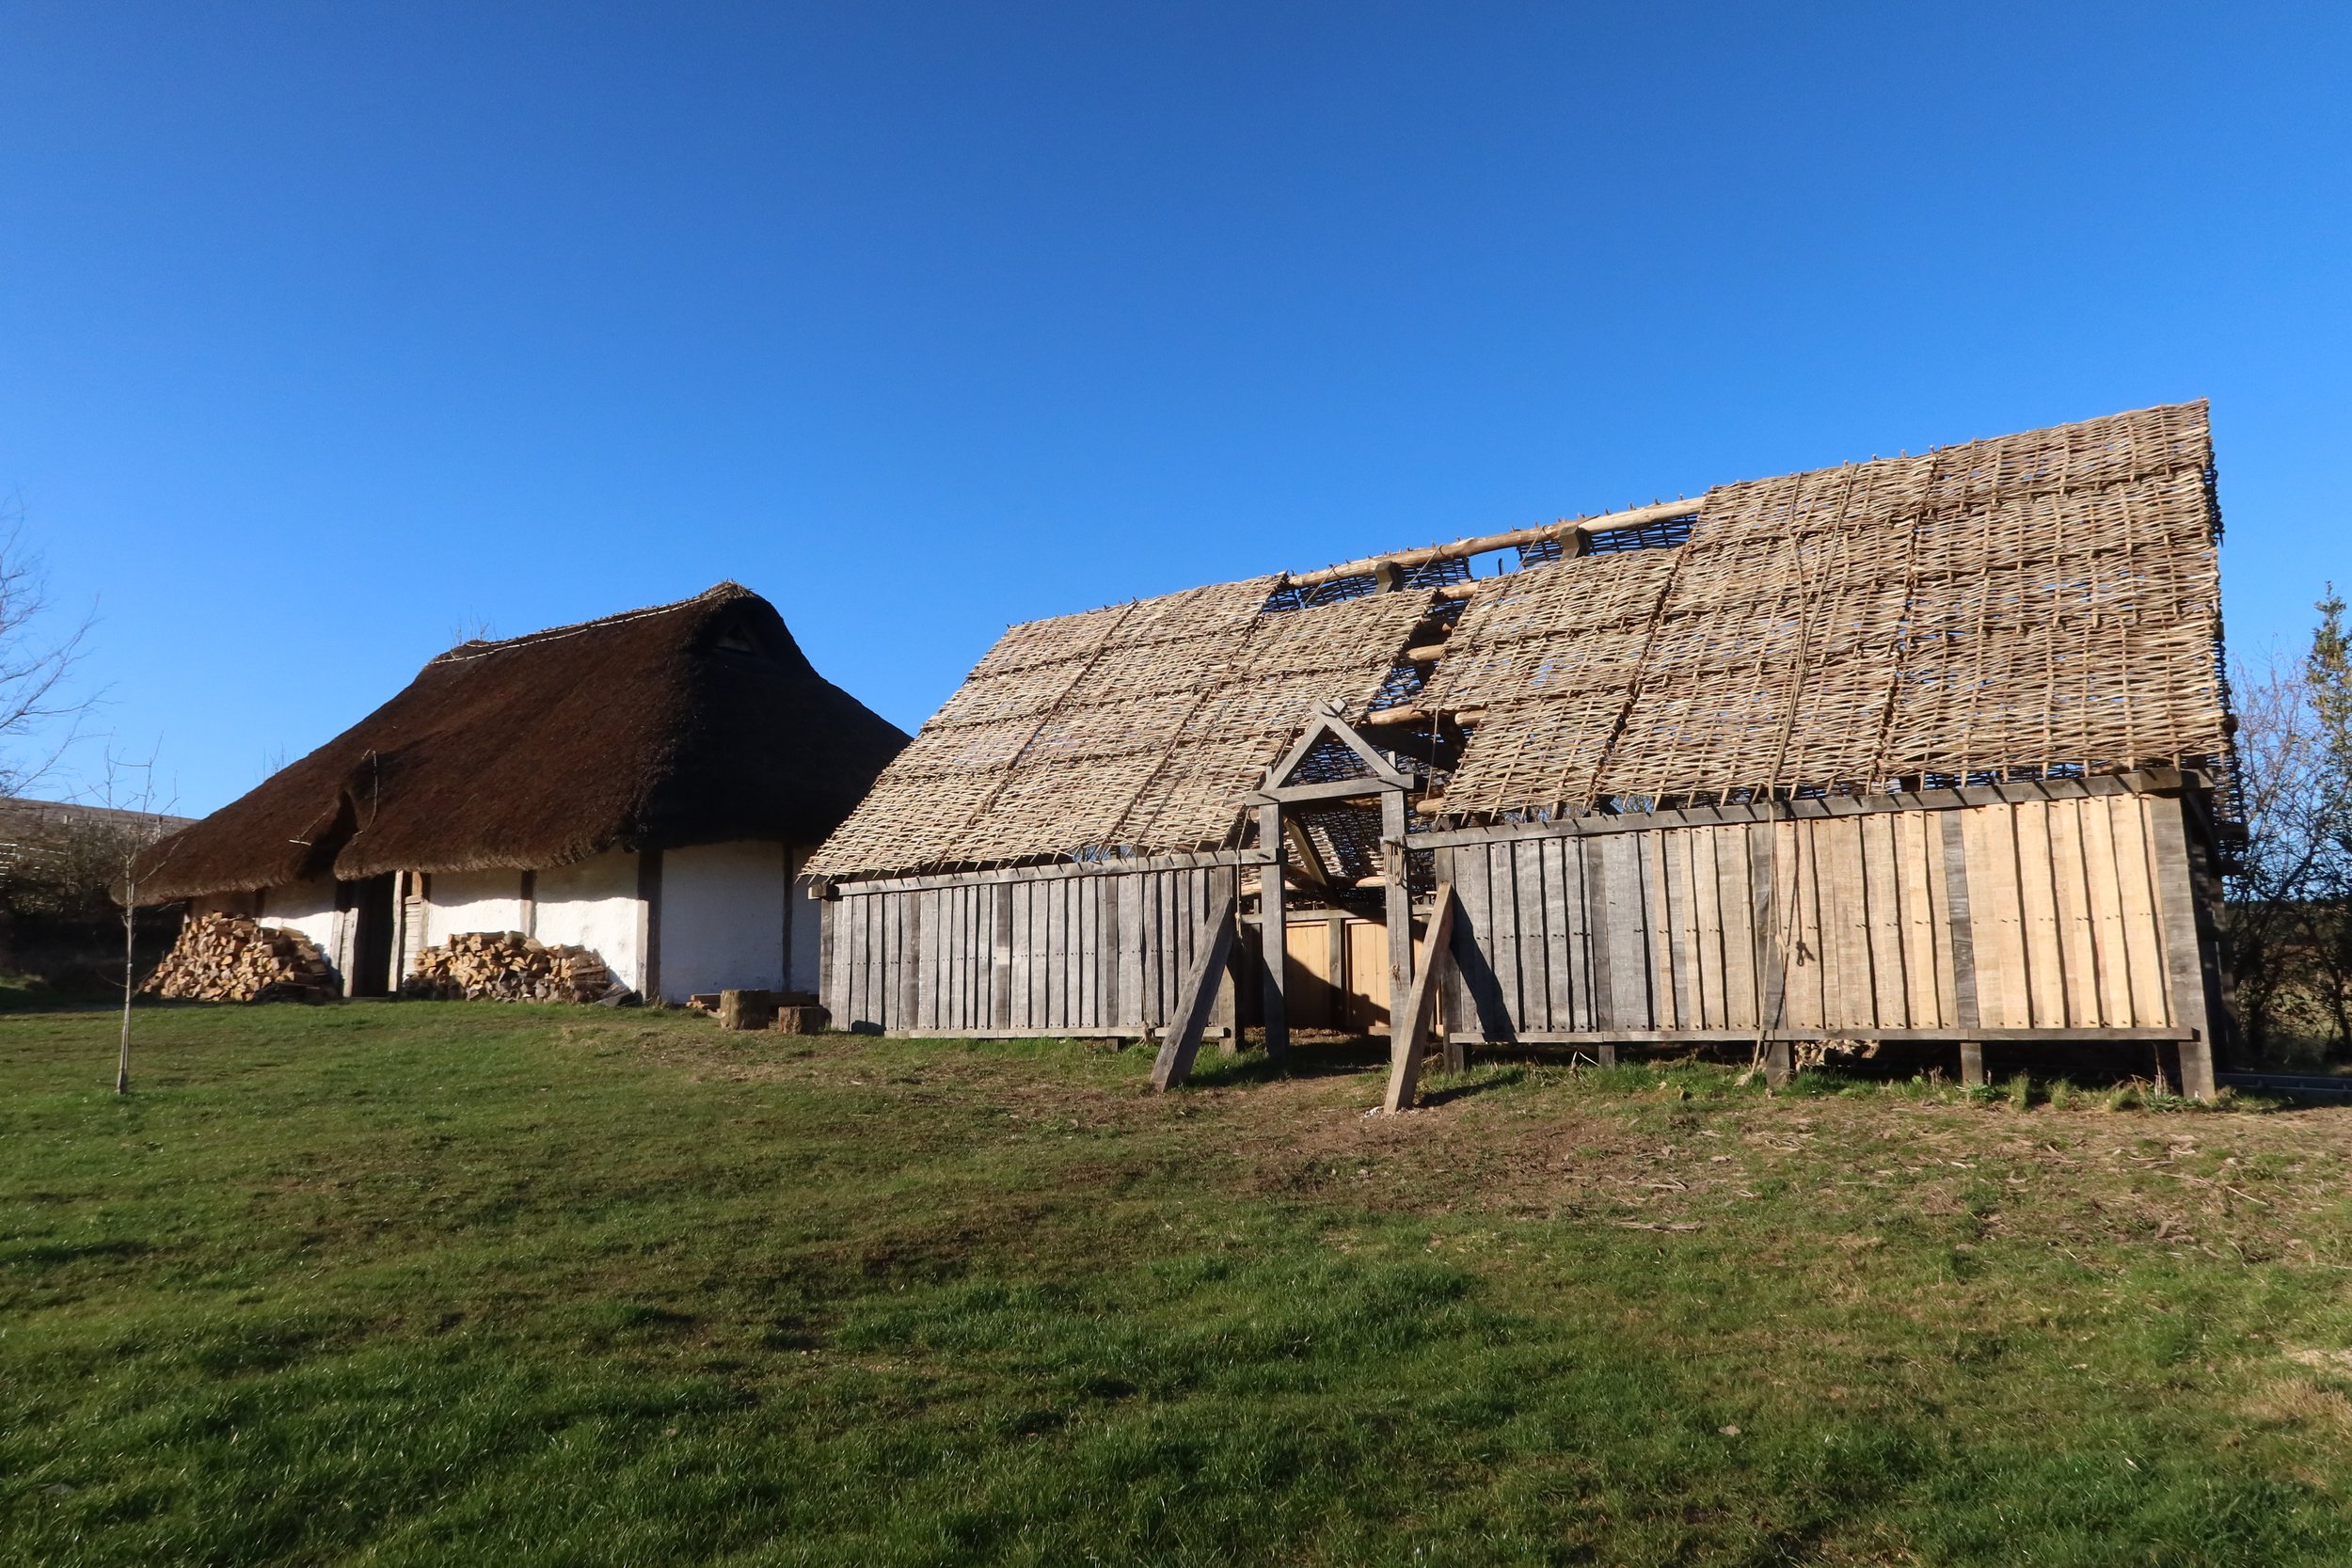
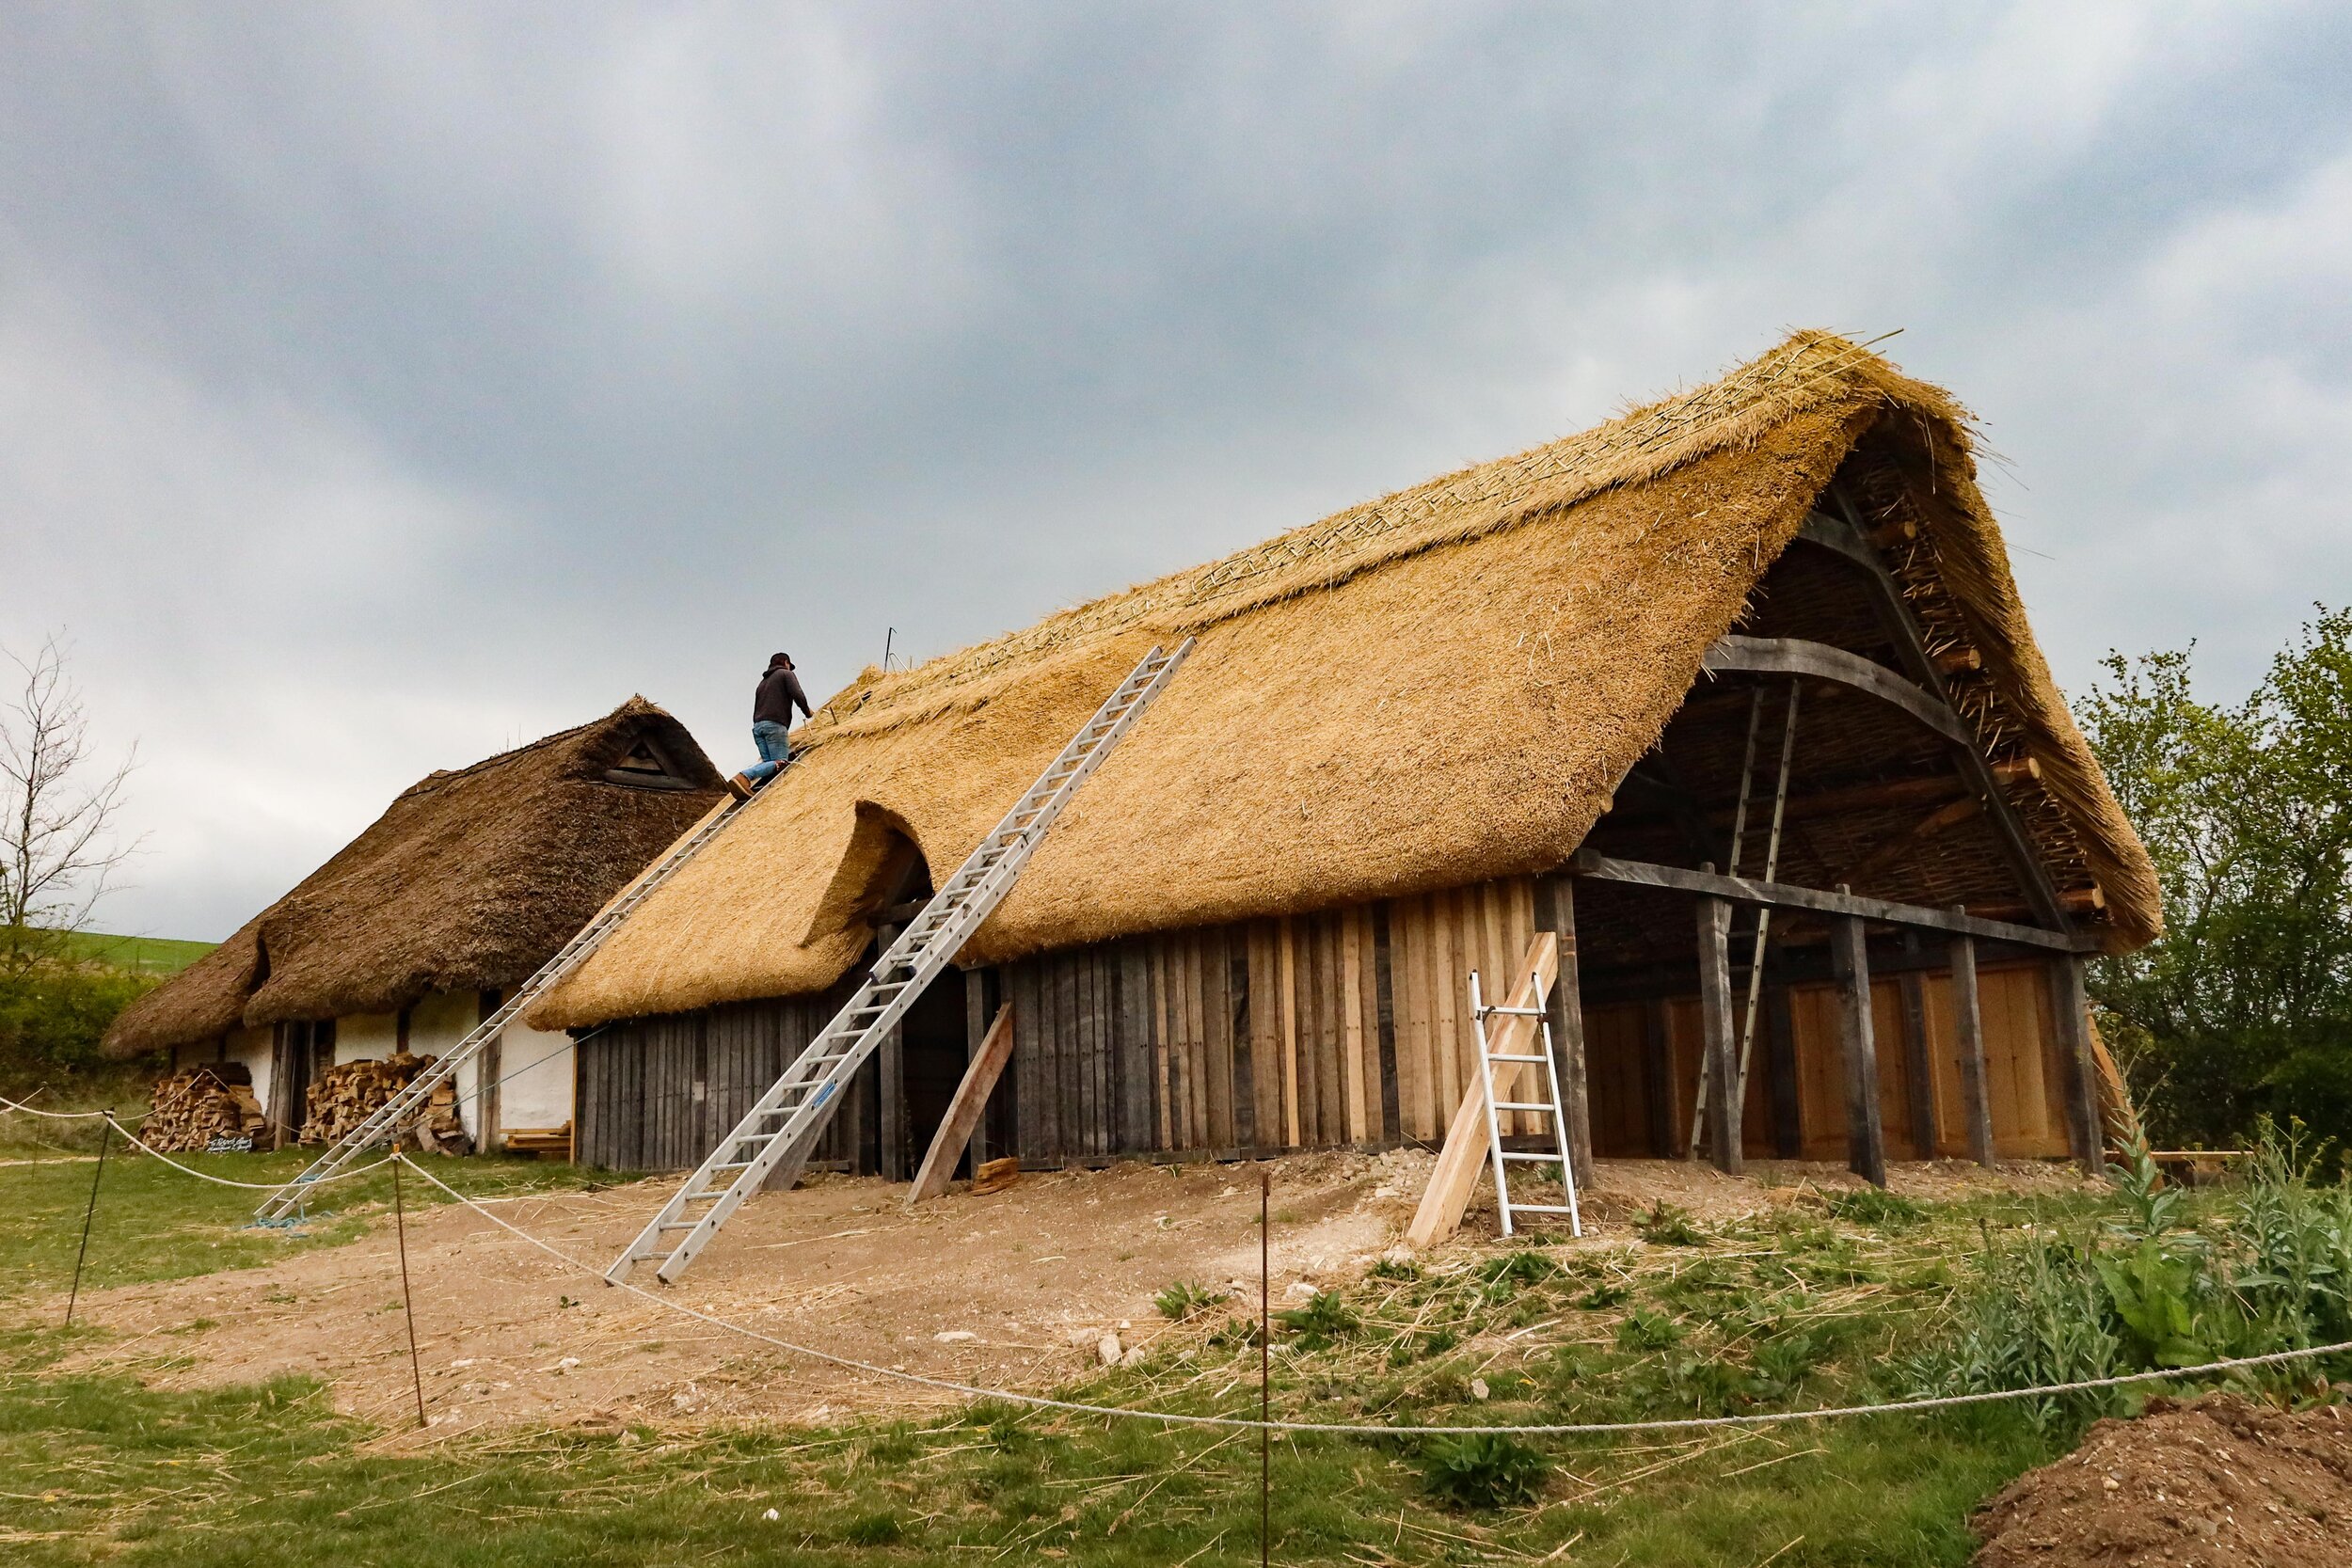
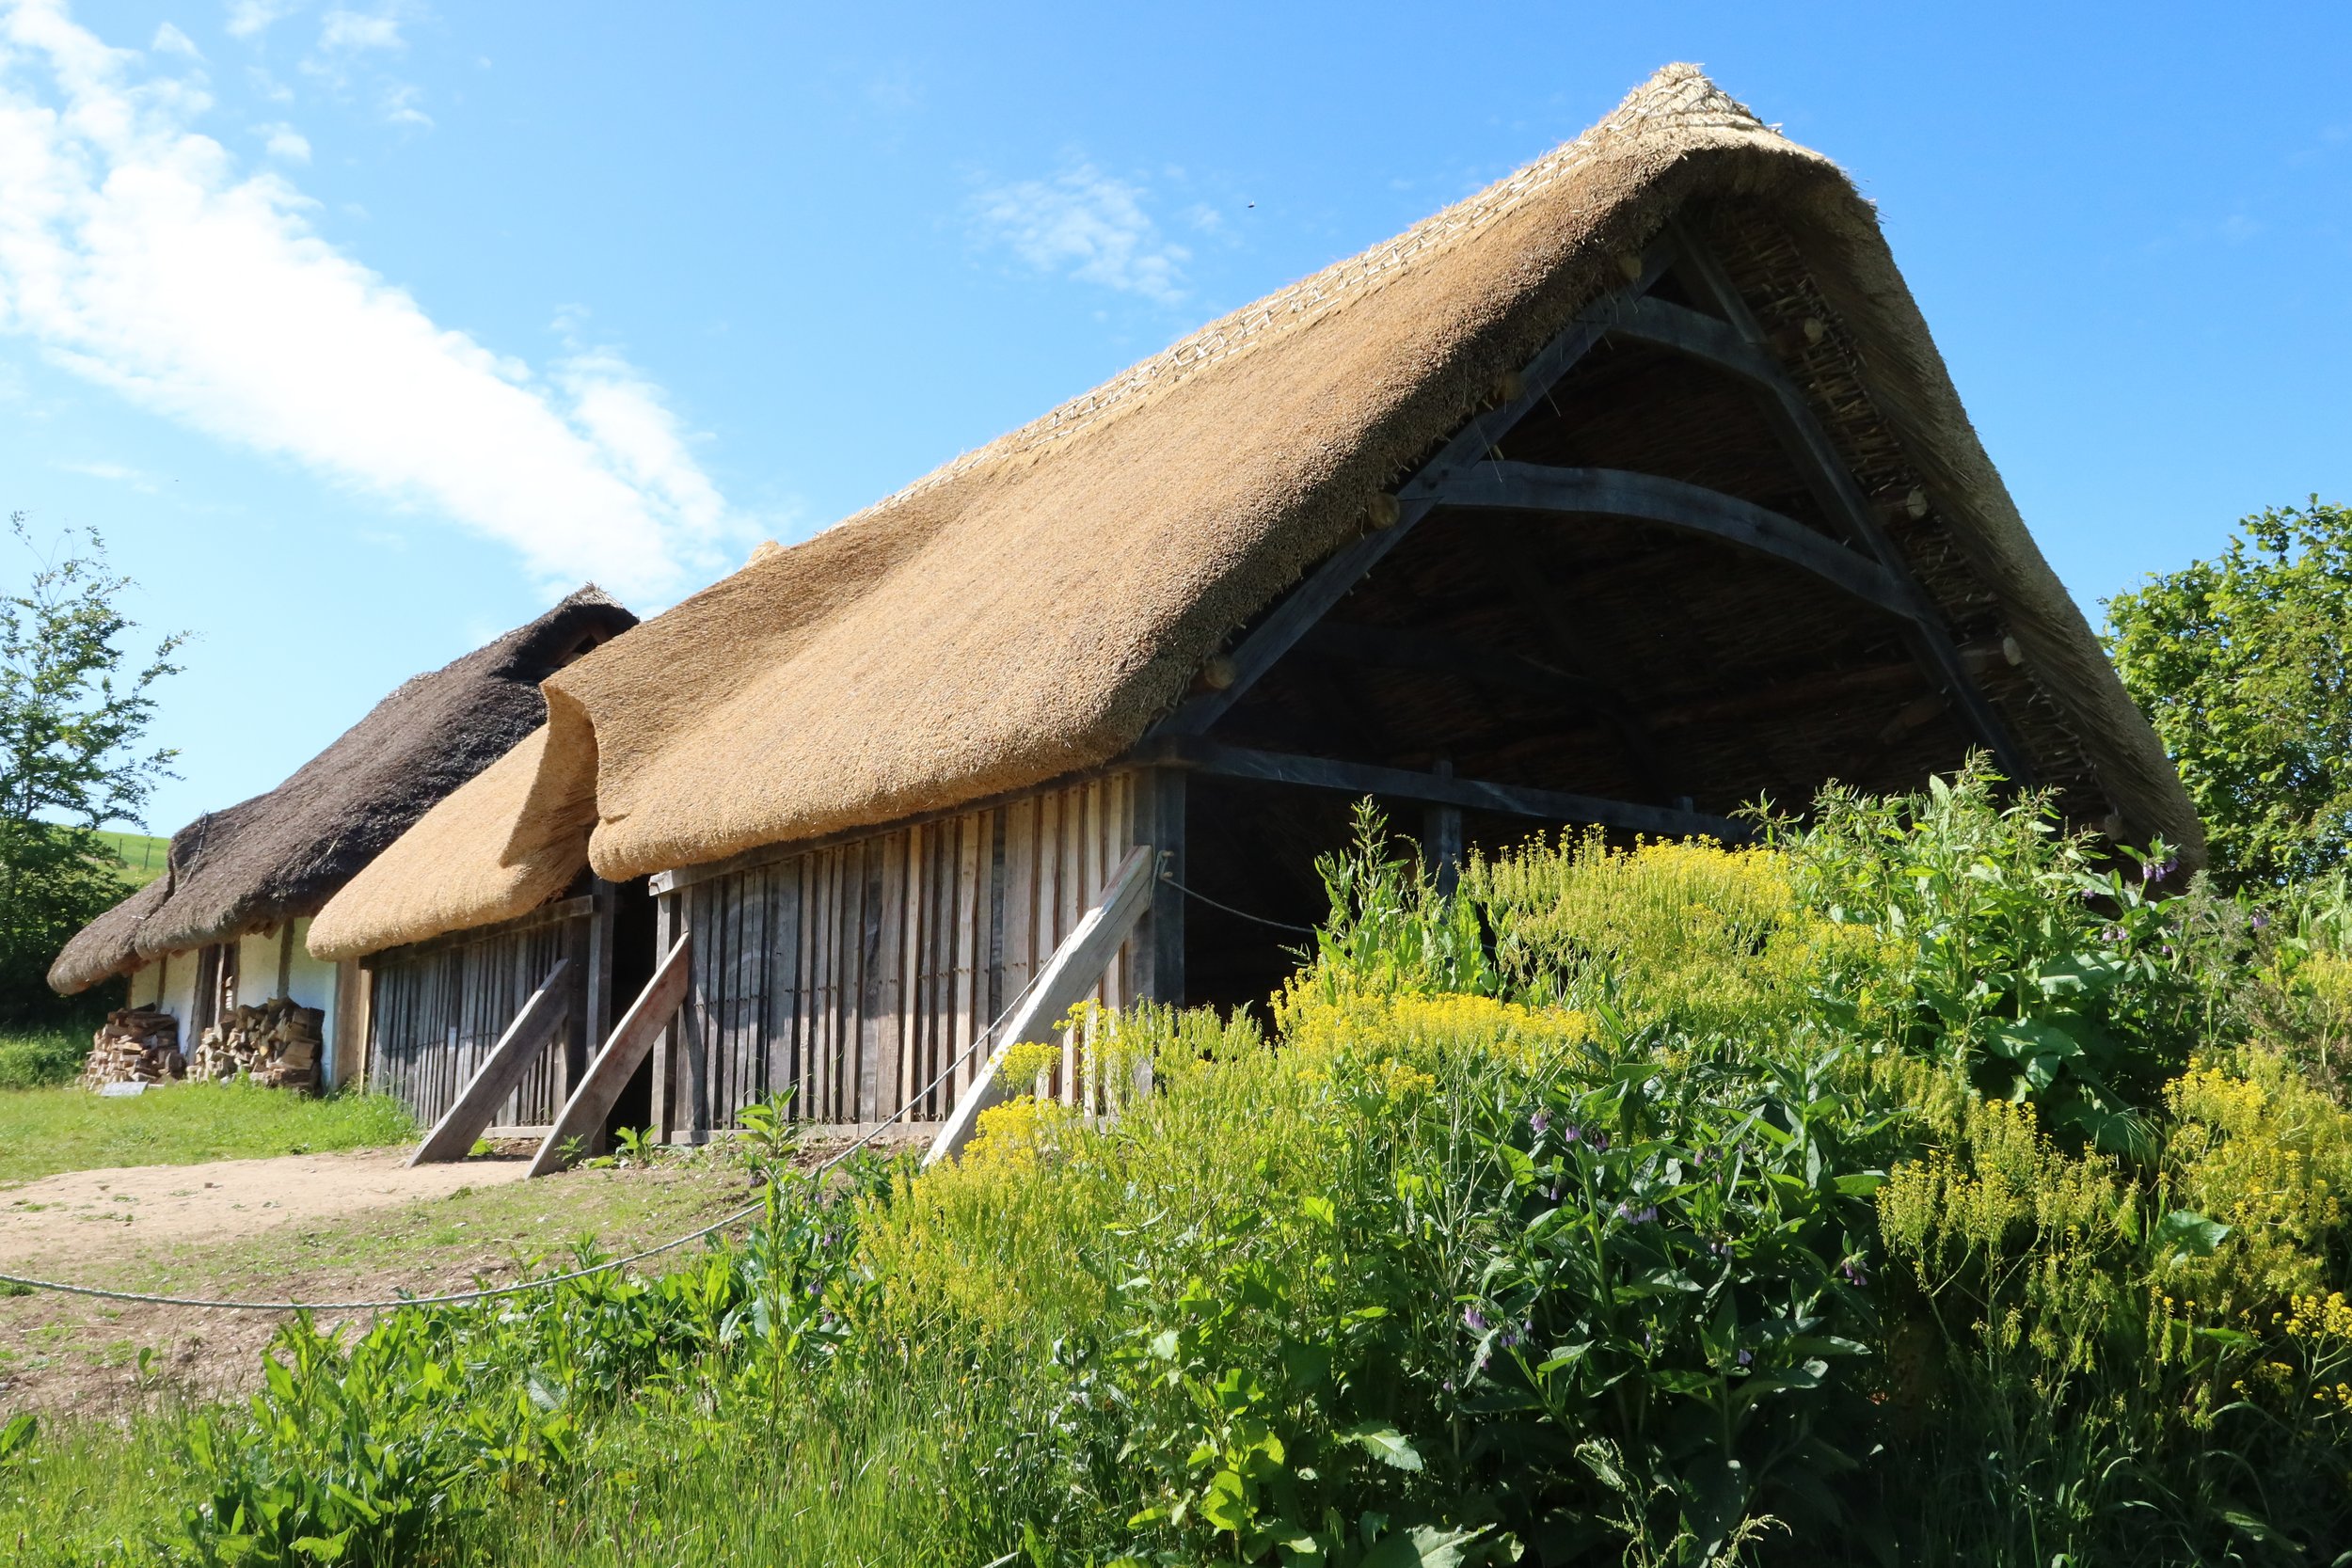
Sam’s thatching work on Danebury CS20 Roundhouse

Here you can clearly see the older darker reused thatch and newer thatch on top.
Mistakes being a key part of any human labour, the idea of having sufficient time to actually learn multiple aspects of any one craft is what makes skill-sharing such a success. There is, unlike many parts of life today, no time to rush; doing so is likely to lead to more costly, time-consuming, and labour-intensive problems to fix.
Learning in this way makes historical sense too. It is one thing to live as part of a society, like we do today, which has a hyper-abundance of products. What of those prehistoric peoples who, to get anything at all, had to work hard at each step? The hazel rods, for example, making up multiple purlin rings around the heavy timber roof, would not have come to those people pre-cut and shaped already. Instead, they would have their starting point at the tree itself, to which they would have to take their axe (again, the result of a long process of iron ore extraction, smelting, forging, and so on) before carrying the timber back to wherever the new house was being built. Each step of the way was a learning curve for those people, with the time and energy invested being more precious than money; no machines could step in to replace their effort and dramatically reduce the time involved; it was vital, therefore, not to waste resources.
So, although my very first week learning to thatch a roundhouse roof covered a small portion of the third lift (or “level” of thatch), it provided plenty of opportunity to resonate a fraction more with how those before us had to go about things. Down to the seemingly minute details - for example, are the reeds spread thin enough? - and the unforgiving nature of thatch when tied on properly - there is little movement to push through, although that is needed to get the next bundle tied securely to the beam behind - the feeling of scratched, cold hands makes prehistory and its people feel incredibly close.
On top of that, the opportunity to begin this learning journey adds an enormous amount of value to the educational side of work at the Farm. Enabling the skills experienced and learned first-hand to be communicated with eager students puts a priceless value on the past and encapsulates what it means to bring to life practices and skills which are slowly being lost.

Danbury CS20 Roundhouse being thatched, February 2023

Firing a Roman Kiln
Previously in our blog we heard from Professor Bill Sillar - Professor of Archaeology and Technology in Society at UCL Institute of Archaeology about the Roman Kiln UCL built at the farm. Below Bill describes the process of firing the Kiln for the first time during UCL’s ‘Archaeotech’ experimental archaeology course.
Previously in our blog we heard from Professor Bill Sillar - Professor of Archaeology and Technology in Society at UCL Institute of Archaeology, about the Roman Kiln UCL built at the farm. Below Bill describes the process of firing the Kiln for the first time during UCL’s ‘Archaeotech’ experimental archaeology course.
In September 2022 the UCL team returned to fire up the replica Roman Kiln they built in April.
Constructing the Roman kiln in April 2022
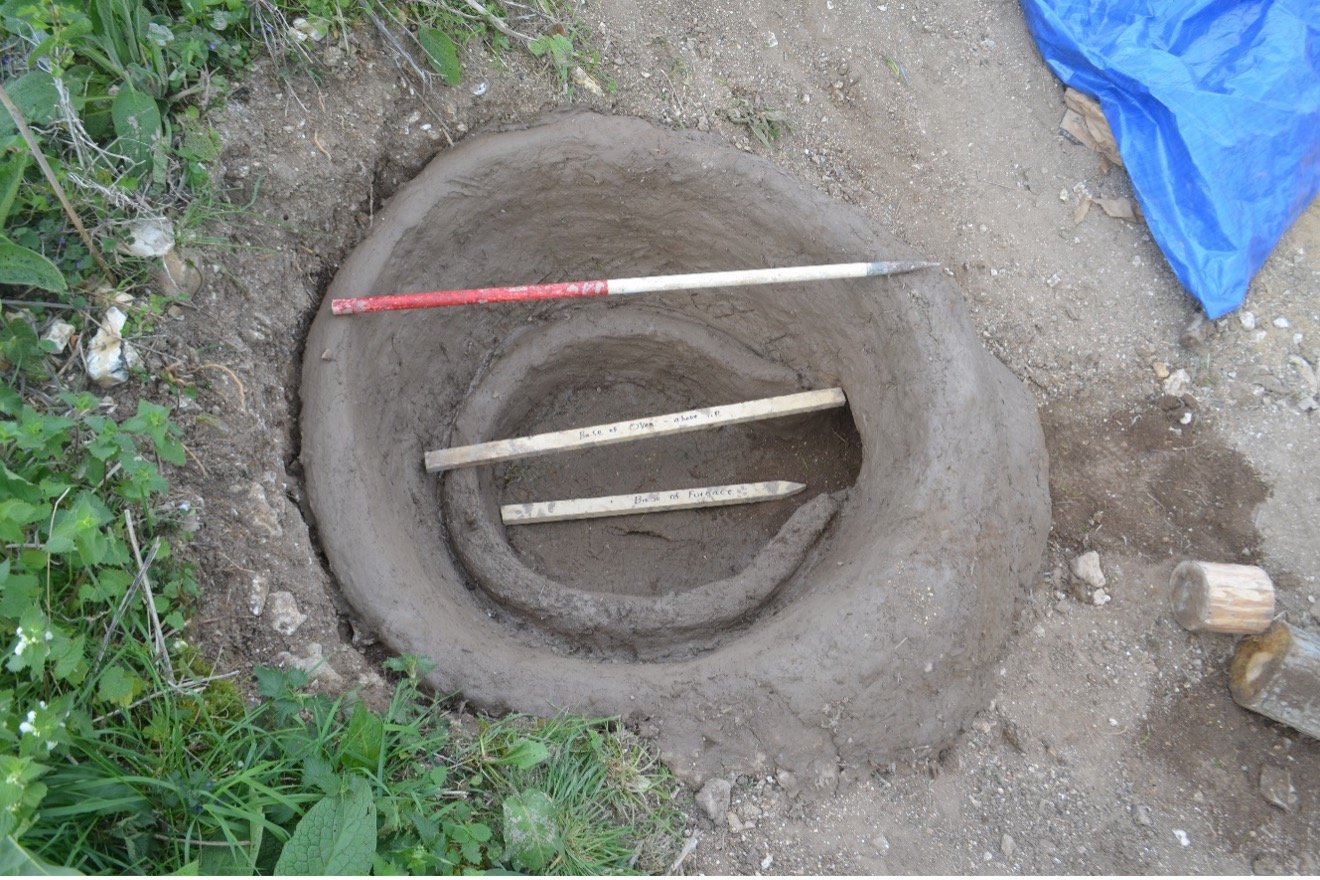
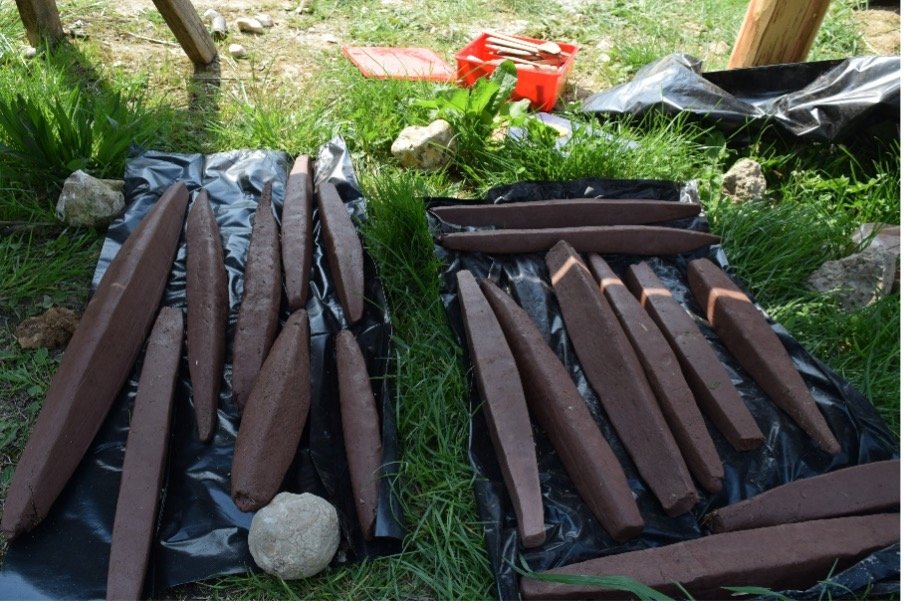
The kiln, based on an early second-century Roman kiln on the banks of the River Medway, originally excavated in 1975 by the Upchurch Archaeology Research Group (UARG). By September our replica kiln was dry to the touch, but still had a lot of moisture in the clay, so we started with a small fire at the base of the chamber to dry out and warm the kiln structure. We then placed our pre-prepared pedestals and kiln bars and continued to heat the structure.
A couple of the kiln bars broke, probably as we heated them up too quickly to release the moisture in the clay. We had made a few pots on the kick wheel we brought from Fishbourne Roman Palace, but, as with the original kiln assemblage, we made the majority of our pottery using hand building techniques, including a range of jars of similar sizes to those found in the excavated kiln.
The first firing of the kiln

So, we loaded the kiln placing the jars and other pots mouth downwards, we put two layers of pottery with a mixture of vessels. We continued to slowly heat the kiln. For fuel we were using coppiced wood from fences and structures that had been dismantled at Butser, this was predominately hazel that was aged and fairly dry, so a very suitable fuel to use in the restricted opening of the kiln flue. As the pottery began to heat up we placed a covering of pottery sherds (including some fragments of original Roman tiles) over the kiln load. (An interesting question is whether some of the pottery excavated at the original Medway kiln was being used as a sherd covering for the firing.)

The firing continues into the night

The results of the first firing
We kept the firing going into the night reaching a temperature of around 860 centigrade, and then left it to cool before unloading the following morning. This first firing was fairly successful with only 3 vessels completely shattered, but the pottery was slightly underfired and some large vessels had small cracks or chips, which were probably a result of production and handling faults. About 20% of vessels were partially reduced/carbonised as a result of poor circulation of air/oxygen during the firing.


The second firing of the kiln

Results of the second firing
A second firing was more successful reaching a temperature of 960 degrees, but again with about 20% of the pottery partially reduced/carbonised. We now intend to undertake further analysis of the original assemblage from the Medway kiln to consider how our improved understanding of the kiln might help our interpretation and we hope to undertake further firings to assess how different fuels and methods of covering influence the firing conditions.
Thank you very much to Bill and all the staff and students from UCL and Archaeology South East for building and firing this fantastic kiln here at Butser . We are looking forward to the next experiments!
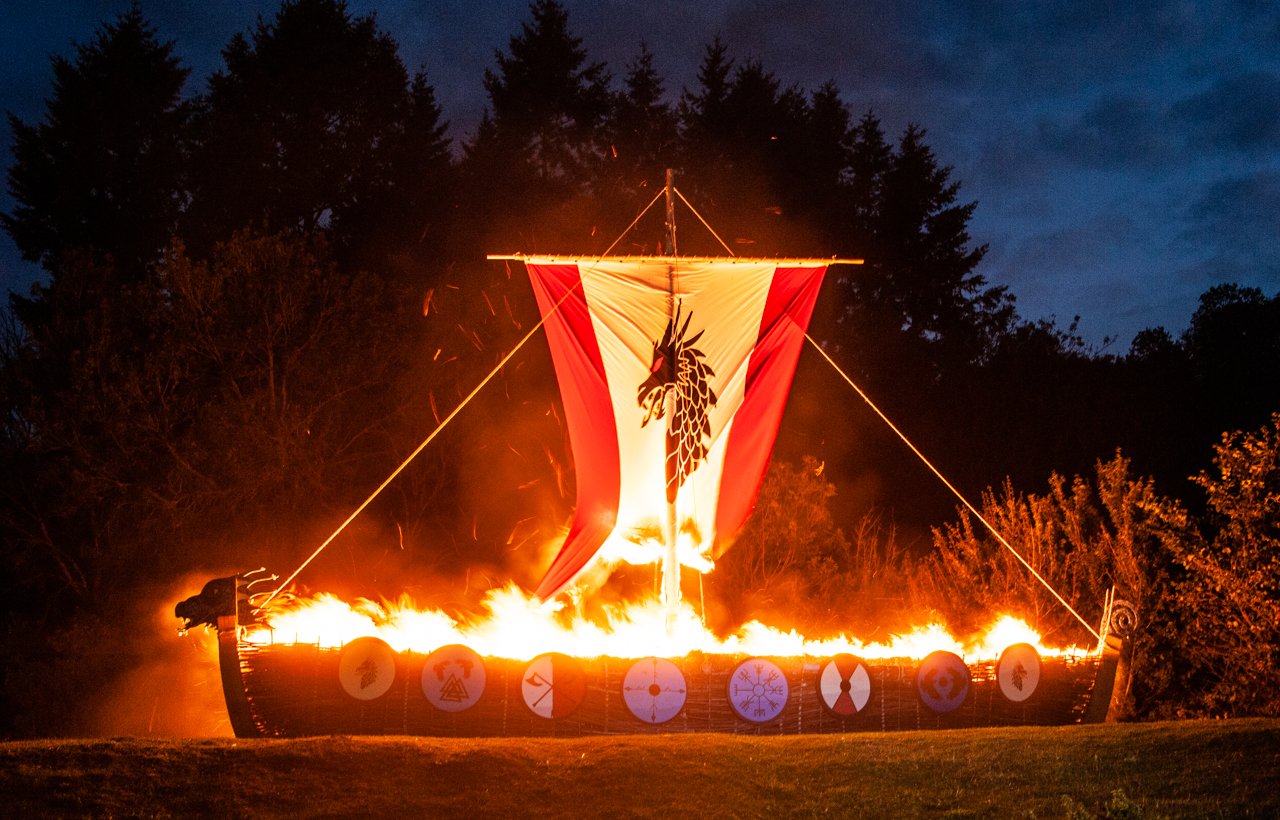
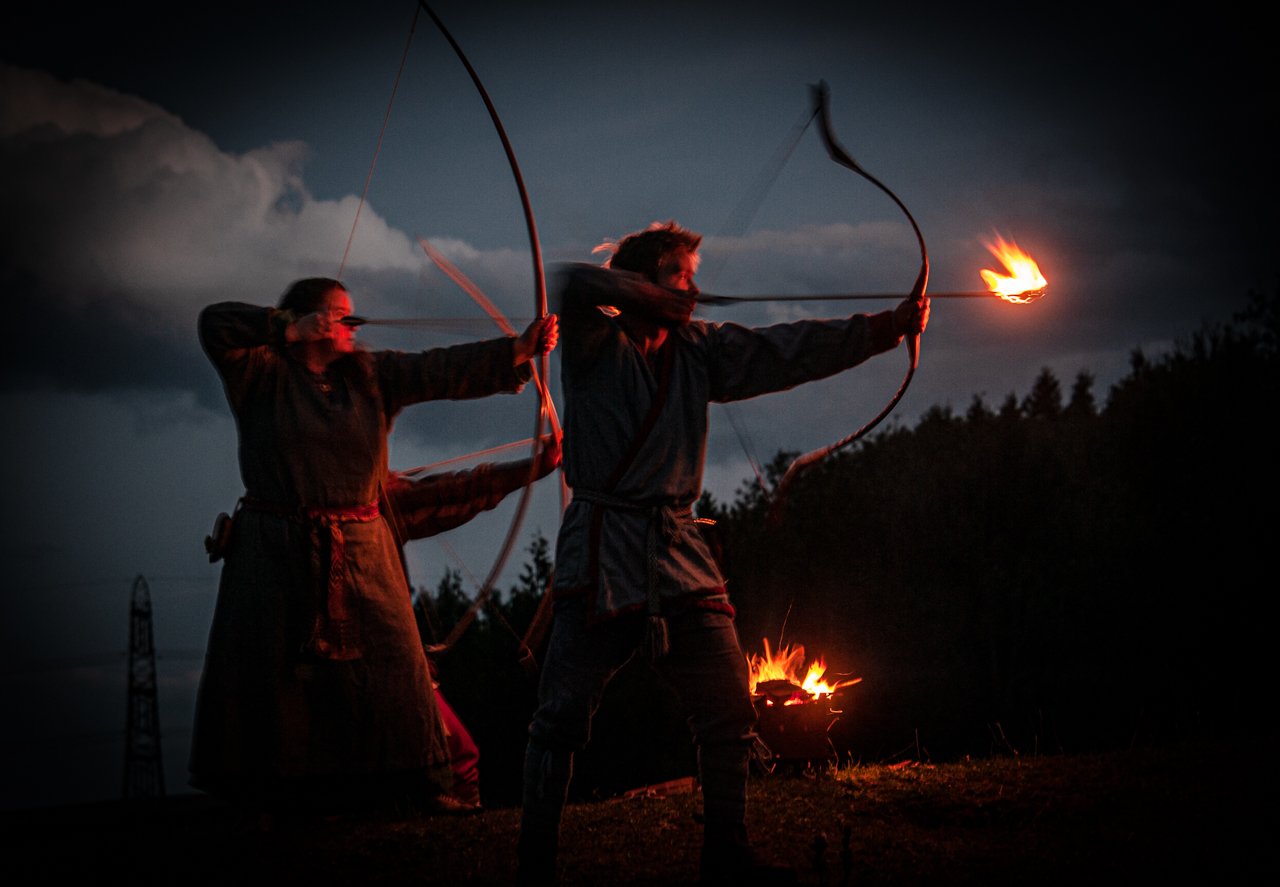
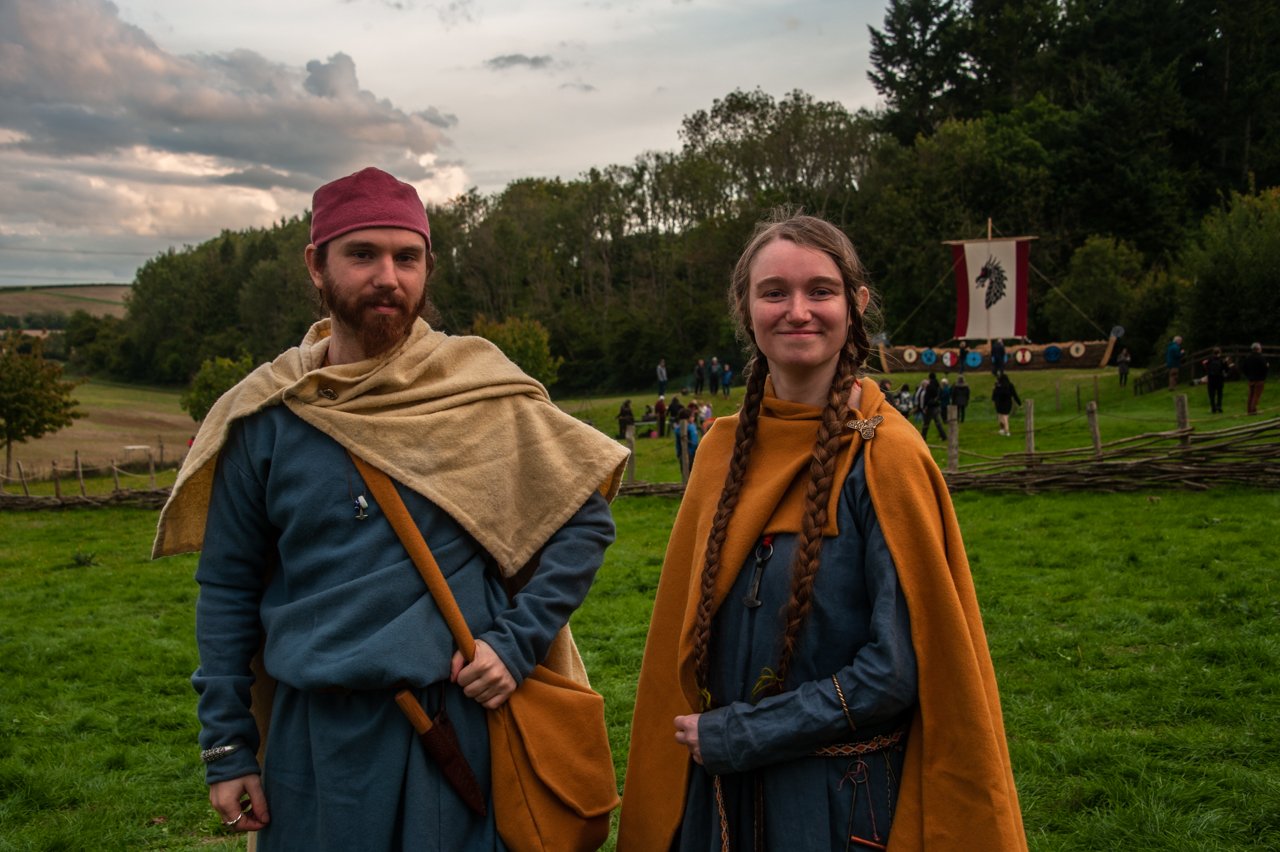
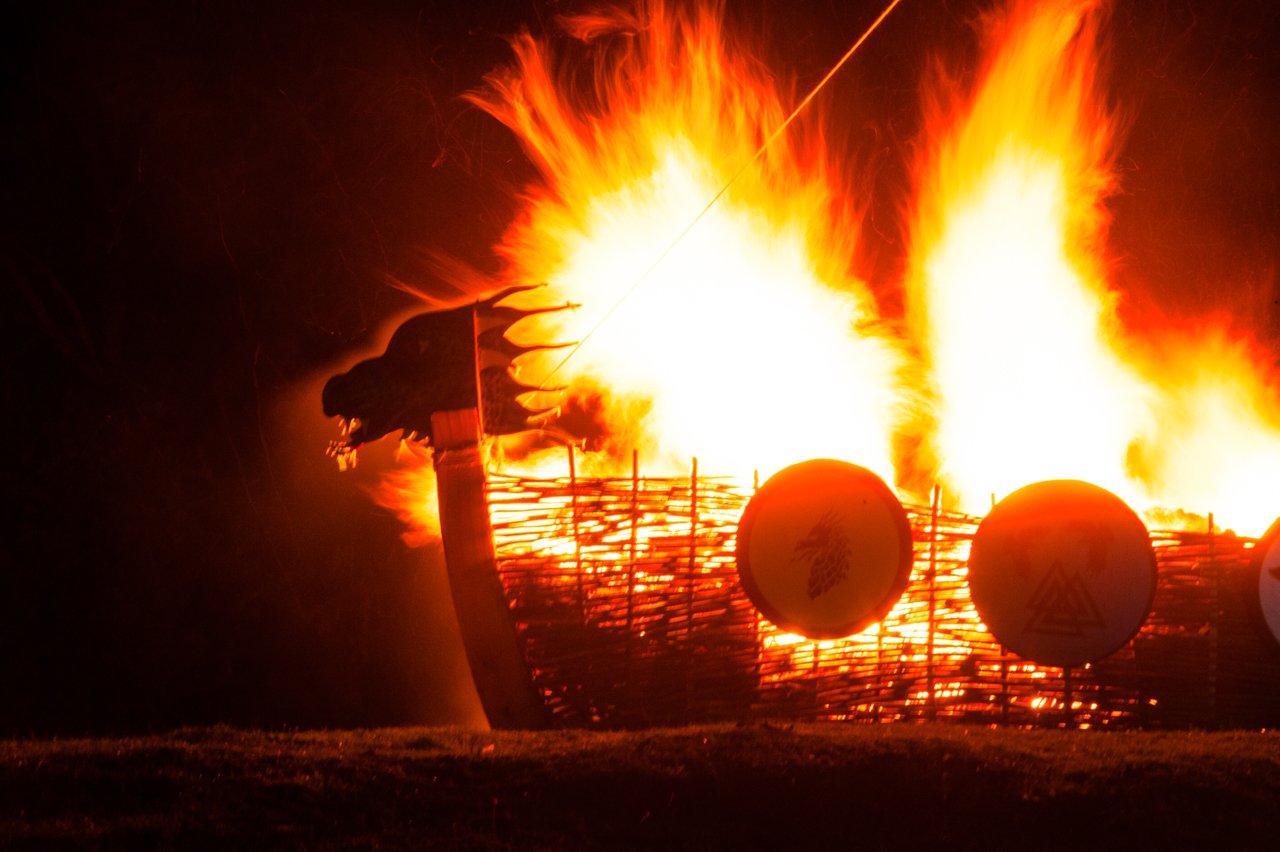
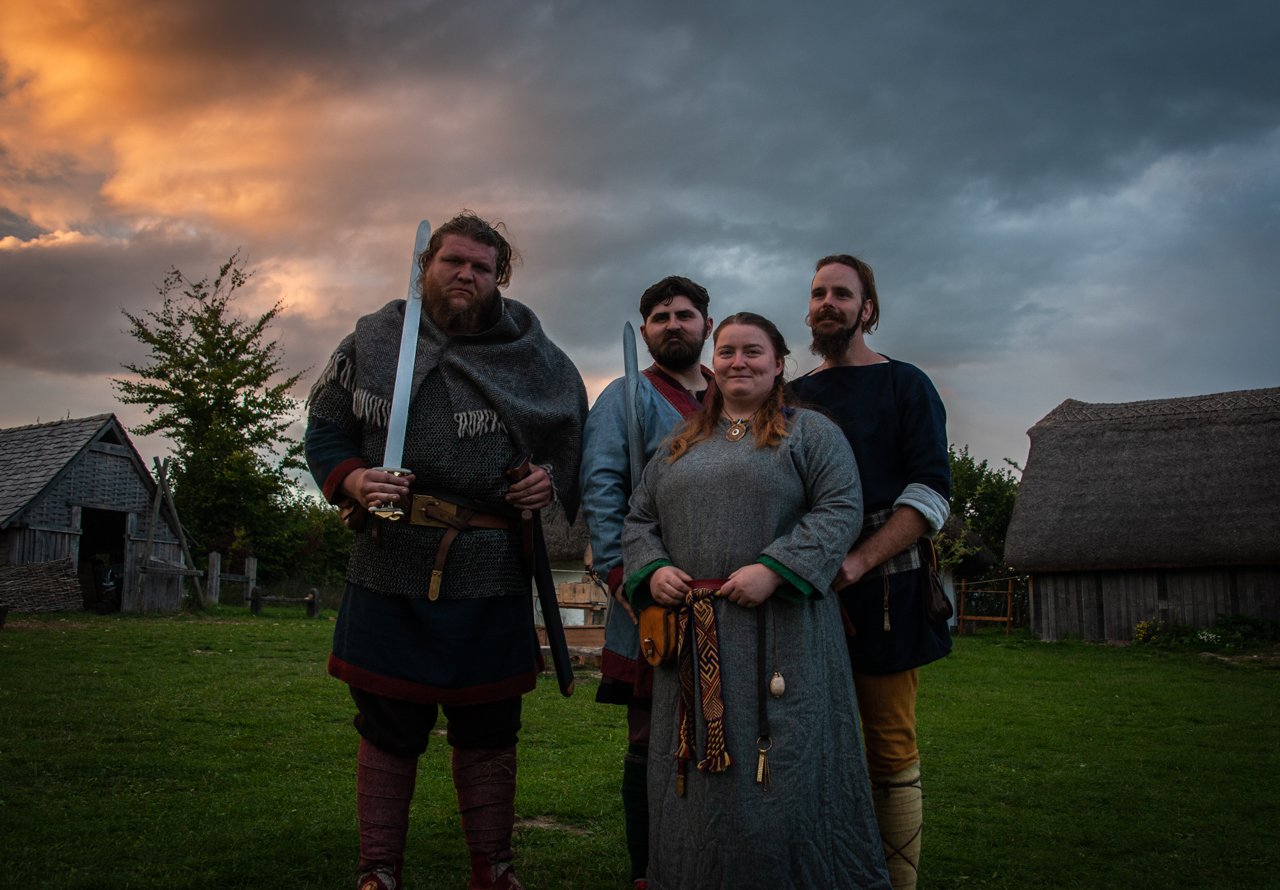
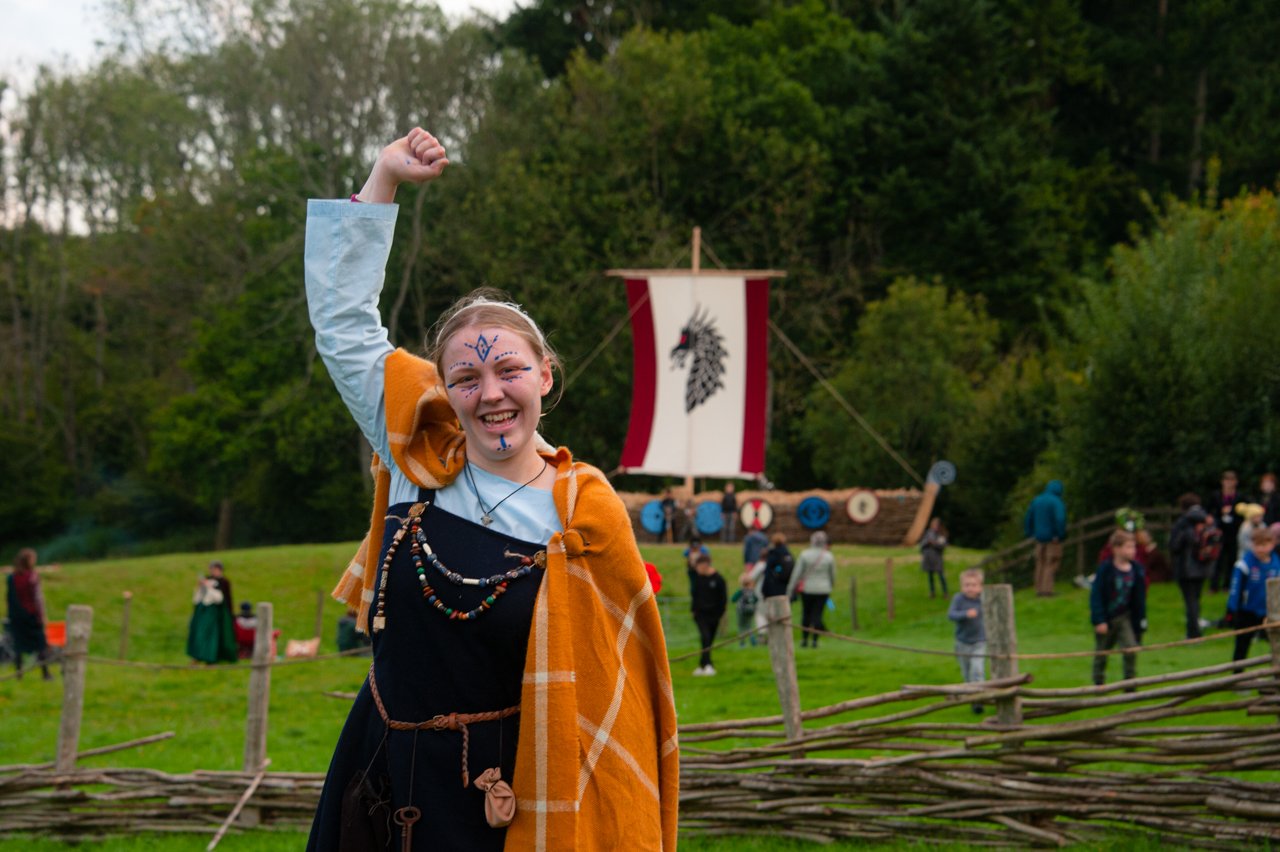
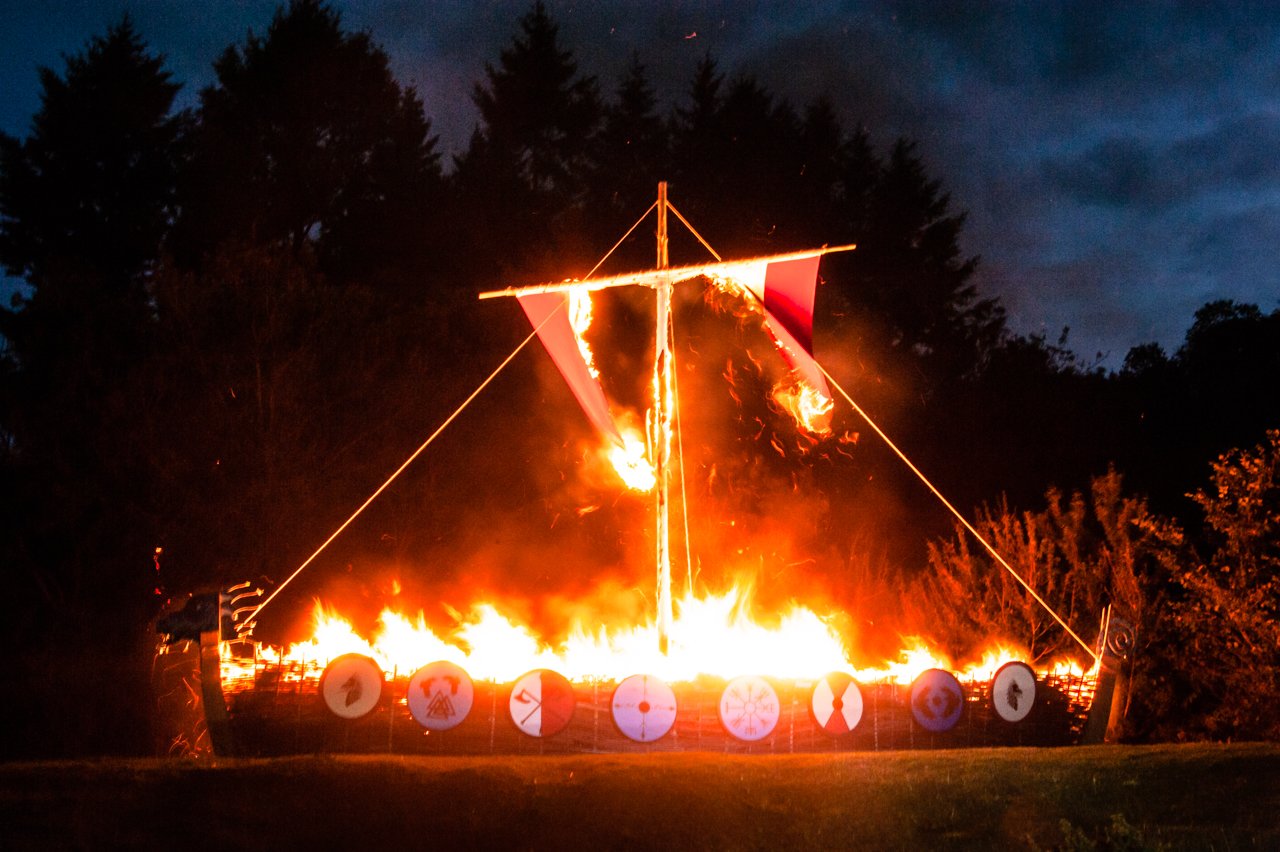
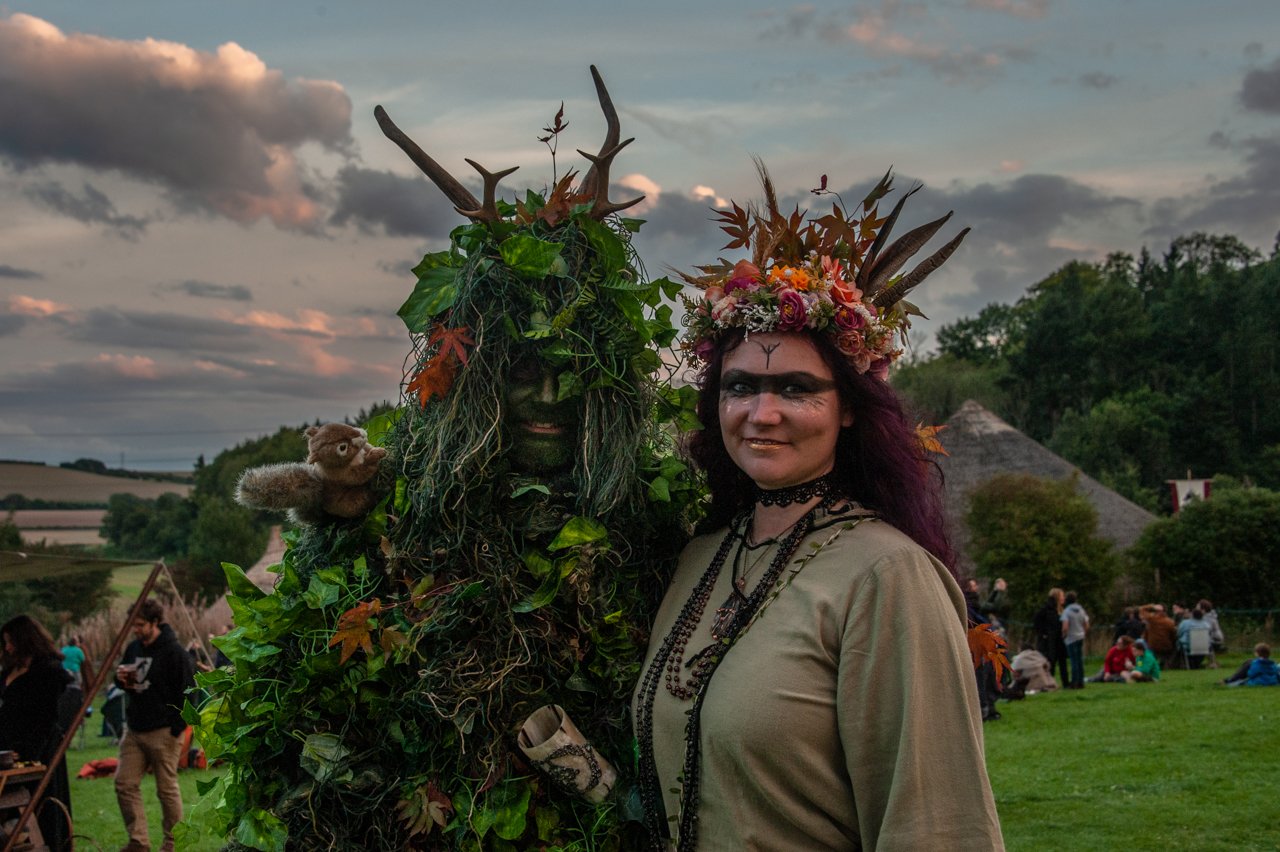
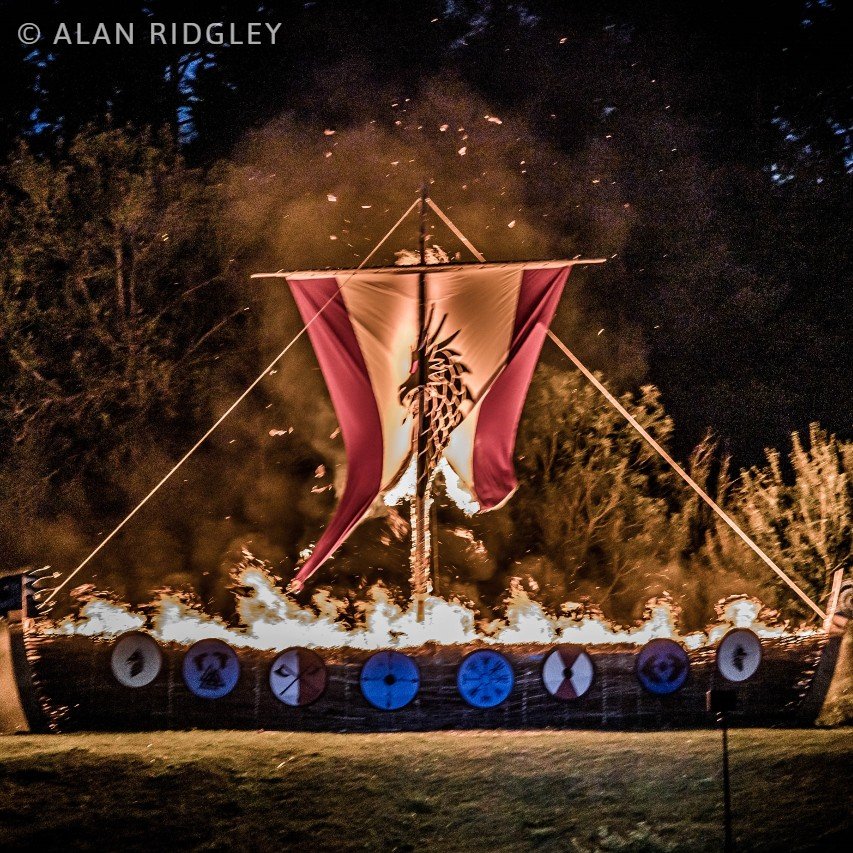
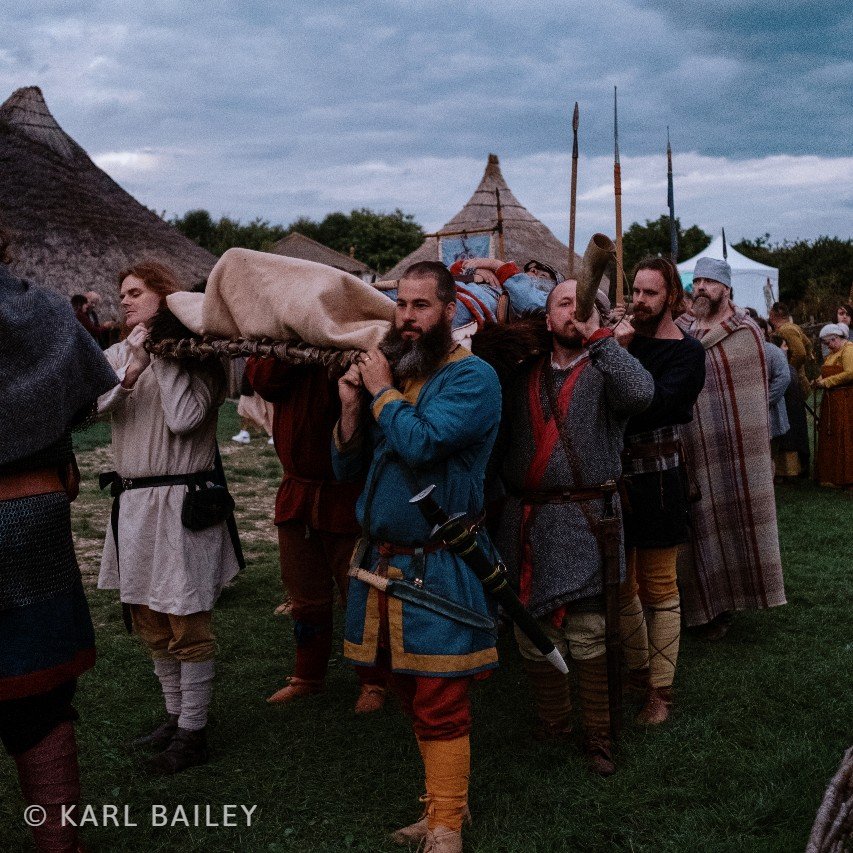
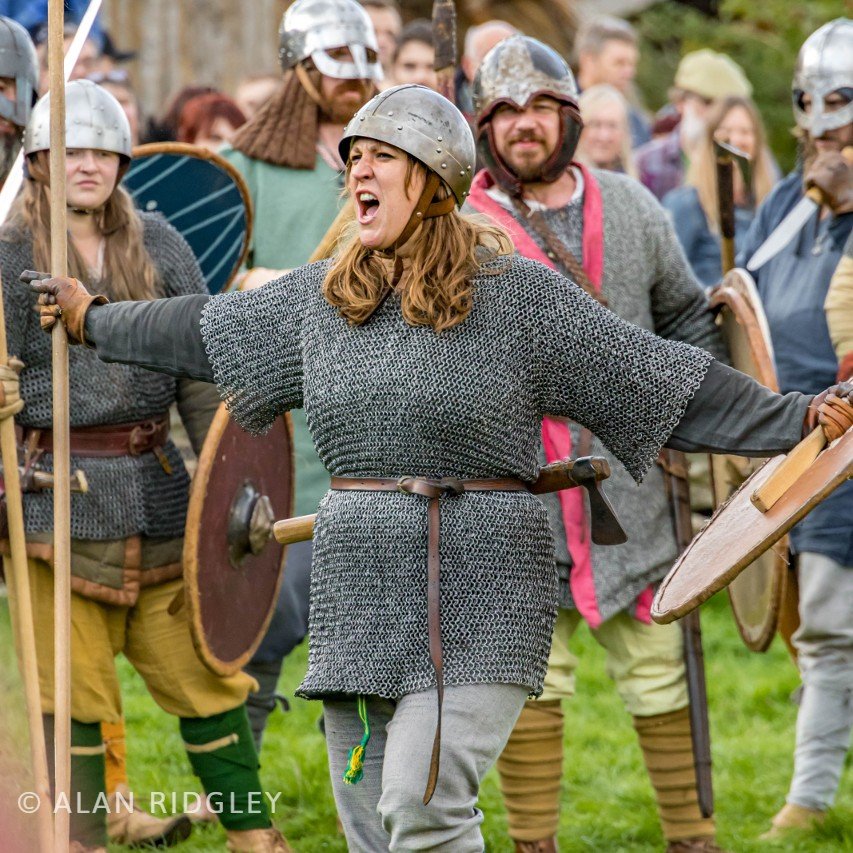
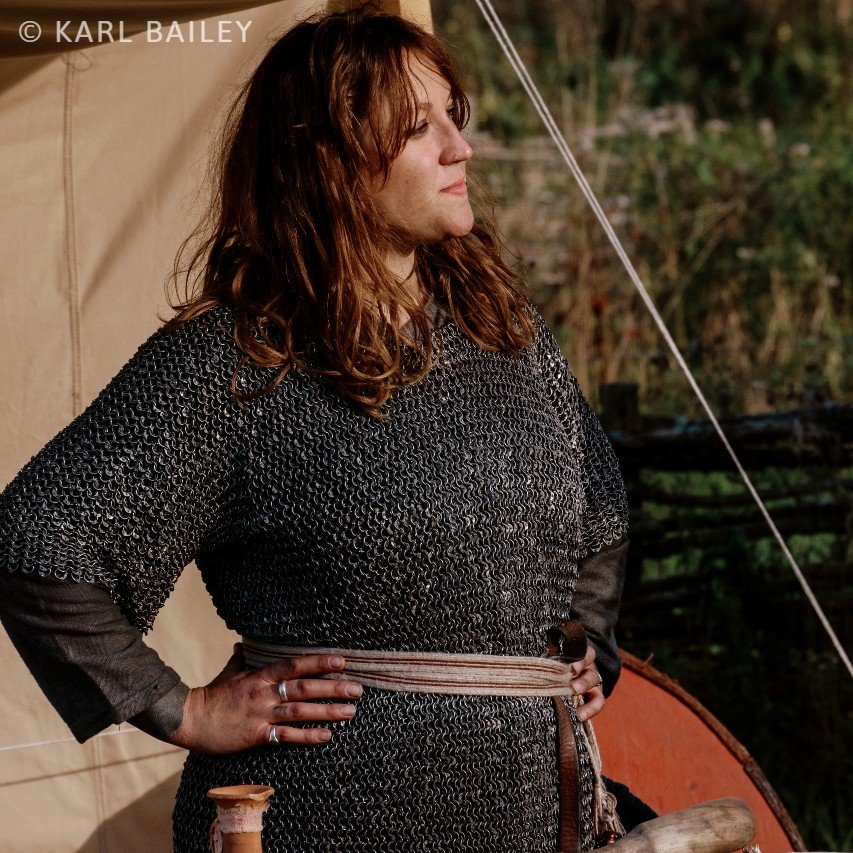
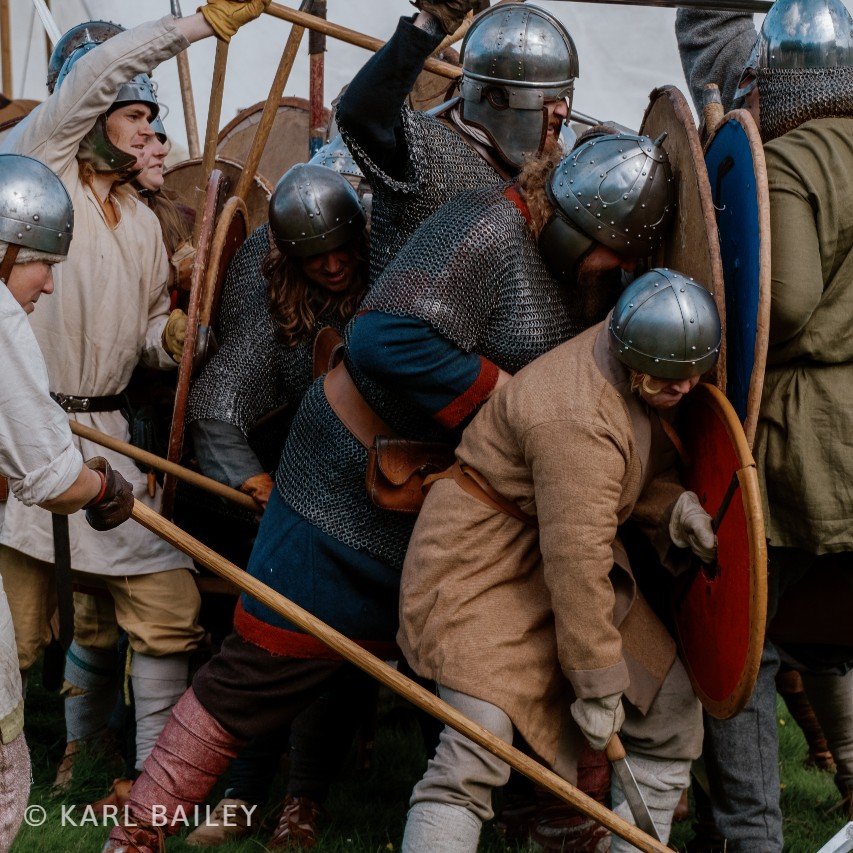
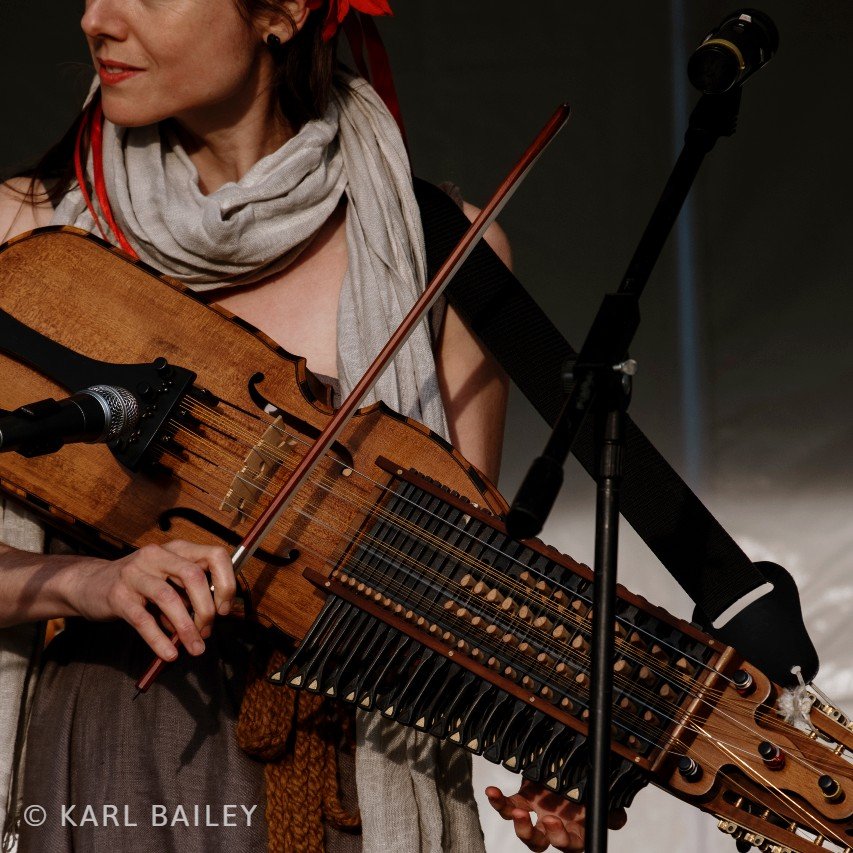
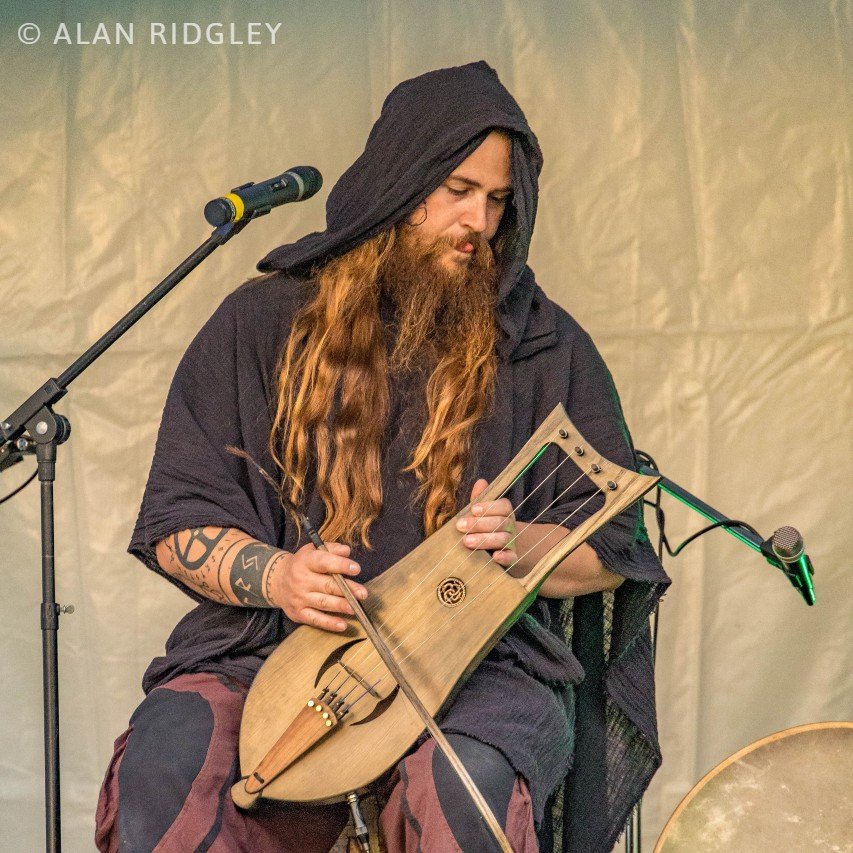
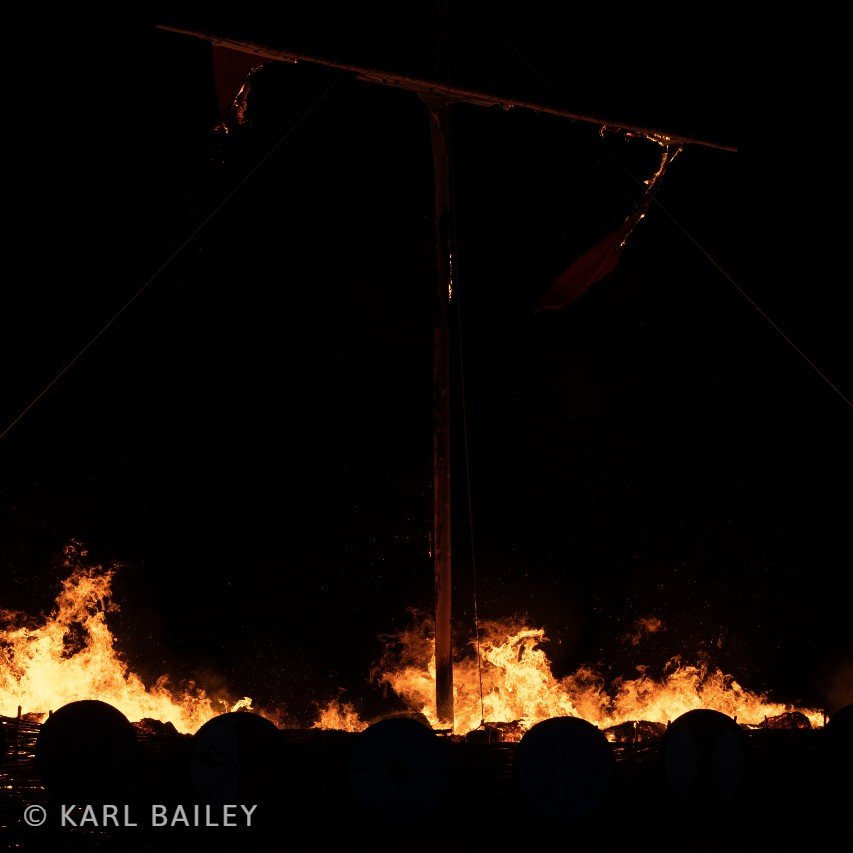
Viking Boat Burn for the Autumn Equinox 2022
We celebrated the Autumn Equinox in style with a spectacular Viking boat burning! See some of our favourite pictures from this incredible event.
We celebrated the Autumn Equinox in style with a spectacular Viking boat burning!
As the sun set on the last summer's day and the year turned to autumn, Vikings marched on our Saxon homeland, and a fierce warrior was lost... Stunning Viking music, an incredible reenactor battle, Saxon and Viking encampments, and of course, fire.
Thank you to everyone who joined us for this wonderful event! To everyone who made it out, to all our visitors and volunteers and supporters here, thank you for making things like this possible.
Stay tuned here for some of our favourite pictures from the event!
Relive the magic with our commemorative video!
Watch our short video from the event and relive the magic of the boat burn! See this and 40+ other videos on Butser Plus for just £2.99.
Photos from the Viking Boat Burn
With all our thanks
To all our staff and volunteers, for your hard work on this event! To Herigeas Hundas the Saxon band and Wuffa the Vikings, for the wonderful atmosphere of your encampments and of course the big battle. To the musicians Anna Tam, Seidrblot, and Pentacle Drummers for your incredible performances. To Joe the Smithy, the Saxon Forager, and Jez Smith for your demonstrations. To Westcott woodworkers, Hare and Haber, and the Friends of Butser for your stalls, and Crepe Britain, Matt the hog roast, and the Mobile Coffee Box for your delicious food and drink! To Karl Bailey and Alan Ridgley for allowing us to use your stunning photos. And finally, to our supporters on Butser Plus, to our visitors, and to you 💚

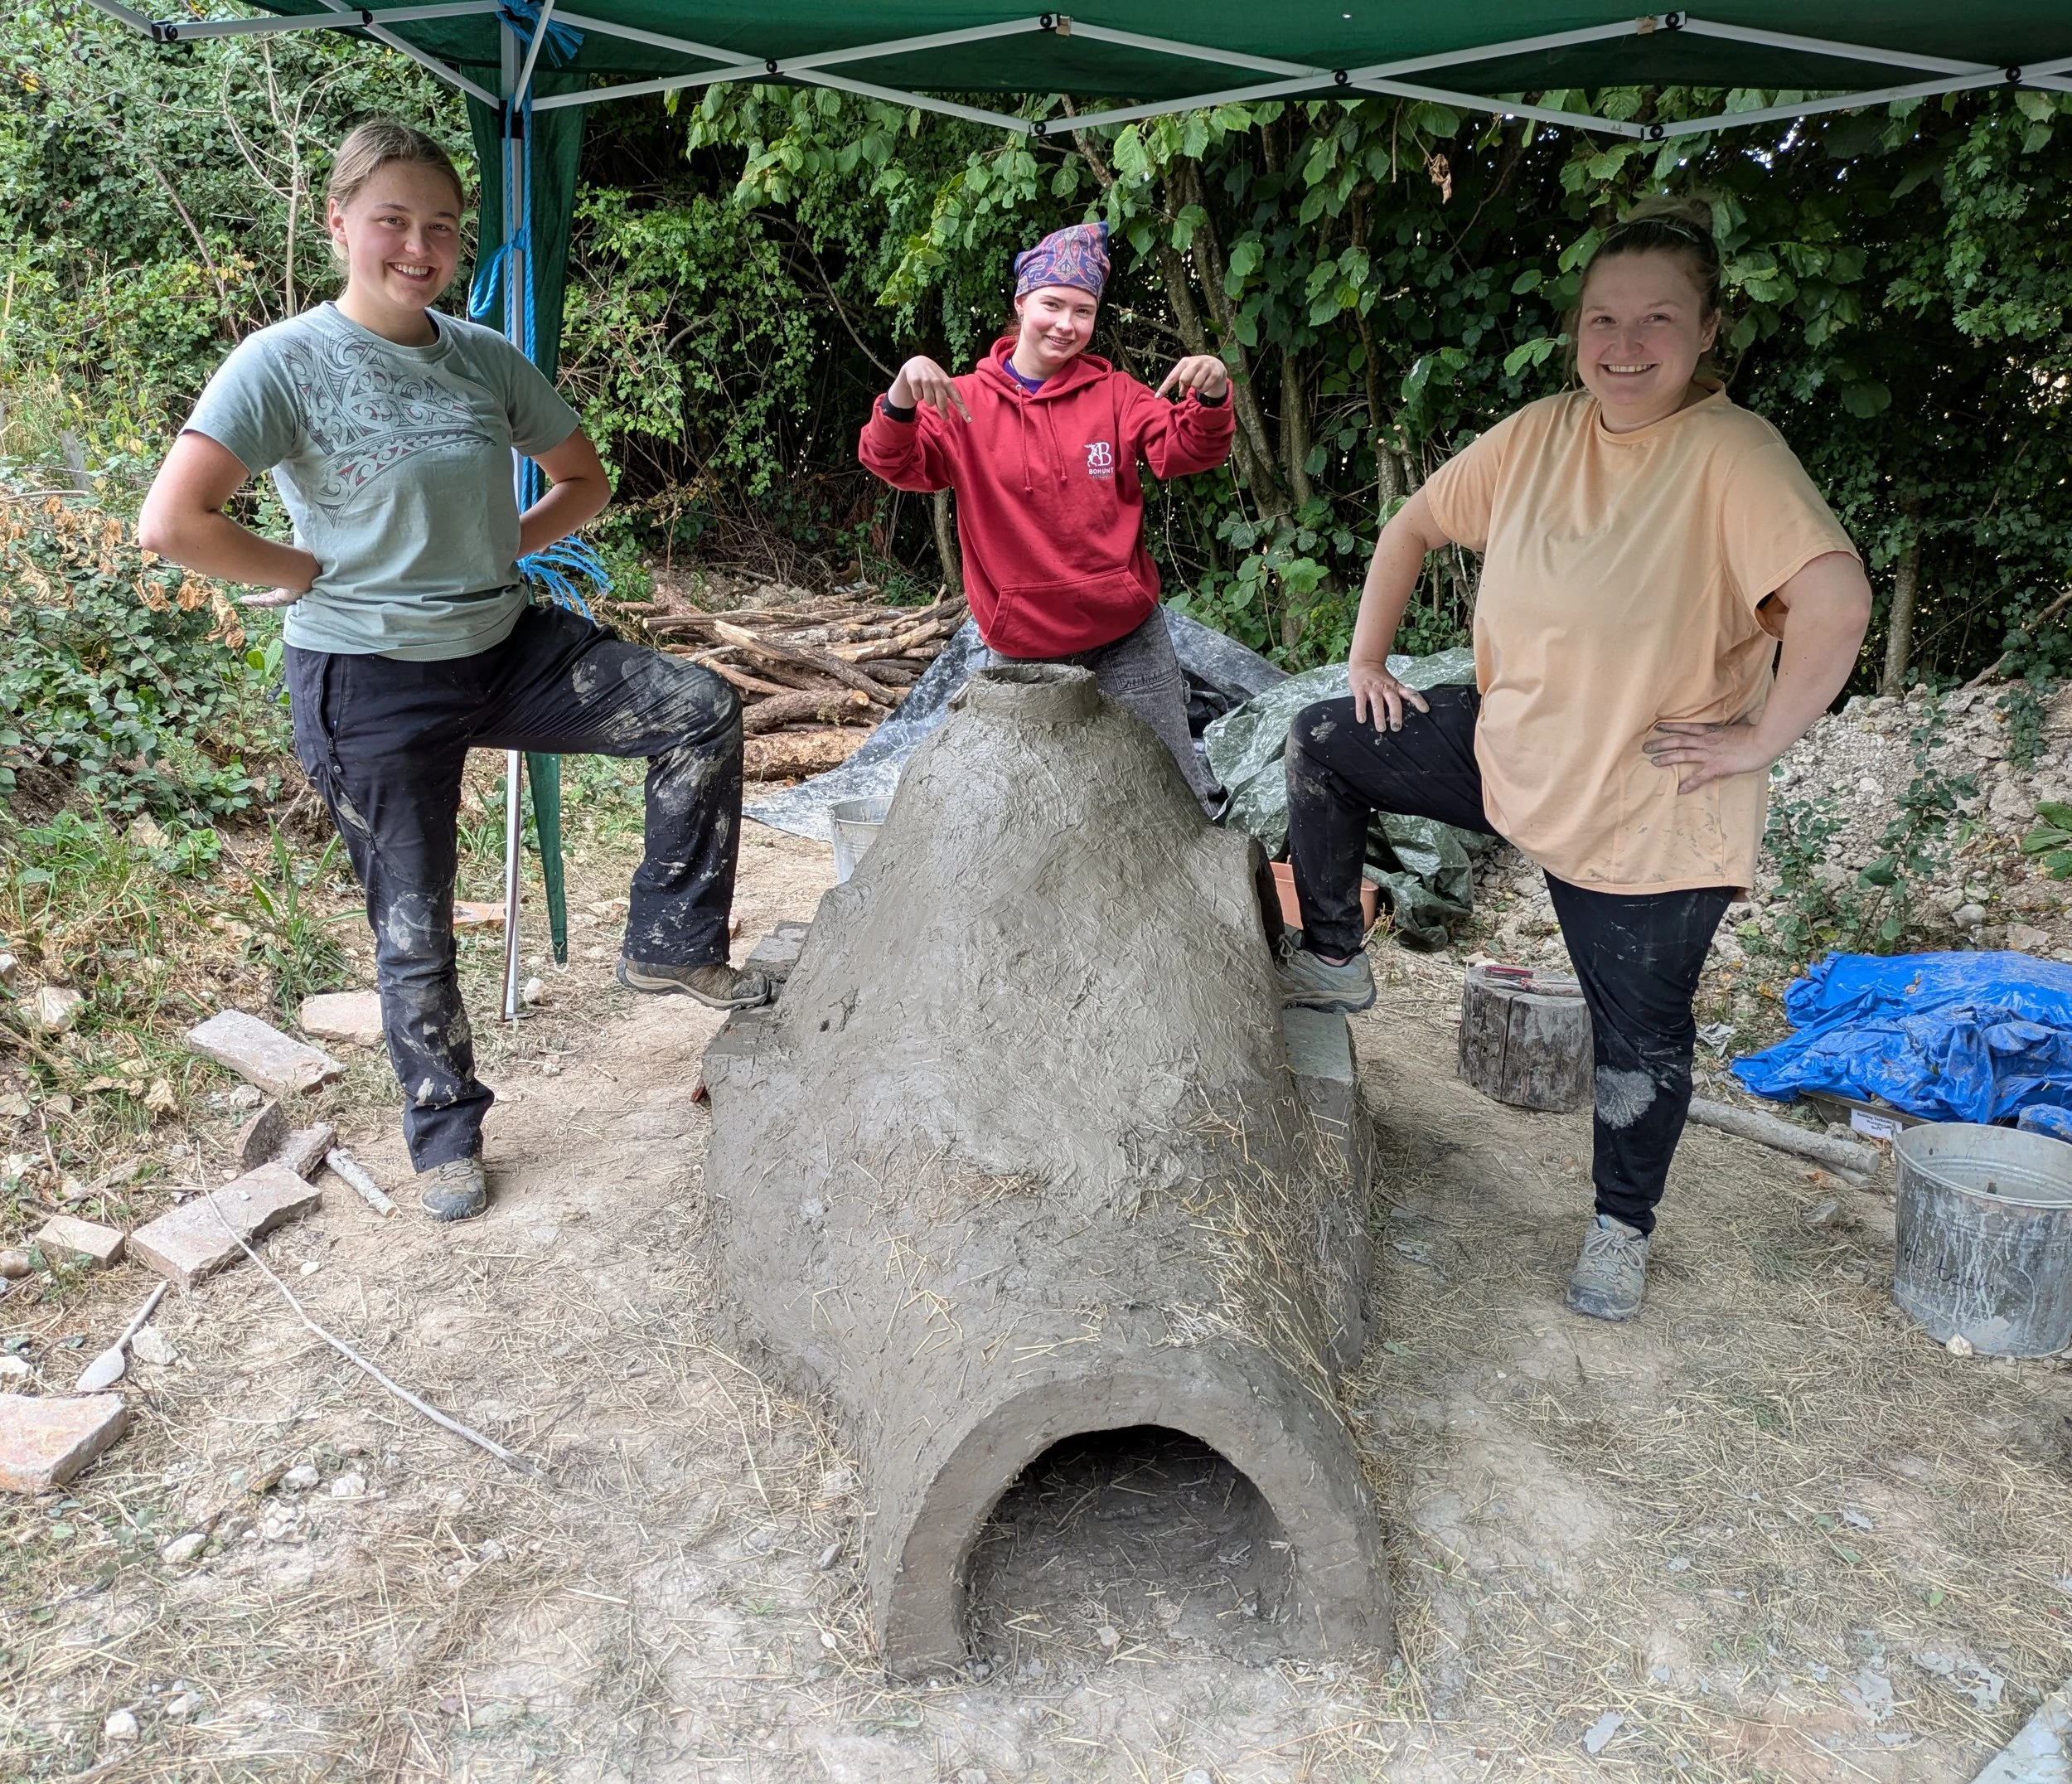
An Experimental Charcoal Burn
During the Festival of Archaeology, we were joined by woodsman Mark Allery to demonstrate the process of charcoal making. He was helped by Katie, a student from Bournemouth University on a work placement here at Butser. Here she is reflecting on the experience — just one of many things she’s been helping us with on site!
During the Festival of Archaeology, I spent a day working with Mark Allery learning the process of making charcoal. It was fascinating to learn, as we did two different methods: using an oil drum and a traditional earth burn. The oil drum was used to produce a larger amount of charcoal to be used for other experiments, such as metalworking, whereas the earth burn was more of an experiment.
Typically, an earth burn would use 4-foot logs, arranged upright in a circular pattern around a central pole, which is then covered in bracken and then an earth clamp. However, the earth burn that we did was on a much smaller scale, almost 1/8th the size of a traditional earth burn. Burns of this size aren’t typically done, but we wanted to see if there would still be a good yield of charcoal when using smaller logs.

Arrangement of logs before the earth clamp was constructed.
Thin sticks and offcuts were stacked around a central pole in a triangle shape, to create a base structure and provide fuel for the burn. The logs we were burning were around 8-9 inches and had been cut in half vertically. This allowed us to lay them upright around the ‘pyre,’ alternating the direction they were facing. The first layers edge was flat against the side of the structure, then the next layer faced outwards, which was repeated until it created a circular shape around the central log and pyre. Lastly, more logs were laid on top of the pile, creating a layer to help stop dirt from falling through the wood. Fresh bracken was placed on the top and around the sides to give another protective layer before dirt was packed around the entire structure.
The central pole was then removed, and the hole was filled with wood shavings, chips and a cloth wick soaked in oil. The wick was lit, and the hole was sealed using a flat piece of wood, bracken, and more dirt, completing the earth clamp.
Oxygen and temperature play a significant role in the process of making charcoal. We found that, due to the size, it was difficult to control these factors in the miniature earth burn. With the oil drum, it was easier as there were holes that could be covered and uncovered, depending on how fast or slow the burning needed to happen. On the miniature burn, the smoke was still only coming out of the top, which meant that the wood that was lower down wasn’t being cooked and wouldn’t end up as charcoal. We decided to poke holes along the bottom of the clamp, to try and ‘throttle’ the burn by bringing more oxygen into it. We hoped this would increase the temperature and help to speed up the process.

The earth burn.
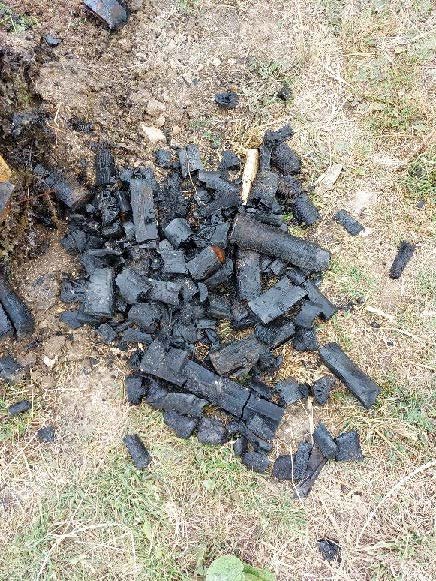
Charcoal produced by the earth burn.
In total, we left it to burn for around 4.5 hours before we stopped the process by pouring water on it and starting to remove the earth and bracken. The results of the experiment showed that only the top 2 inches of the logs had been turned into charcoal, and that the outermost logs hadn’t been burned at all.
We decided that when building up the wood, we should have sloped the sides, rather than leave them straight, to allow for better airflow. We also should have left it to burn for longer, but we were working under the time constraints of the day. The earth burns done on a larger scale can burn for several days, so our mini experiment might have yielded more charcoal, had we left it longer.

The oil drum.

Charcoal produced by the oil drum burn.
Even though the mini earth burn didn’t yield much charcoal, the oil drum did, with most of the wood becoming charcoal. This burn process was fully completed, allowing the wood to have a good chance to fully cook. We knew this because the smoke from the drum turned blue and then almost stopped. At this point, we placed the lid on, sealed the edges with sand and the holes at the bottom with earth. This stops any airflow into the drum, and stops the cooking process, allowing the charcoal to cool down so it can be used. When we lifted the drum, we found a pile of charcoal was then taken to other areas of the farm for use.
Even though the experiment didn’t go entirely to plan, it was still exciting to find out what would happen. Using the results, and corrections, we could re-do the experiment to see if an earth burn of this size could produce a good amount of charcoal in relation to how much wood you choose to burn. Learning this process was incredible, and I’m thankful that I got to experience it, alongside all the other skills I’ve learnt on my placement!

Theory Vs Practice – experimental brass production
Our Experimental Archaeologist Therese Kearns explains a recent experiment conducted as part of the Accidental and Experimental Archaeometallurgy conference at the Ancient Technology Centre in Dorset.
Our Experimental Archaeologist Therese Kearns explains a recent experiment conducted as part of the Accidental and Experimental Archaeometallurgy conference at the Ancient Technology Centre in Dorset.
Butser colleague Fergus Milton and I recently attended the Accidental and Experimental Archaeometallurgy conference organised by the Historical Metallurgy Society in the Ancient Technology Centre in Cranbourne, Dorset.
The conference programme was divided into oral presentations and practical experiments covering ferrous and non-ferrous metallurgy. This meant that there were furnaces of all shapes and sizes dotted around the site and a buzz of enthusiasm for high-temperature technologies, which makes these gatherings so wonderful.
Figure 1 Therese and Fergus experimenting with a variety of crucibles in the furnace.
The last time I attended this conference was in 2010 when I was involved with iron smelting experiments, but this time we decided to take a leap into the unknown and experiment with the production of brass.
While we were familiar with the theory of brass production by the cementation process, we had never tried it practically, so we were excited by the steep learning curve that awaited us!
Brass is an alloy of copper and zinc and has a yellow colour much like gold. It was prized in antiquity not just for its colour, but also because it was harder, stronger and more malleable and ductile than bronze (an alloy of copper and tin).
The Romans were producing brass using the cementation process by at least the 1st century BC. Initially, it was used for coinage, but it soon largely replaced bronze for the manufacture of decorative metalwork. Traditionally, the introduction of brass to Britain was associated with the arrival of the Romans, though there is some evidence of brass metal from late Iron Age contexts.
The metallurgy of brass is fascinating and more complex than other alloys such as bronze where the alloy constituents (copper and tin) are mixed together in their molten state. Zinc melts at 419°C and vaporises when heated above 907°C which is below the melting point of copper (1083°C). This means that zinc and copper cannot be in a molten state at the same time so they can’t be melted together. In antiquity, the brass manufacturing process involved first producing zinc oxide by crushing zinc carbonate ore (such as calamine) and layering it with powdered charcoal (which acts as the reducing agent) then roasting it at around 700°C. The carbon combines with oxygen which is released as carbon dioxide gas (CO2), leaving behind zinc oxide (ZnO).
The zinc oxide was then placed in a crucible with charcoal and granulated or finely divided copper. The zinc oxide reacted with the carbon inside the crucible to produce zinc vapour which diffused through the copper while in its solid state. It was crucial that the crucible was sealed, otherwise, the zinc vapour would be lost to the atmosphere. It was also important to control the temperature so that it remained below the melting point of copper to ensure the copper remained solid until the maximum diffusion of the zinc vapour had occurred. If the copper melted, it would sink to the bottom of the crucible and reduce the surface area available to absorb enough vapour to form brass.
Our experiments were inspired by metalworking debris excavated at the Westward House area of Fishbourne Palace in the 1990s. Among the excavated finds were fragments of crucibles and moulds which were used for making and casting brass.
The fragments were from two distinct crucible forms – handmade triangular shallow bowls – a type well known from late Iron Age contexts, and small wheel-thrown jars with an extra outer layer of ceramic material, examples of which were also found in Roman contexts in Cirencester, York and Silchester.
As these experiments were our first venture into practical brass production our main aim was to get a feel of how the process might have worked, explore different crucible types and understand the working temperatures required for the process.
We had hoped to use a thermocouple to take regular temperature readings, but unfortunately, the thermocouple malfunctioned, so we had to do without apart from one run when we were able to borrow from a colleague.
All the experiments were conducted in a shallow bowl furnace with air input via a tuyere extending to the centre of the furnace pumped through a small set of goat-skin bellows.
We had prepared a range of crucibles of different shapes and sizes, all hand-built, and some similar to the triangular forms seen in the archaeological assemblage from Westward House. The crucibles had to be strong enough to hold the metal and resist the heat but also needed to be sealed to avoid the loss of zinc vapour. We were unable to procure any zinc ore but were happy that zinc metal would suffice for these initial experiments and would not detract from our broad understanding of the process.
The learning curve was every bit as steep as we had expected and although we were experienced in smelting copper and casting bronze in a similar furnace where temperatures above 1000°C are required, the requirements for this process were very different. Here, the challenge was to achieve temperatures above 907°C but under 1083°C and maintain it for as long as the process required. How long was that? We had no idea!
For our first attempt, we used a crucible with an indented lid (figure 2) which we hoped would be self-sealing. The crucible was charged with 50g of copper prills and 15g of granulated zinc. When we thought we had reached around 1000°degrees (which we gauged by the colour in the furnace) we continued to bellow for 12 minutes at which point we stopped and opened the crucible to have a look inside. The zinc was still solid suggesting that we had not reached a high enough temperature and certainly not high enough to penetrate through the crucible fabric. We continued to bellow trying to ensure that the heat was being distributed right across the furnace and into the crucible wall. After a further 25 minutes, when we opened the crucible, it was clear from the colour of the metal that some brass has been produced, however, we had also melted the contents of the crucible and a solid ingot weighting 63g lay at the bottom. The exciting thing was that the ingot was clearly brass on both sides, though we have yet to determine how deep that penetration goes.
In total, we ran four experiments using crucibles of different forms and fabrics and different methods of sealing lids, using clay, dung, leather and sheep's wool. We had varying success on each attempt and in hindsight, I believe that we were being too cautious about the temperature control after we melted the entire contents of the crucible on our first attempt. In subsequent attempts, it was clear that we had created some brass, but we opened the crucible too soon, just as the vapour was just starting to diffuse into the copper but before the process was complete.
On the one occasion when we did have access to a thermocouple it showed that we reached 1160° C in the furnace after bellowing for six minutes at a rapid rate, when bellowing stopped the temperature decreased by consistent jumps of 100°C, which showed us that to maintain a temperature just over 900°C we needed to slow down the bellows dramatically.
We learned lots of lessons from these experiments and will be much more informed for our next attempt – so watch this space!

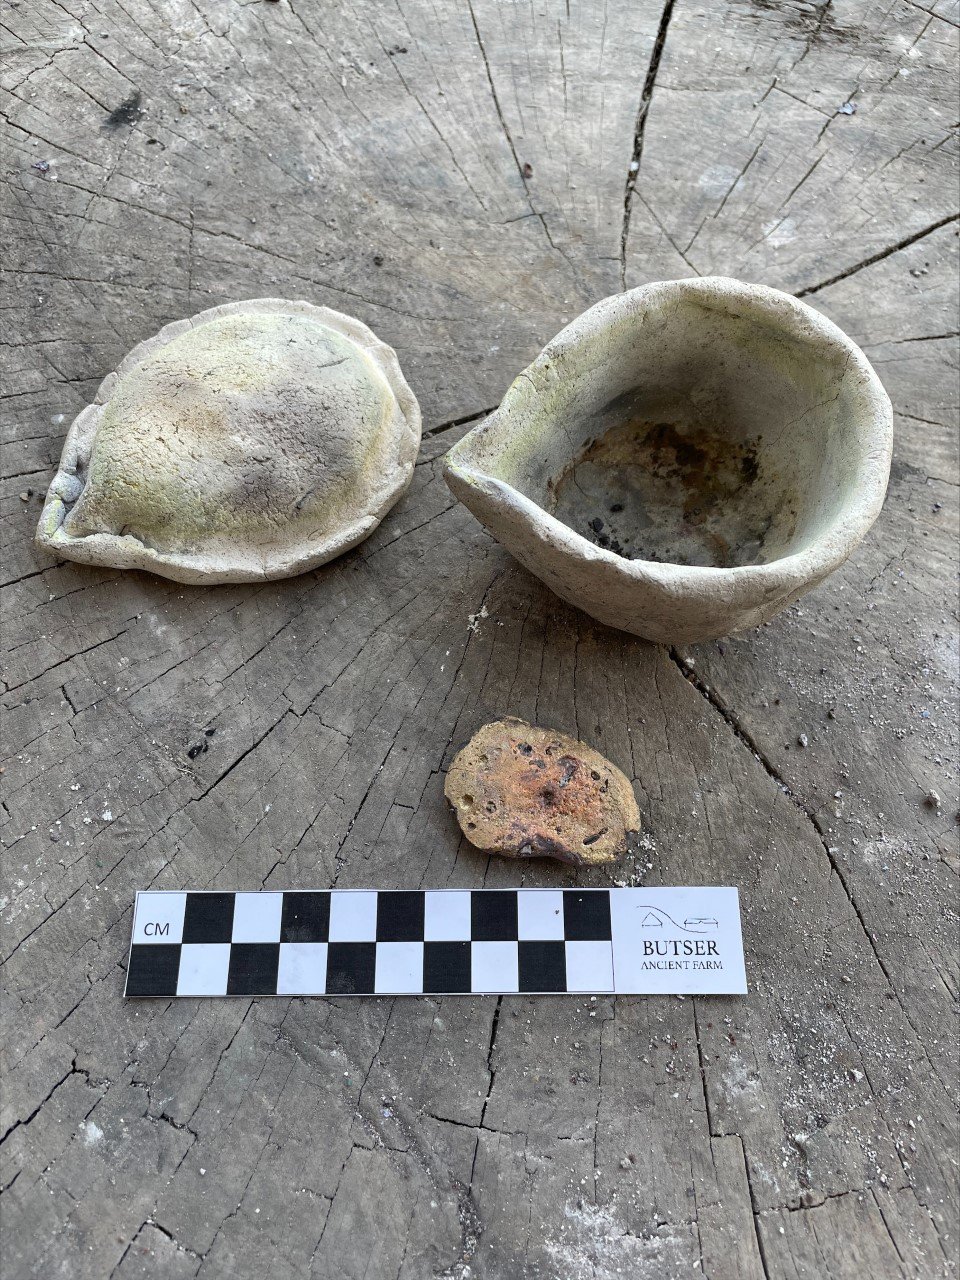
Figure 2 A lidded crucible ready to go into the furnace, and the resultant ingot with the distinctive brassy colour visible on the underside.

Triangular crucible sealed with clay, straw and dung mix.

Building a Roman Kiln
Over the Easter holidays we welcomed staff and students from UCL and Archaeology South East to Butser for a mini ‘archaeotech’ - a chance for the students to get hands on with some experimental archaeology.
In the process they built a wonderful Roman kiln at the farm. Below Bill Sillar, Professor of Archaeology and Technology in Society at UCL Institute of Archaeology shares the process behind this latest construction.
Over the Easter holidays we welcomed staff and students from UCL and Archaeology South East to Butser for their ‘archaeotech’ course- a chance for the students to get hands on with some experimental archaeology.
In the process they built a wonderful Roman kiln at the farm. Below Bill Sillar, Professor of Archaeology and Technology in Society at UCL Institute of Archaeology shares the process behind this latest construction.
UCL, Institute of Archaeology students spent a week at Butser building a Roman kiln, working with our colleagues from Archaeology South East.

The completed Kiln construction at Butser.
The kiln is based on an early 2nd century Roman kiln from the salt marshes of the Medway Estuary, originally excavated in 1975 by Ian Jackson and the Upchurch Archaeology Research Group (UARG). This is one of at least 18 similar kilns in the intertidal area investigated by UARG, which are thought to be derived from Late Iron Age, La Téne style, kilns. The excavation was difficult as it needed to be undertaken during a limited low-tide period, before the site was again submerged by the rising tide.The Roman potter built this kiln into a bank by the riverside, which is partly why it was so well preserved. This was an up-draft kiln where the pottery was placed on bars which were in turn supported above the furnace by pillars and a thick lip around the base of the kiln. The superstructure of the kiln was not preserved but turfs or pottery sherds could have been used. The stokehole was relatively small which may reflect the type of fuel used. It has been suggested that these kilns were short lived and that potters had a ‘knockdown and rebuild’ approach where the kiln bars could be reused on a new kiln, however the excavators of this kiln identified evidence of re-lining showing that structures could be ‘re-vamped’ and used on more than one occasion. We chose this kiln as our referent partly due to the generosity of Ian Jackson and colleagues in sharing their understanding of these kilns and allowing us to study the assemblage of pottery excavated from within and beside the kiln.

Cross section from the kiln excavation

Plan from the kiln excavation
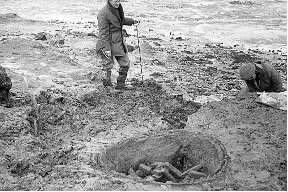
Photograph from the original excavation

Photograph from the original excavation. Note central pillars and thick lip at base of the kiln upon which the kiln bars were supported.
At Butser we built our replica kiln into a bank in the area between the Iron Age enclosure and the Roman villa. This both reflected the chronology of an early Romano-British Kiln and contributes to the ‘pyro-technology’ area that Butser is developing for future metal working, pottery firing and (hopefully) glass working. The chalk geology of Butser is very different to the estuarine silt of the Medway, so we had to import clay, but like the Roman potters we mixed the clay with organic material (grass cuttings) for the lining of the kiln chamber. We also made kiln bars and the pedestal supports out of clay well-tempered with chaff and grass. It might have been possible to do this somewhat more quickly than the six days we took, but we benefited from the gradual drying as we slowly layered the clay onto the sides of the pit and formed the lip support in the interior of the furnace and the exterior flue.
We brought the original excavated assemblage of pottery and kiln furniture to Butser to look at while we were working on the kiln build. This helped the students to understand the connection between the archaeological site and their experimental work. It also provided us with insights into the materials and forming of the kiln furniture and the pottery. We were very grateful that Ian Jackson came to Butser to discuss his excavation with Anna Doherty who has undertaken an initial analysis of the pottery assemblage. Most of the pottery was made on the wheel. In the Roman period this would have been a kick wheel, where the potter uses their foot to push a circular base that transfers the momentum to the wheel on which they form the pots. We brought a kick wheel to Butser and have started to make pottery to imitate some of the original Roman forms. This is something we hope to develop in future months to make enough pottery to fill the kiln. We will allow the kiln to dry out until late September when we will return with another group of UCL students to start to use the kiln, and try out different fuels and coverings. We will let you know how that goes…..
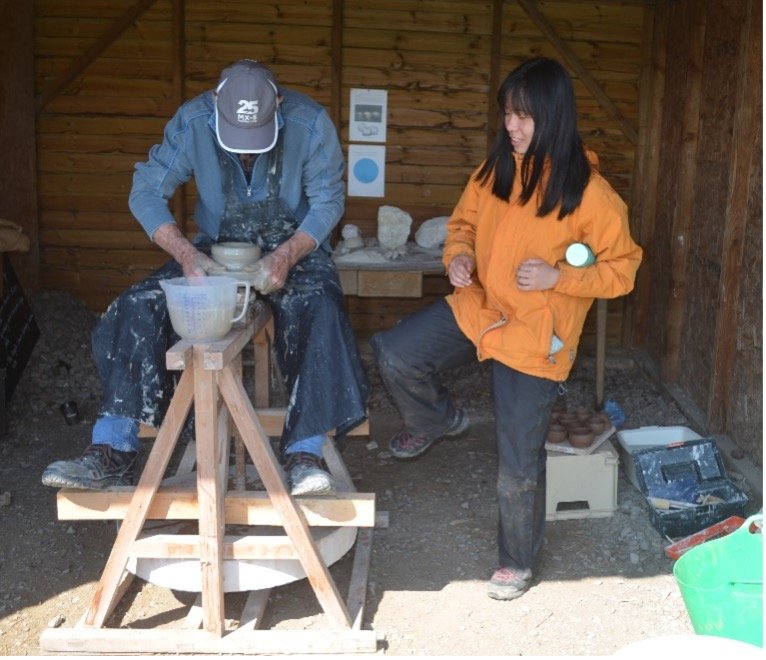
Using the kick wheel

Louise Rayner shows students the pottery assemblage and kiln furniture from the original kiln excavation
Thank you very much to Bill and all the staff and students from UCL and Archaeology South East for building this fantastic kiln here at Butser . We can’t wait till it gets fired up for the first time in September!

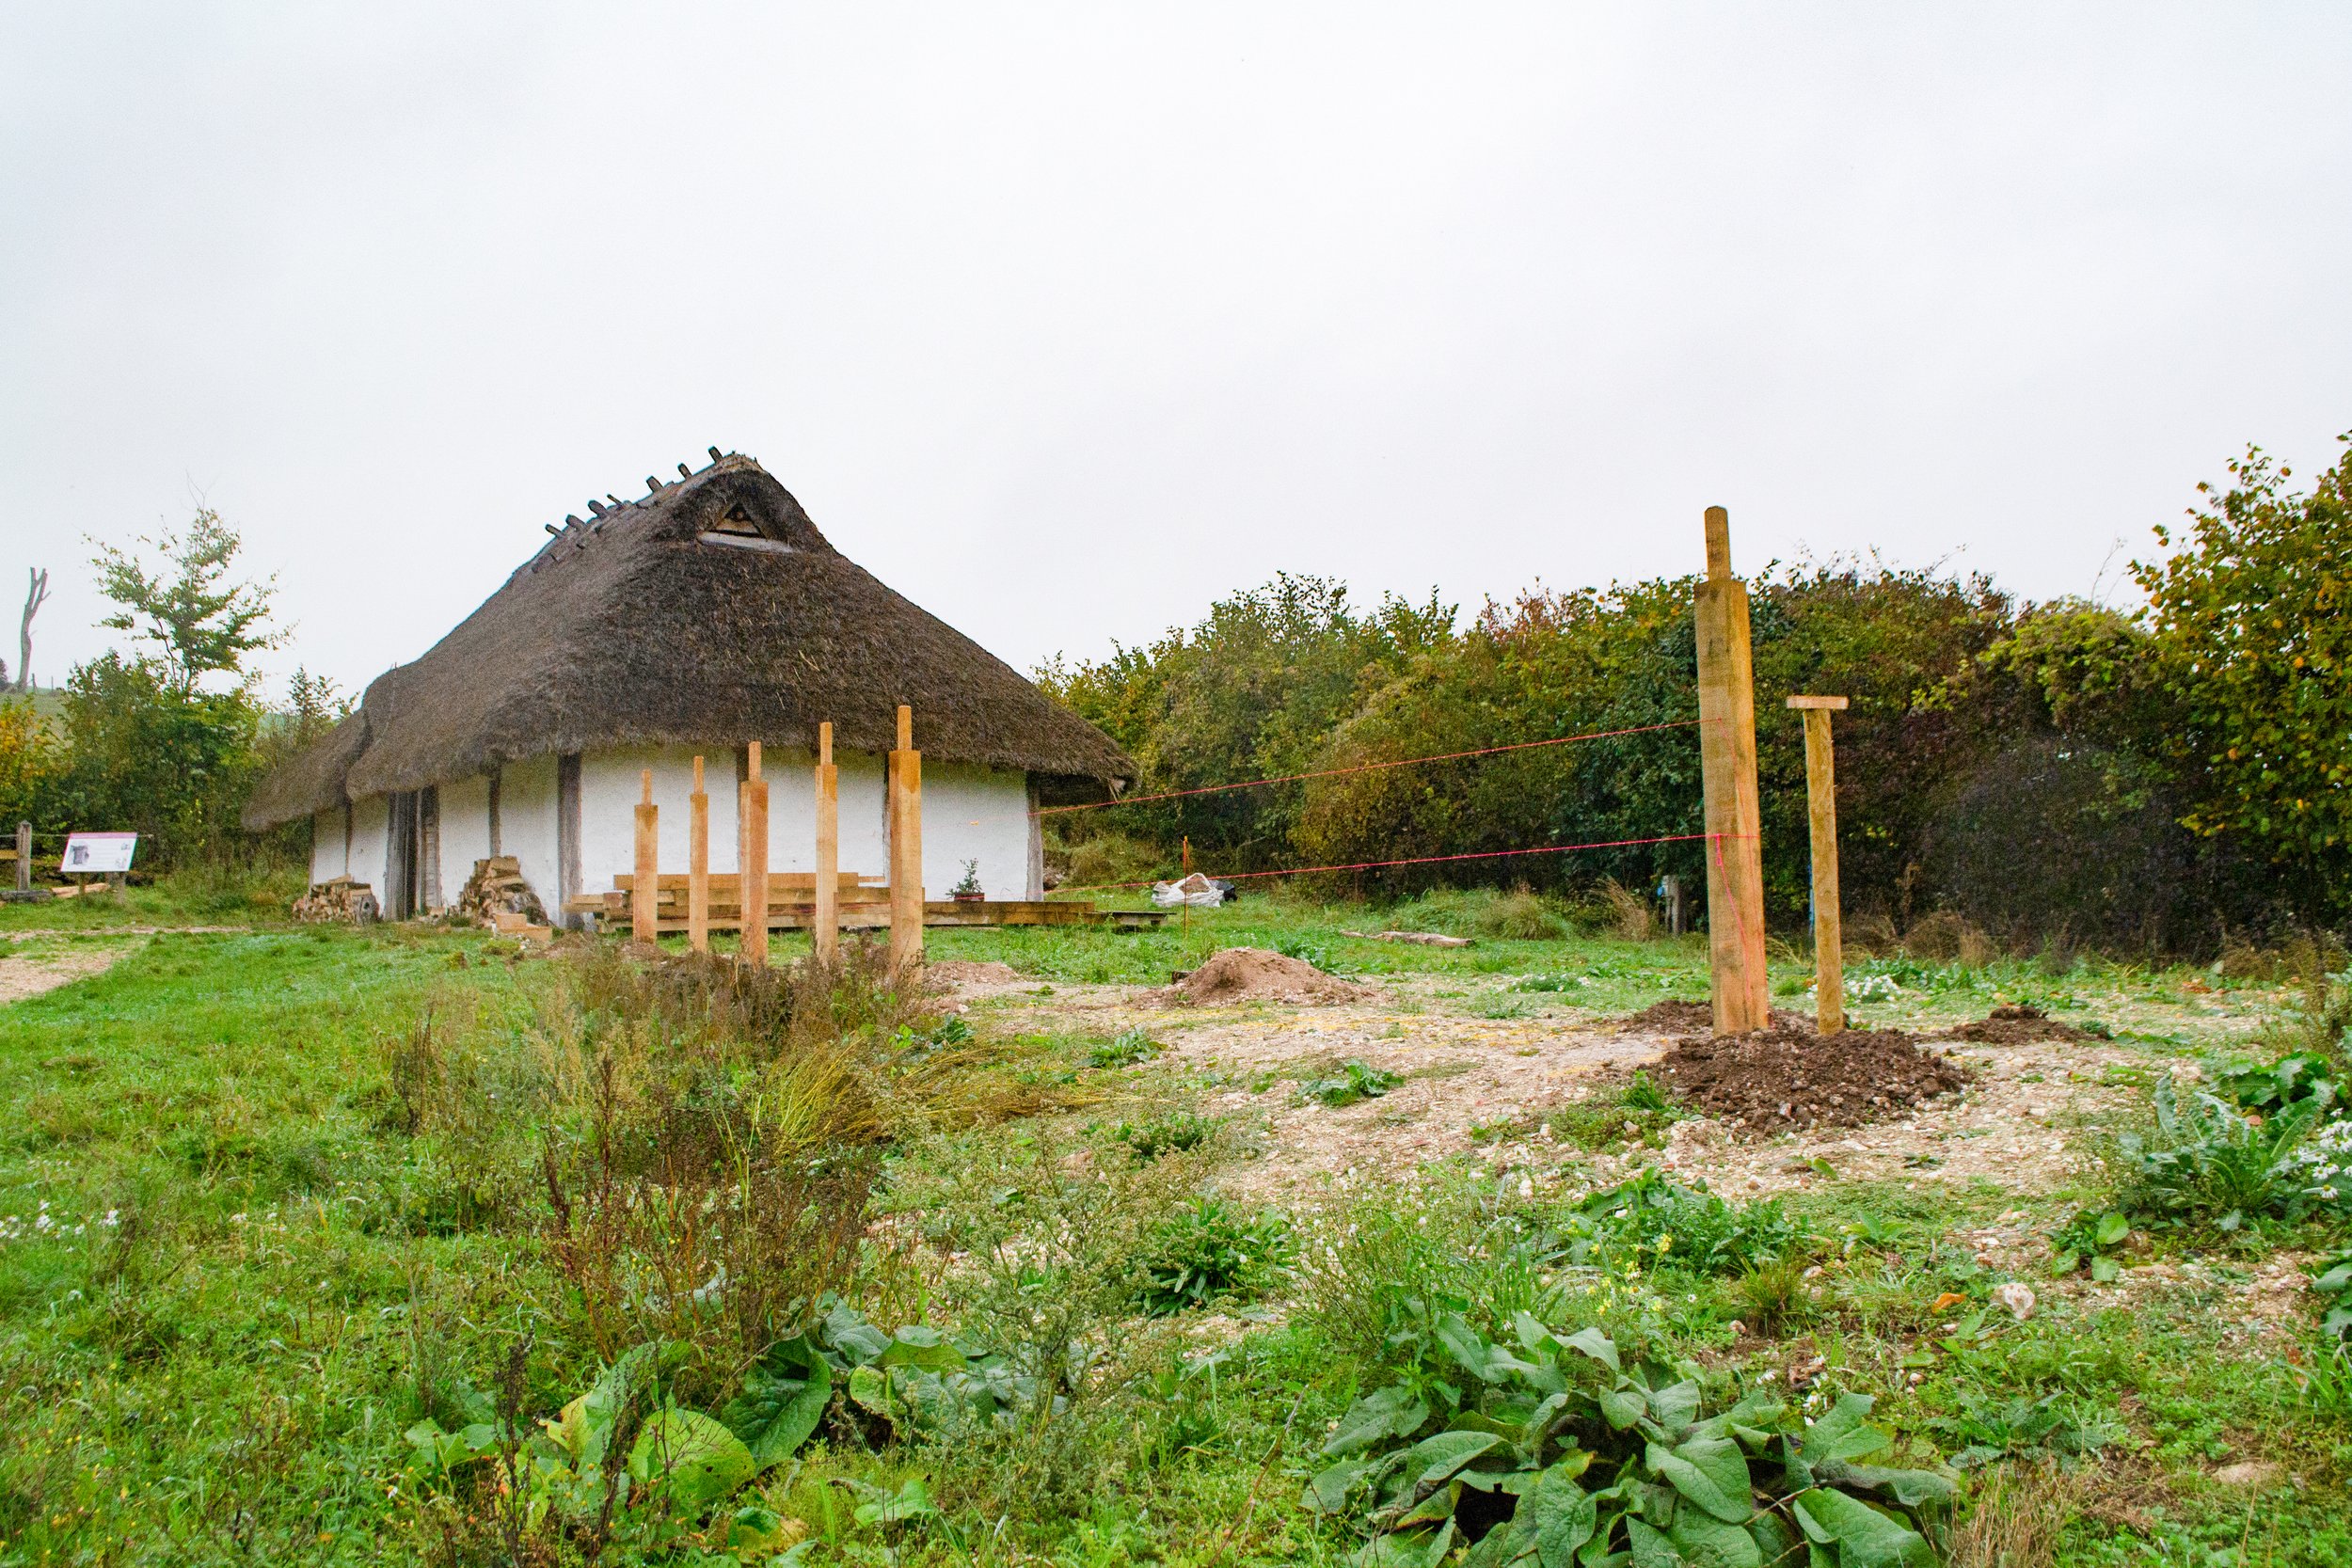
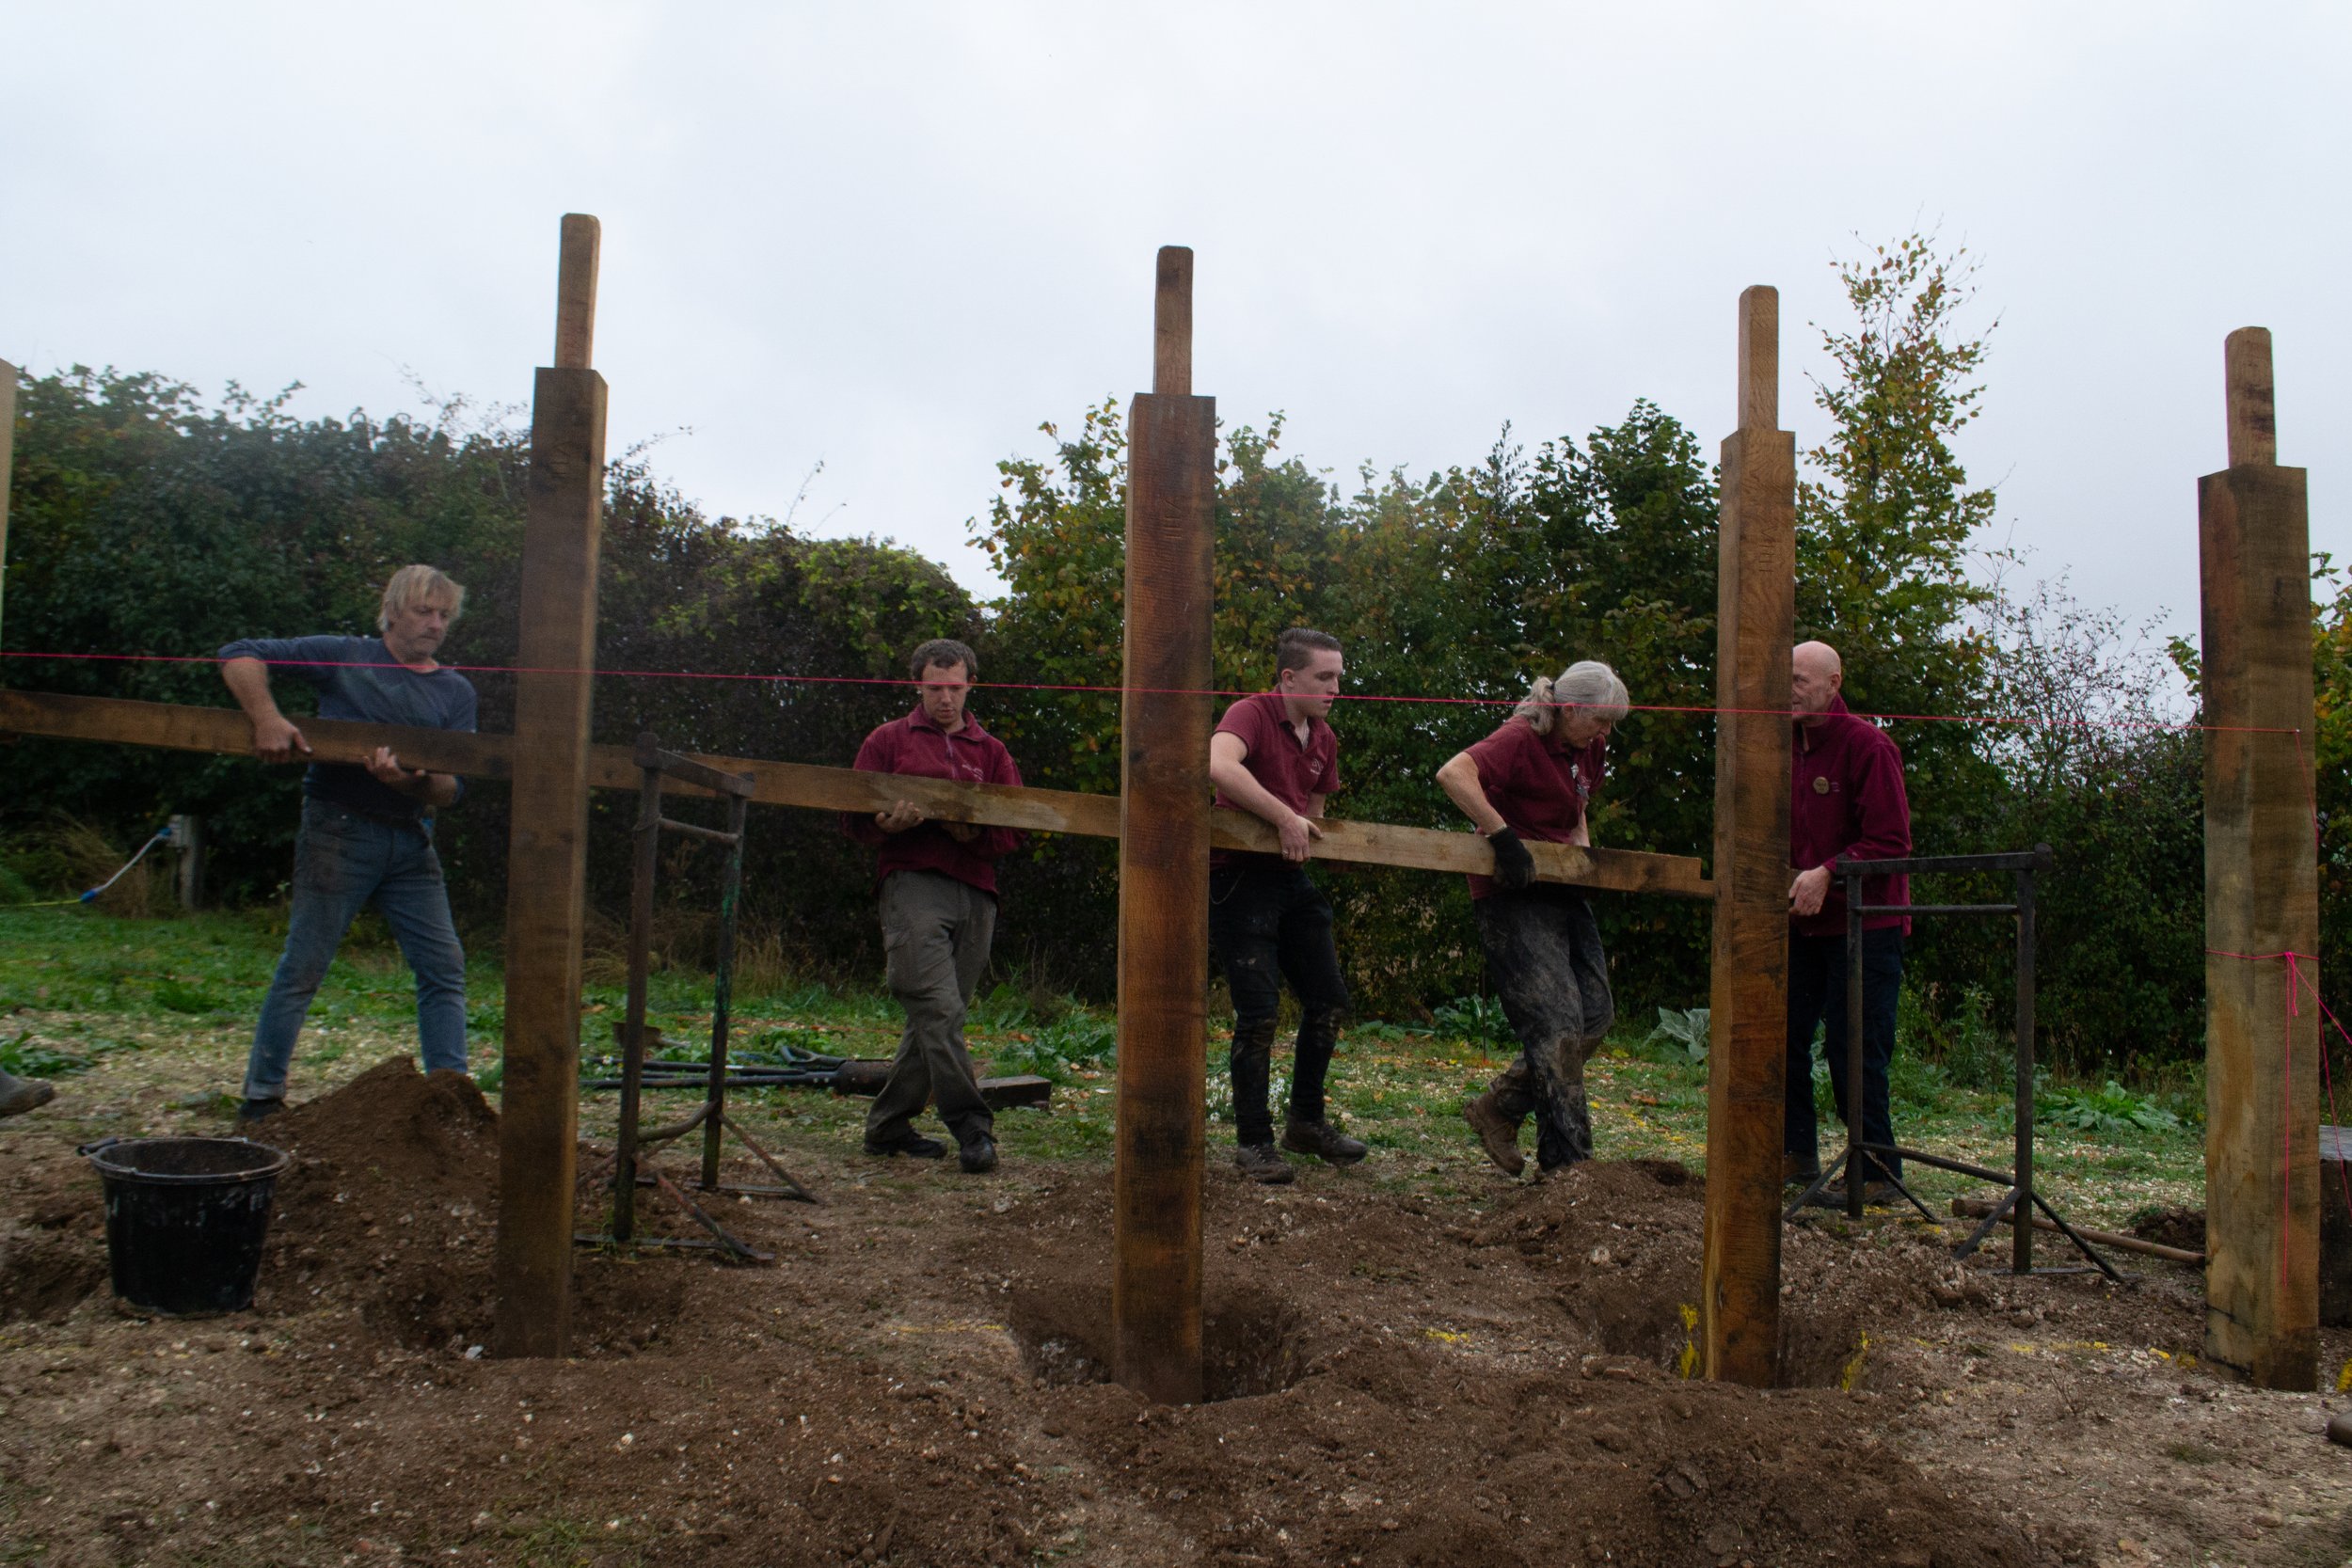
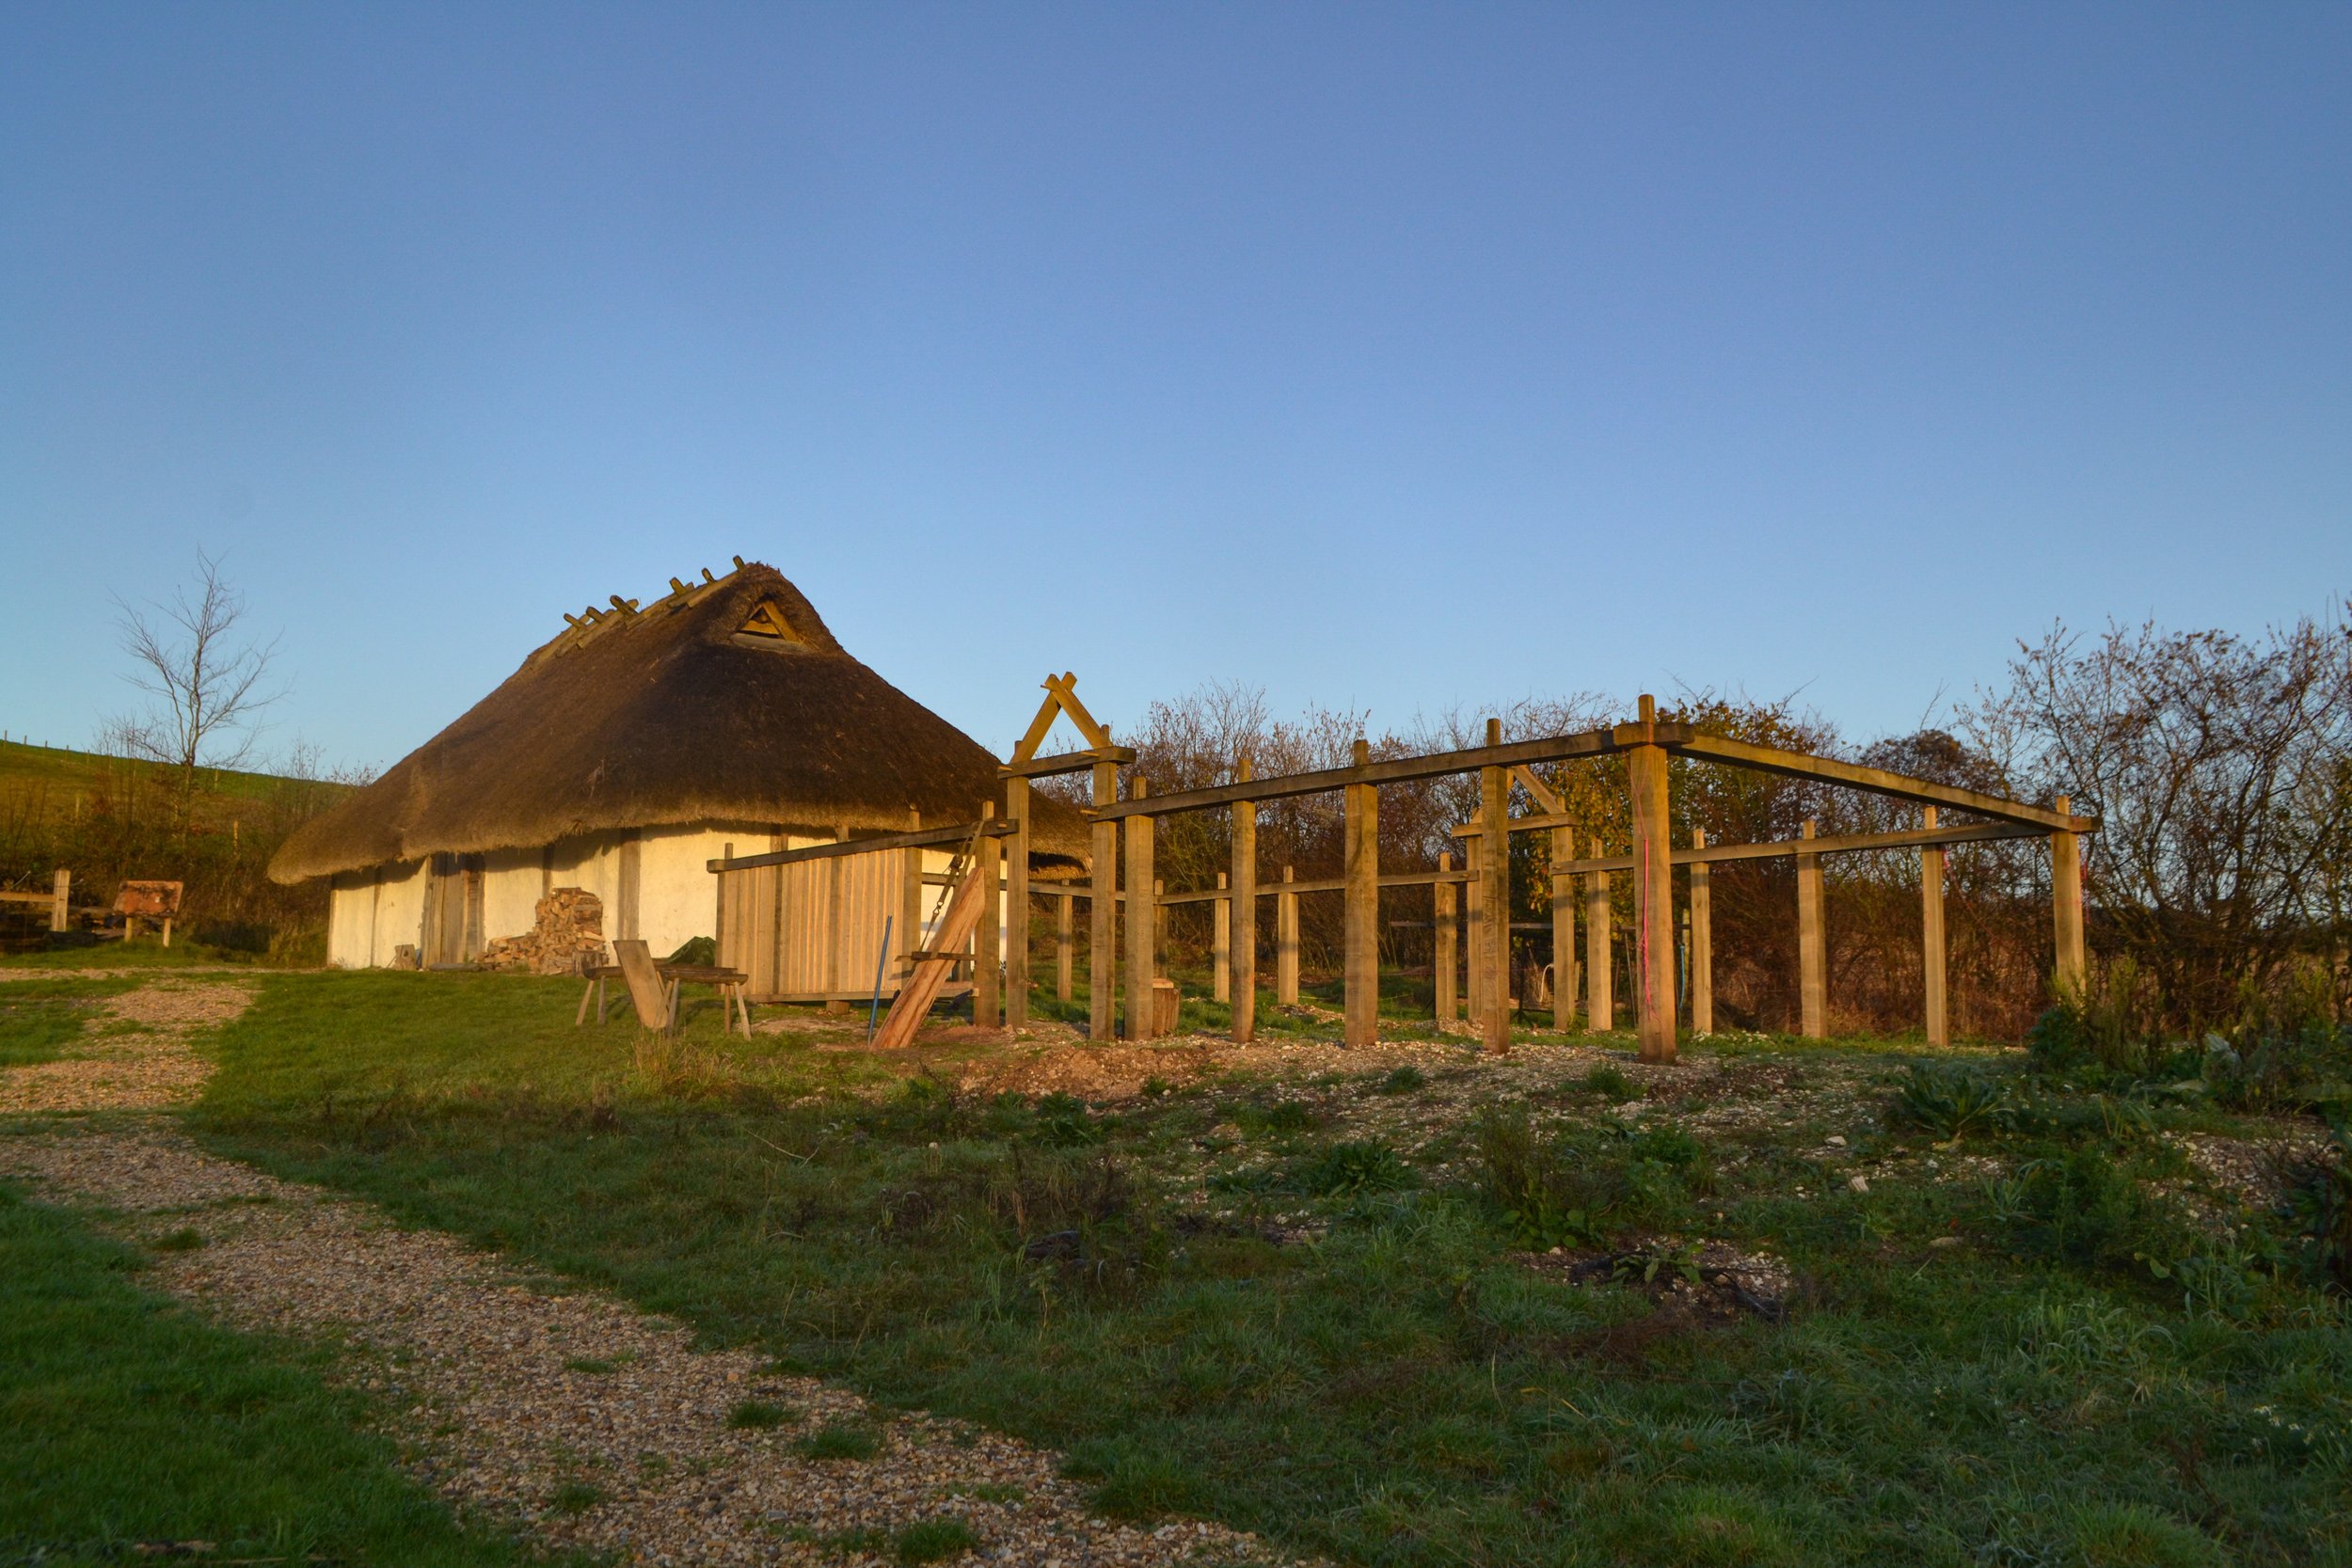
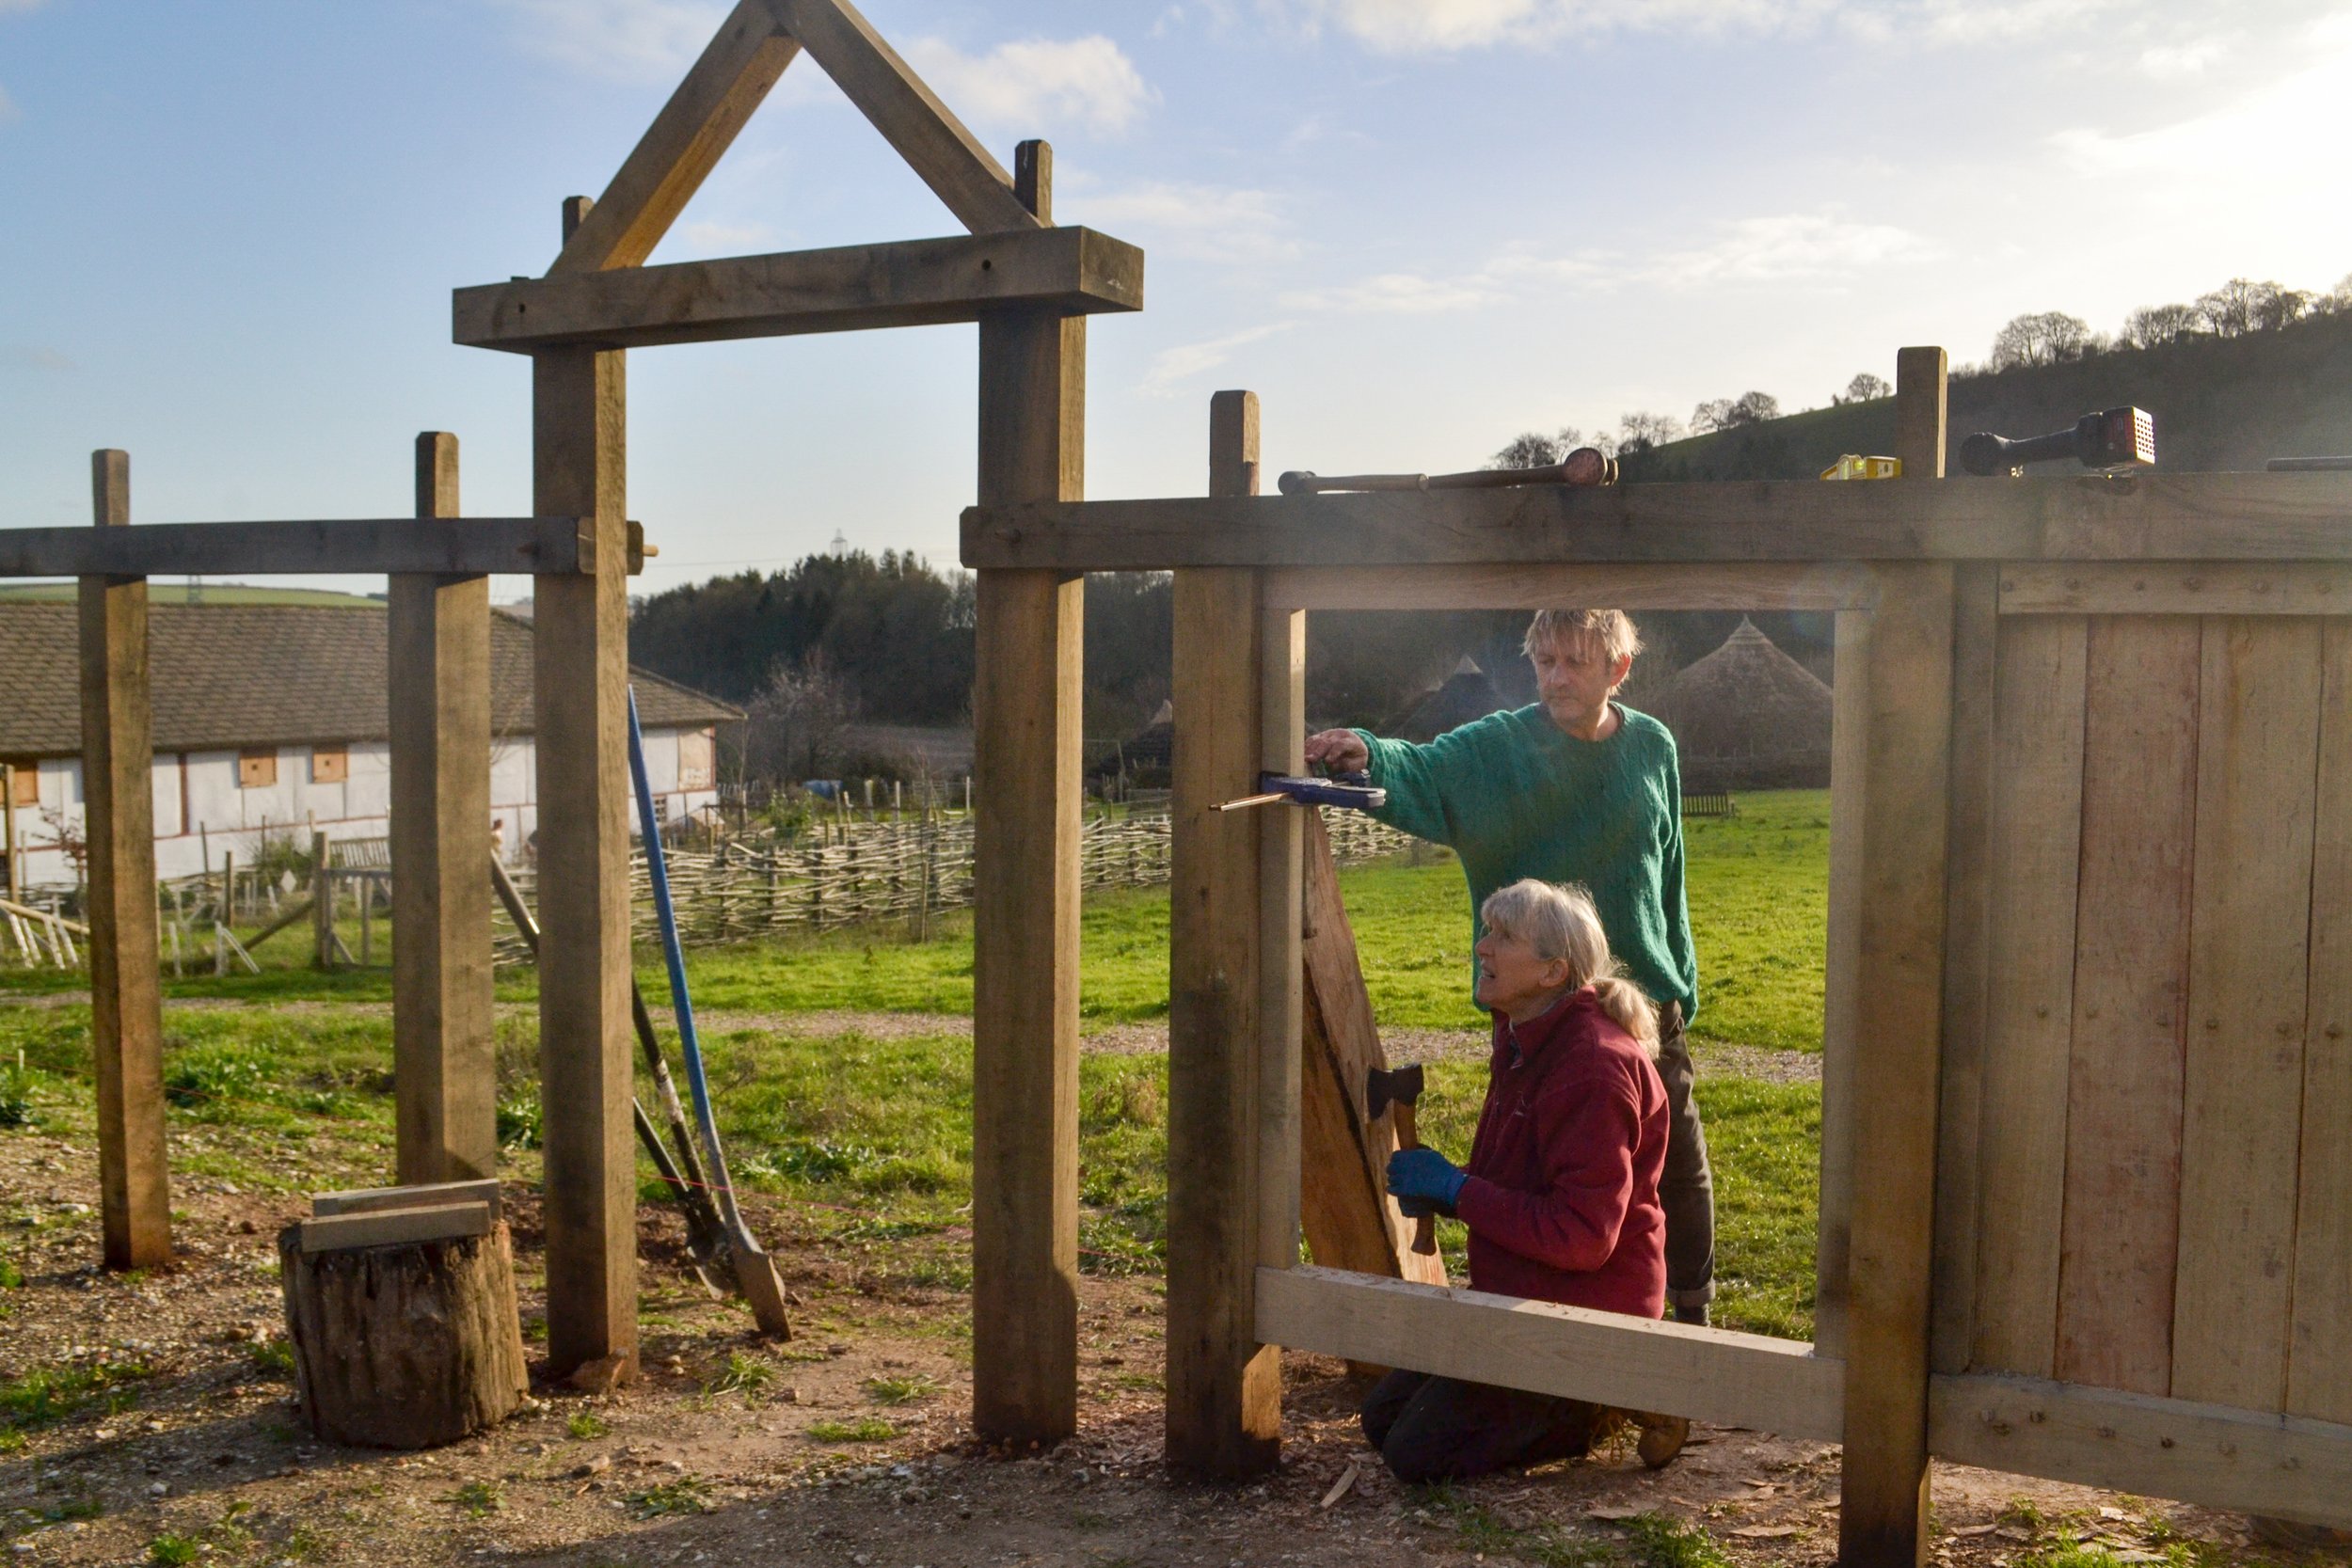
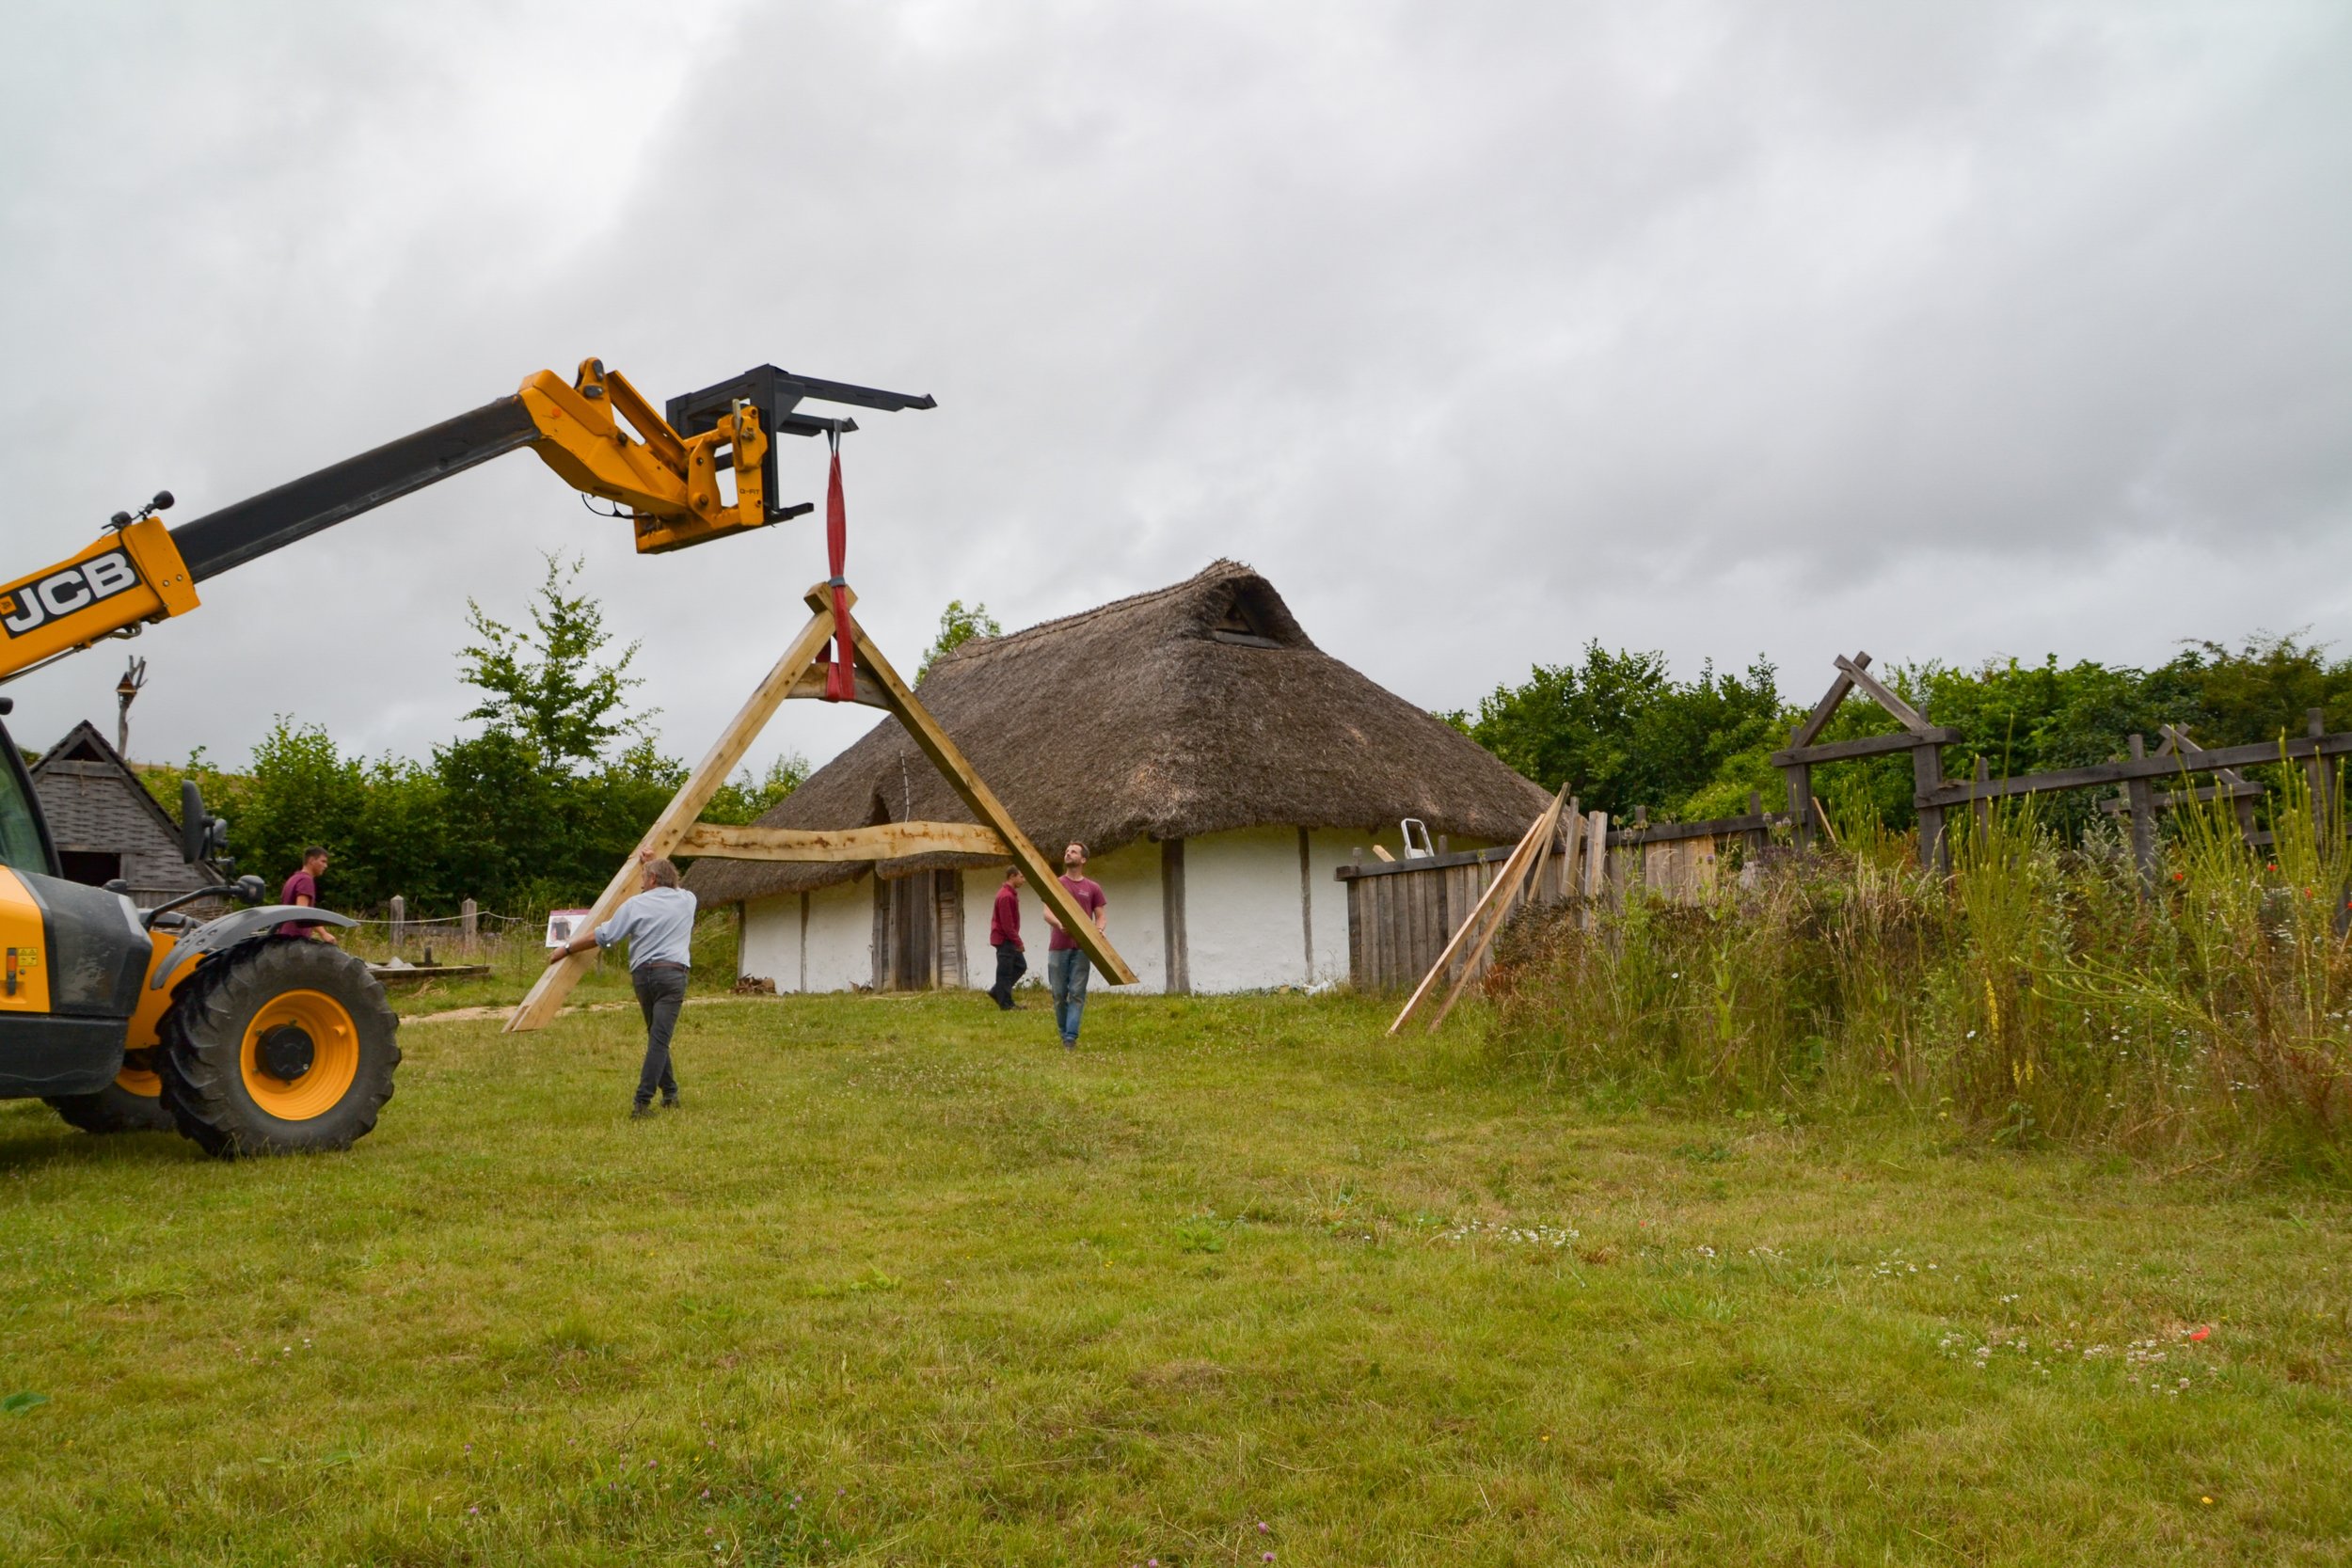
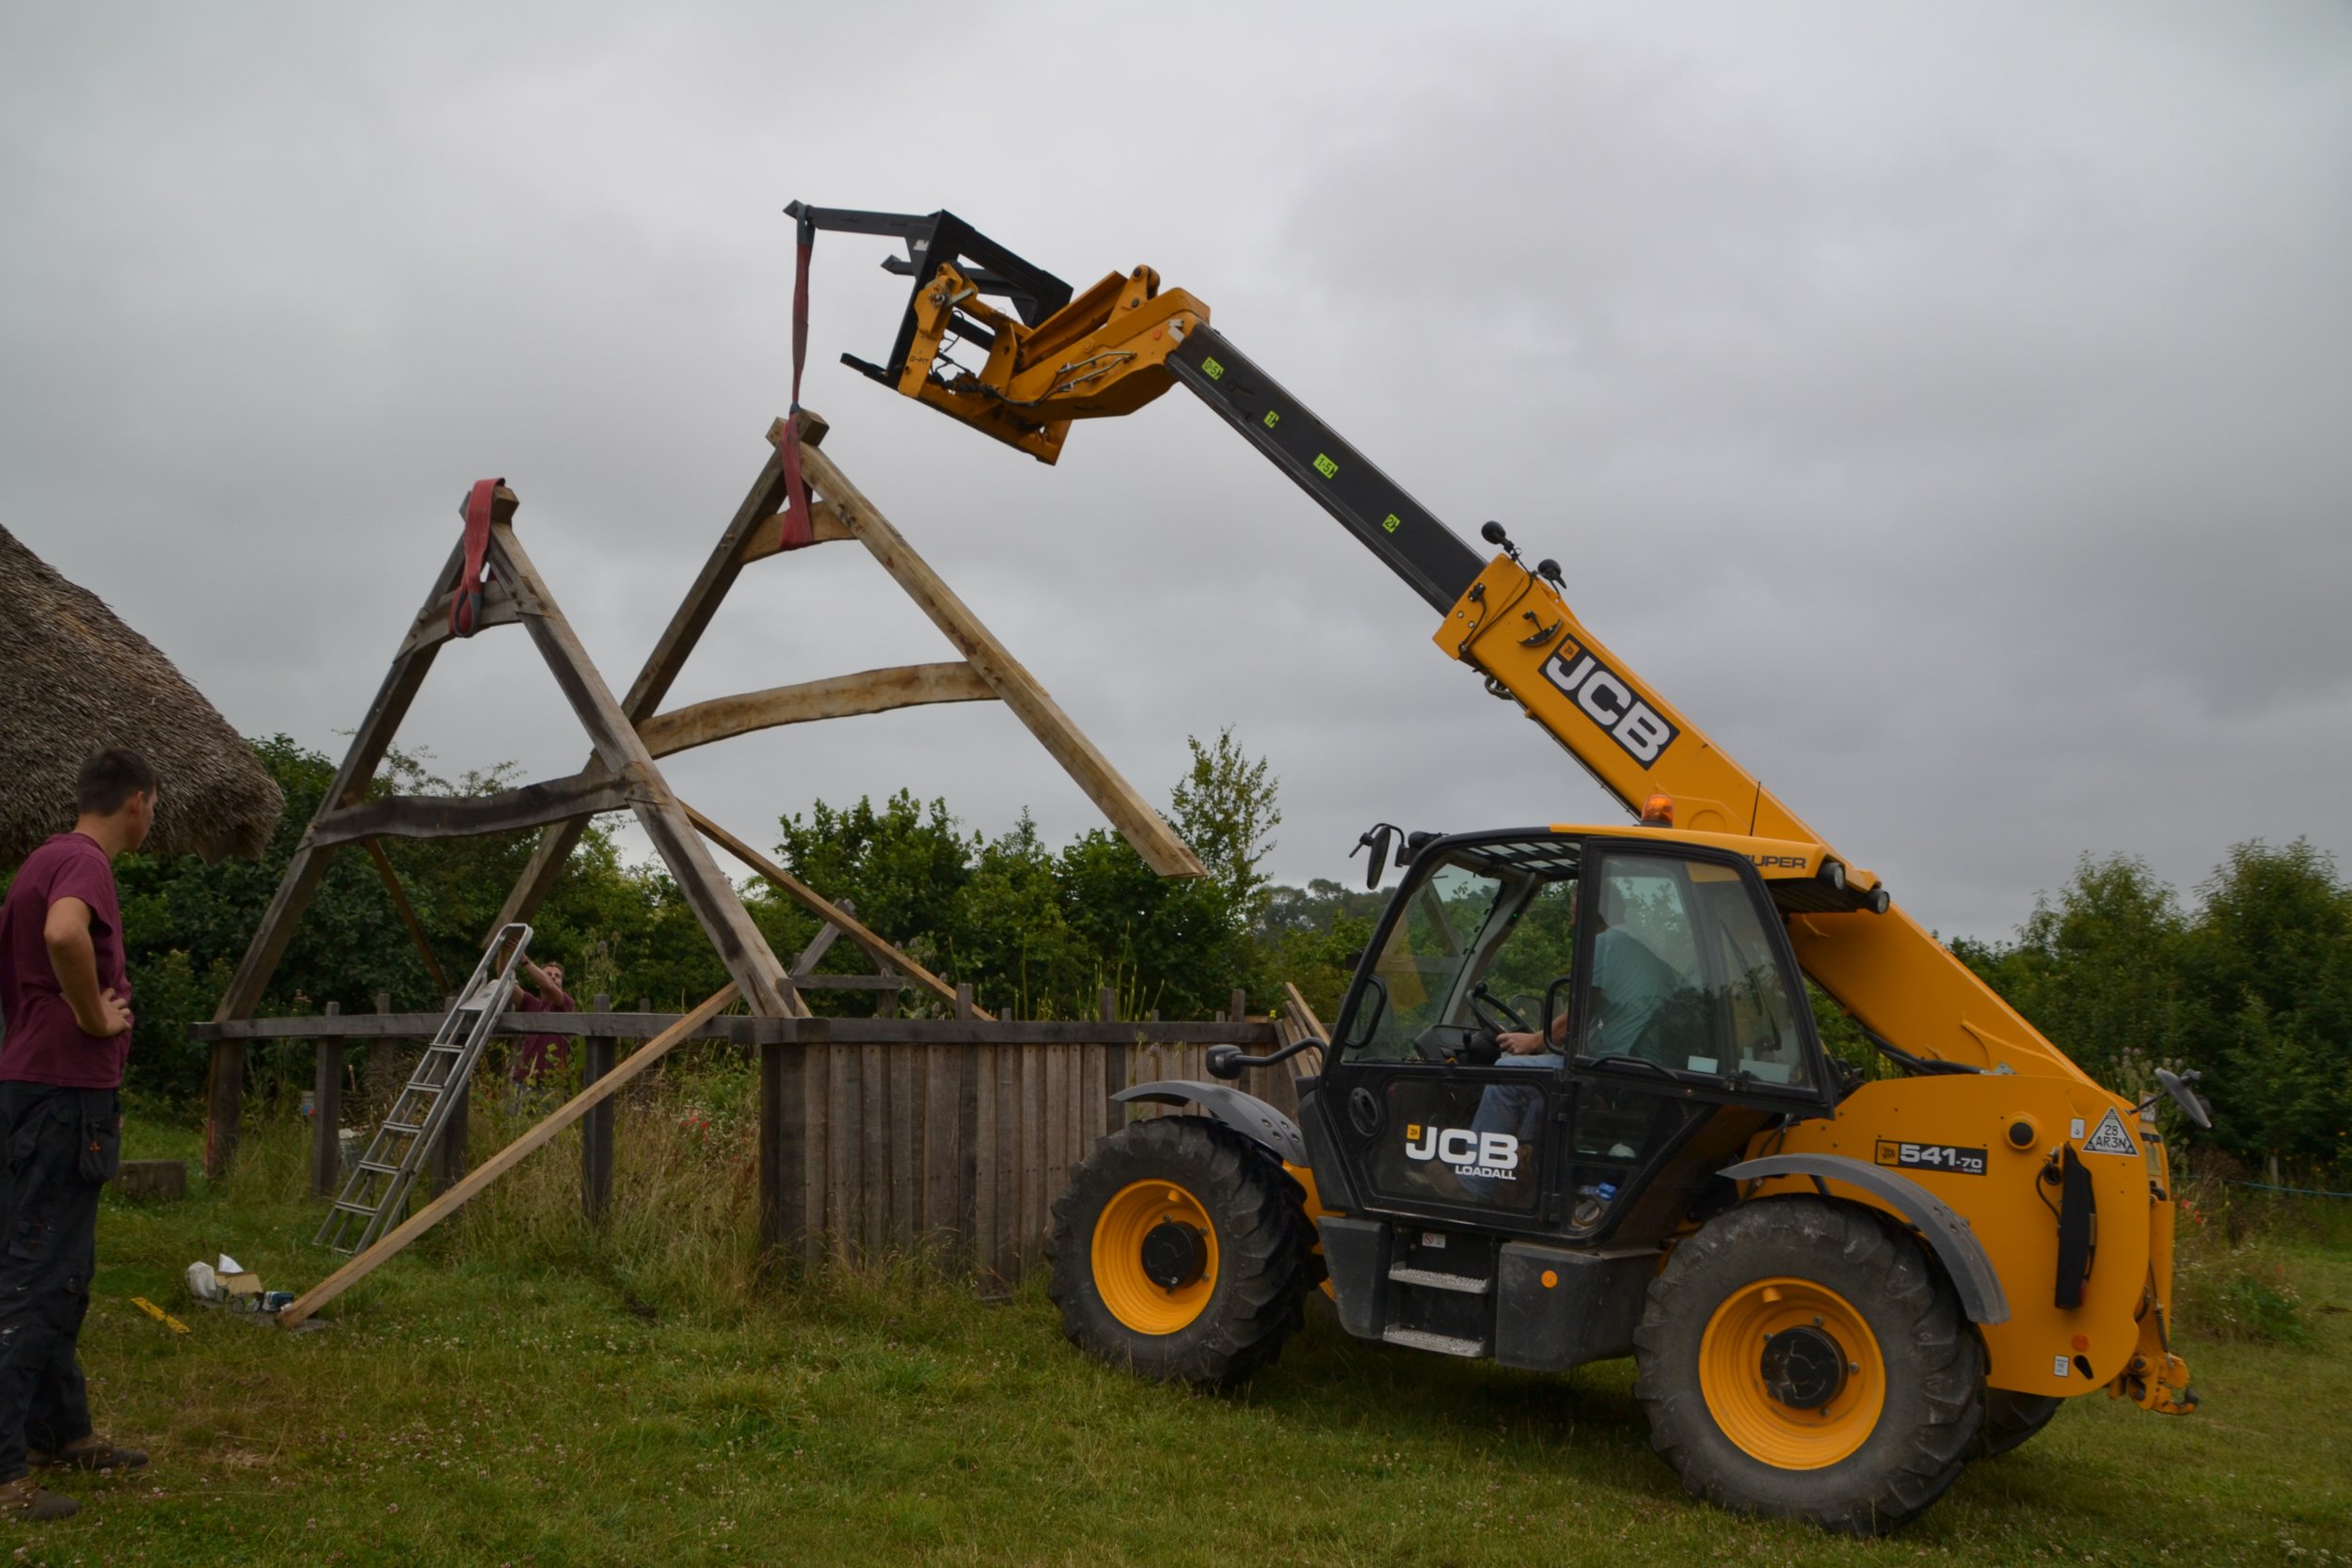
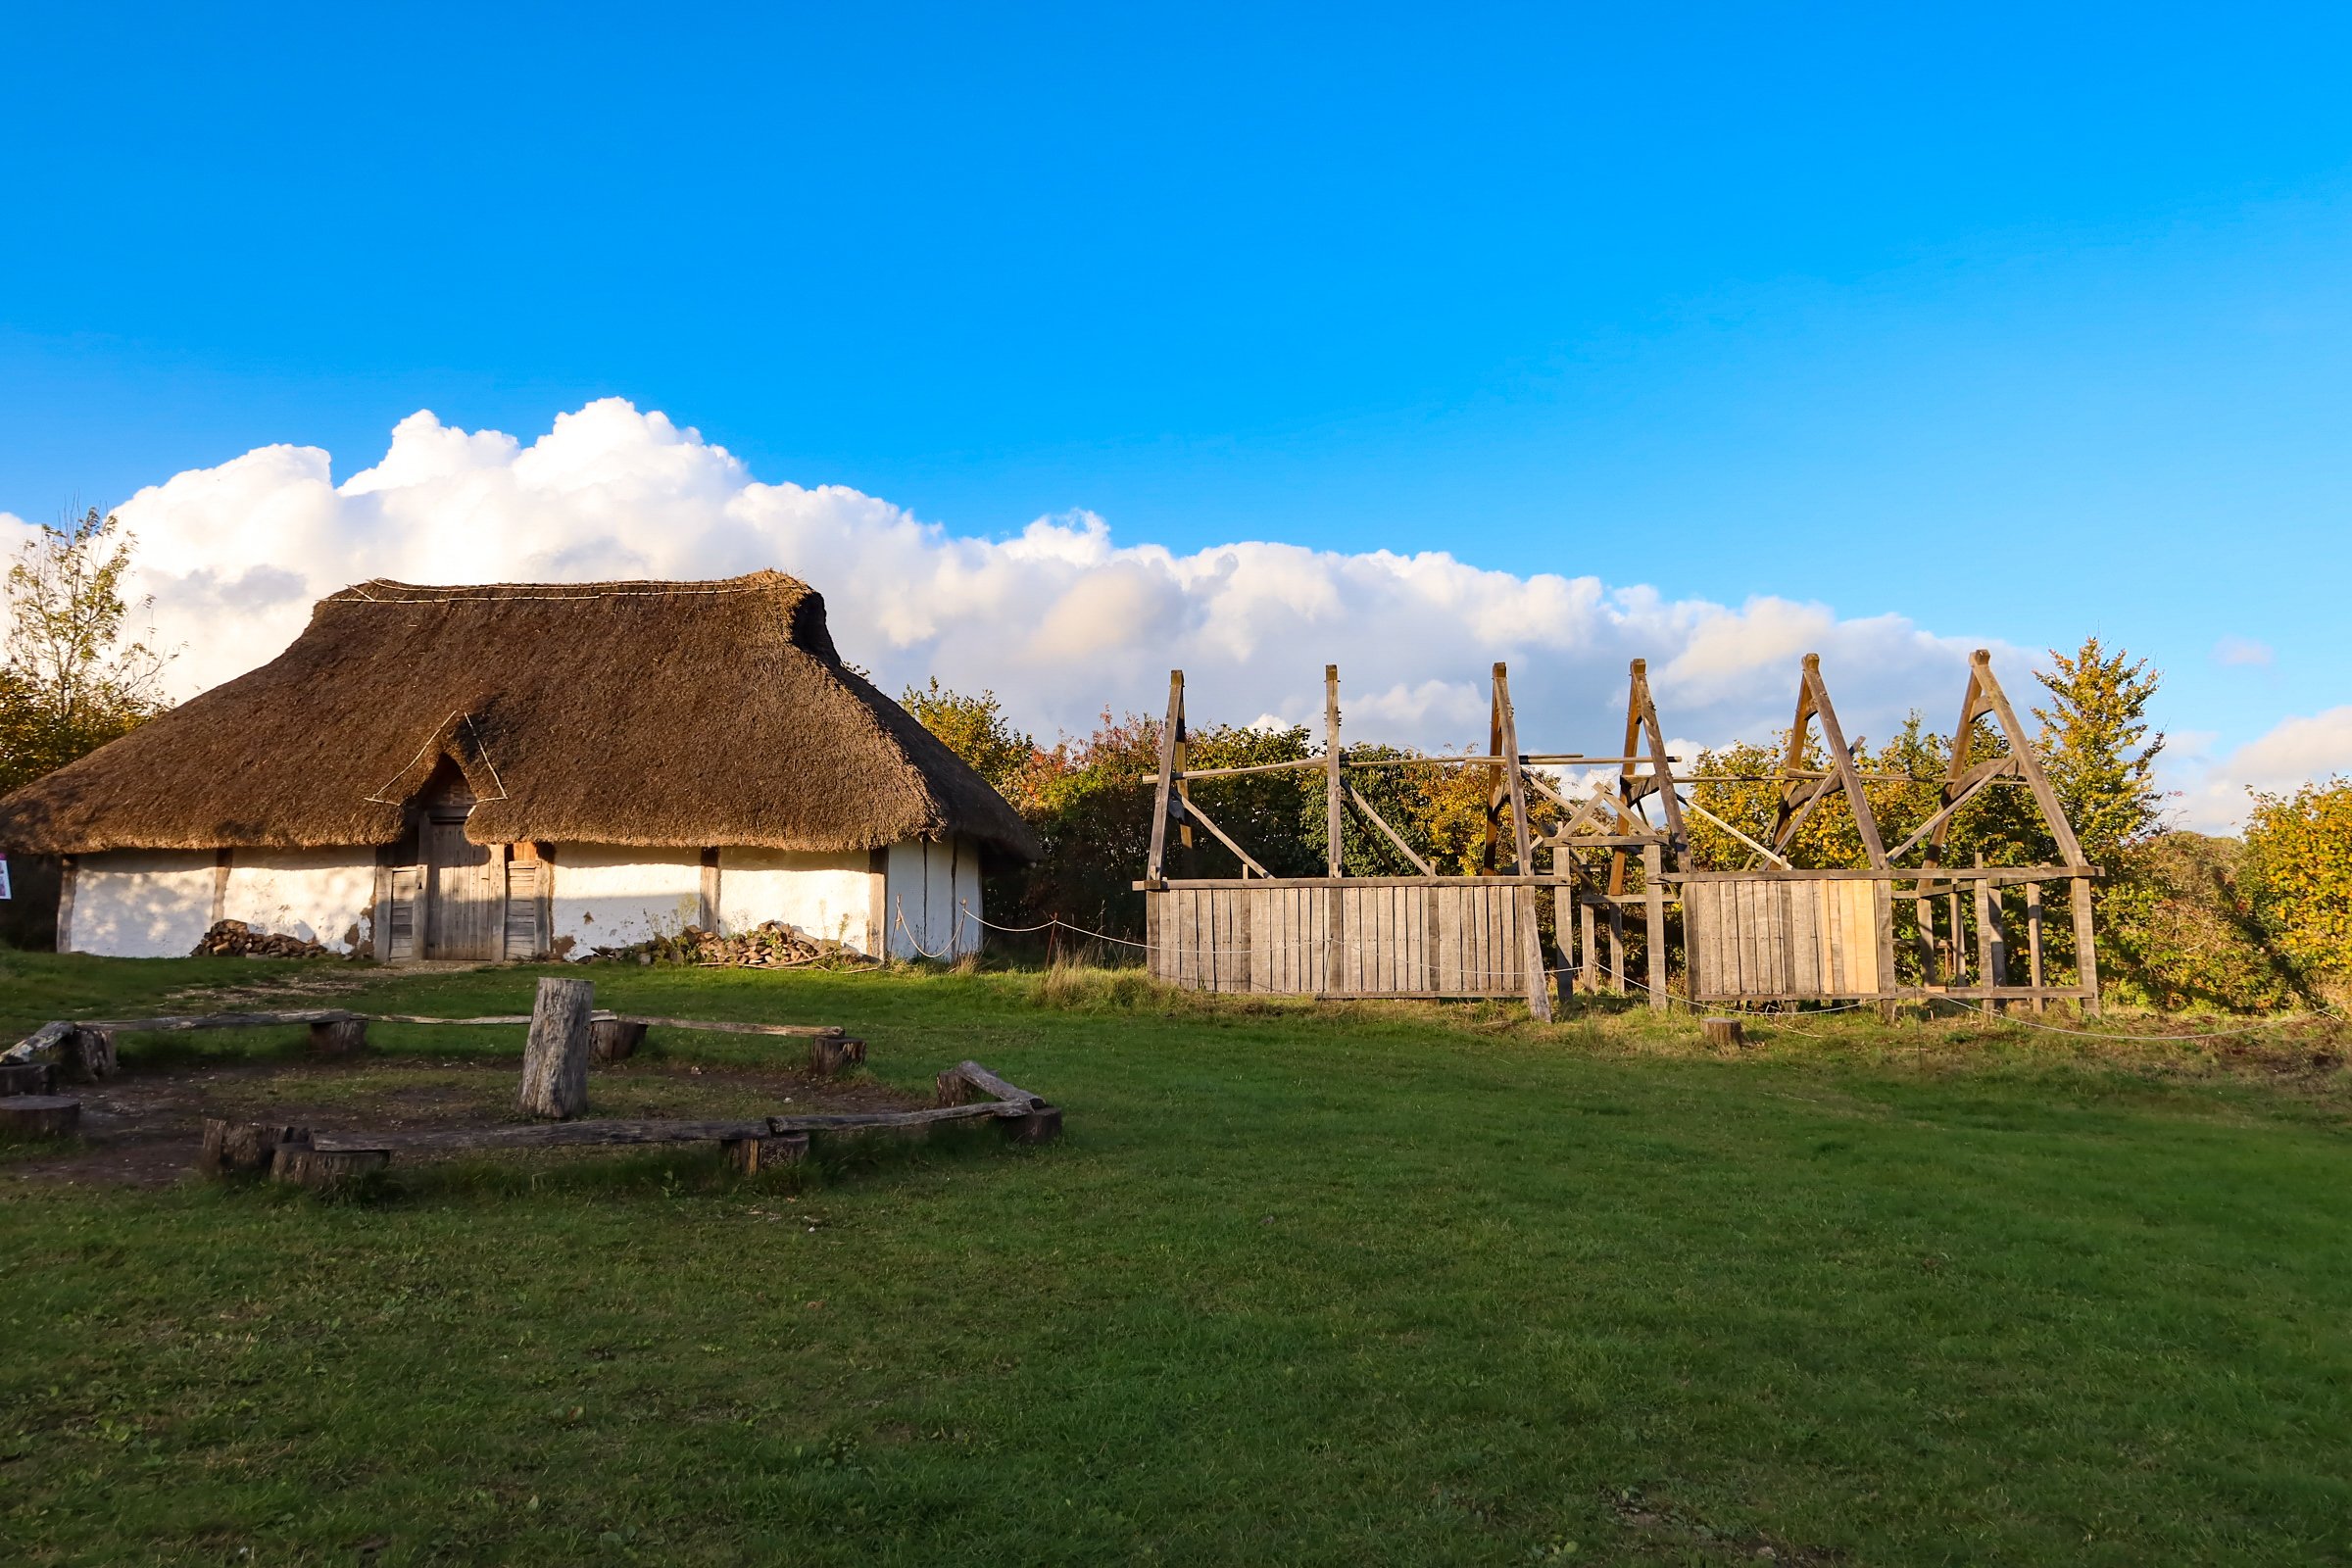
The Opening of our Second Saxon Hall!
As we celebrate the completion of Butser’s Second Saxon Hall, Project Archaeologist Trevor Creighton reflects on its completion and the incredible archaeology the house is based on.
Project Archaeologist Trevor Creighton reflects on the completion of the construction of Butser’s second Anglo-Saxon Hall based on local archaeology from Church Down Chalton.
Here on the Farm, we’re really excited to be opening our second Anglo Saxon building - especially me, as it’s my favourite period in British archaeology and history! The first Anglo Saxon building was finished in March 2016, while our second commenced in 2018. They are both based on the foundations of two houses uncovered during excavations close to our nearby village of Chalton. The dig was conducted during 1971-72 by a team led by Peter Addyman, who soon after led the excavation of the famous Viking site, Jorvik, in York (no prizes for guessing where the city’s name comes from). The Chalton excavations were near the very top of Church Down, which is approximately 1.5km south of the village, and were later continued by the University of Southampton, revealing evidence of 61 structures, numerous fences and other features, as well as the remains of animal bones, cereals, metal work and a few small objects, including spear and arrow tips and decorative objects. Rather wonderfully, you can see the site of the excavation from the front doors of the houses.
The illustration below is a drawing by the excavators of the archaeology of the two buildings we have constructed.

Although there’s a fair bit going on in the drawing, you can (hopefully!) see two rectangular trenches drawn side-by-side, slanting slightly across the illustration. These were the foundations of each house, which originally carried horizontal beams and a series of upright posts. In each trench are drawn some slightly irregular circles and each of these is a posthole.
The posts must have been the uprights for a strong frame, and you can clearly see the way our treewright, Darren, has used that archaeological information to create our two buildings. Inside each large, triangular ‘trusses’ are secured to the massive, upright oak posts. This system, joined along the length of each side by horizontal beams between each post, carries the weight of the beautifully thatched rooves and keeps the buildings standing. We chose oak as it was available to the Anglo Saxons, and we know from other evidence that it was favoured in building for its strength and durability.
You have probably noticed that the buildings in the illustration look very similar. So, why have we built two quite different houses? The truth is, we can never know what the originals were like. So, having the opportunity to build two different styles allows us to explore two possible interpretations of the original, which is the experiment in experimental archaeology!
The other postholes, dotted throughout the illustration (and, indeed, the site) served other purposes. Some were almost certainly fences, quite possibly for gardens. We know from the bones left behind that the folk living on the site had pigs and sheep and hunted deer. If they wanted to grow some fruit and veg, they would also have wanted to keep those critters away from the produce. It’s easy to forget that people in the distant past almost certainly had what we would recognise as vegetable patches. We know from seed evidence that, even in prehistory, plants were clearly selected for growing in certain areas, often near houses, so we have reflected this in the terraced beds in front of our new building. And not just cereals – like the wheat and barley we know our Chalton people grew – but herbs and medicinal plants as well. And I don’t think it’s unreasonable to think that maybe they planted for aesthetic reasons. We do, why not them?
It’s really difficult to precisely date this archaeology but, from the archaeologists’ reports, the site itself existed somewhere between 500AD and perhaps as late as 800AD. The most likely dates for the settlement are somewhere in the middle of that range and our houses appear to have been among the last built. I think if we said that our houses stood somewhere around 700AD, that would be reasonable, so long as we are allowed a bit of wriggle-room. More important than dates and postholes is the question of who lived there and what were they doing? Well, I often call our buildings the ‘Saxon houses’. It’s a convenient shorthand, and sounds catchier than ‘Anglo Saxon structures A1 and A2’, which is what they are called in the archaeology report. It’s not (just) laziness on my part. It’s a fair bet that they were houses – and fairly large and well-made ones at that.
They were, and in a way still are, also in the Kingdom of the West Saxons - Wessex, quite close to the border with Sussex (Kingdom of the South Saxons… again, no prize if you knew or guessed that I’m afraid). So, Saxon house seems reasonable. The wider world of the Anglo Saxons was experiencing a period of dramatic change, especially with the expansion of Christianity among the Saxons. In the late 600’s, no less a personage than St Wilfred was making his way down the Meon Valley – just over the hill from us – on his Mission. The Meon Valley was actually home to Jutes, who did not have a happy encounter with Wilfred, but that’s another story. When I went to school, I learned about the ‘Angles, Saxons and Jutes’, but my school days were chronologically much nearer the 7th Century than the present and the poor old Jutes seem to have been largely forgotten now (could I be mistaken about the inhabitants of our ‘Saxon ‘ houses?!). Wilfred would later convert the South Saxons and found the See of Selsey, near Chichester.
Wessex wasn’t exactly a backwater, but it was not yet the pre-eminent Kingdom of the emerging ‘England’ that it would become in the 10th Century, after the mighty efforts of Alfred the Great in the late 800’s. The Midland Kingdom of Mercia was a real powerhouse then and, if you asked the great historian and monk Bede, who was writing about the same time as our buildings stood, he would have told you Northumbria reigned supreme (As a Northumbrian he was, it must be said, biased, though not necessarily wrong).
So, we have Saxons on a hilltop in the 7th and 8th centuries. Were they a group of proud, West Saxon warriors repelling marauders, secure in their high redoubt? Well, no. At least not on the evidence we have. There were a few weapons and a shield boss recovered at the site and nearby. There were knives recovered as well, but don’t read too much into that. Apart from the sheer usefulness of knives, they were a very Saxon thing – after all, the seax is a type of knife that got them their name. It’s not to say that the weapons, or the trusty seaxes, were never used in anger, but I think we probably had a group of people living generally peaceful, farming and craft-based lives. But that still doesn’t explain the hilltop – no water there! In fact, all of the chalk hills and valleys are dry, except during times of heavy rain. They are, but I think we can be certain those valleys were more like permanent streams in the not too distant past. Even now, when we do get a lot of rain, those valleys become ‘Lavants’ or ‘Bournes’, which are old terms for seasonal streams. Both words, as it happens, probably of Anglo Saxon origin. It might have been much more comfortable and drier on the hilltop than in the valley. And the views are great – why wouldn’t a Saxon homeowner build for the view?
By the way, they also left behind some oyster shells. So, these people were not isolated, nor living a necessarily uncomfortable life!
Interesting Factoids
Dr. Peter Addyman was Director of the York Archaeological Trust from 1972 to 2002. He was the director of the famous Coppergate Viking Dig in York, which was effectively the springboard for the Jorvik Viking Museum. The Coppergate dig began with Doctor Addyman digging beneath Lloyds Bank, on the corner of Piccadilly and Pavement. After early finds, he is reported to have said to the bank manager: ‘you have some extremely interesting deposits in your vaults’.
Well known archaeologist Grahame Soffe was on the dig, as was Phil Harding – yes, he with the hat! One of the other dig members was Martin Carver, a keen but inexperienced amateur freshly out of the Army. The dig so enthused him he decided to pursue archaeology as a career. That idea paid off, he is now Emeritus Professor of Archaeology at the University of York and is one of Britain’s leading Anglo Saxon specialists, having directed the major re-examination of Sutton Hoo from 1983-1992
One of the dig supervisors was Catherine Hills, now Dr Catherine Hills, Senior Fellow, McDonald Institute for Archaeological Research and Fellow of Newnham College. In a reminiscence about the dig, Dr. Hills claimed that an early field find of pottery at the site was made by a schoolboy, many years before the fieldwalking and subsequent excavation. His name was Barry Cunliffe (a native of Portsmouth).
So, the Church Down dig has some illustrious connections!
This illustration of the dig is used with the kind permissions of Dr. Peter Addyman and The Journal of Medieval Archaeology.

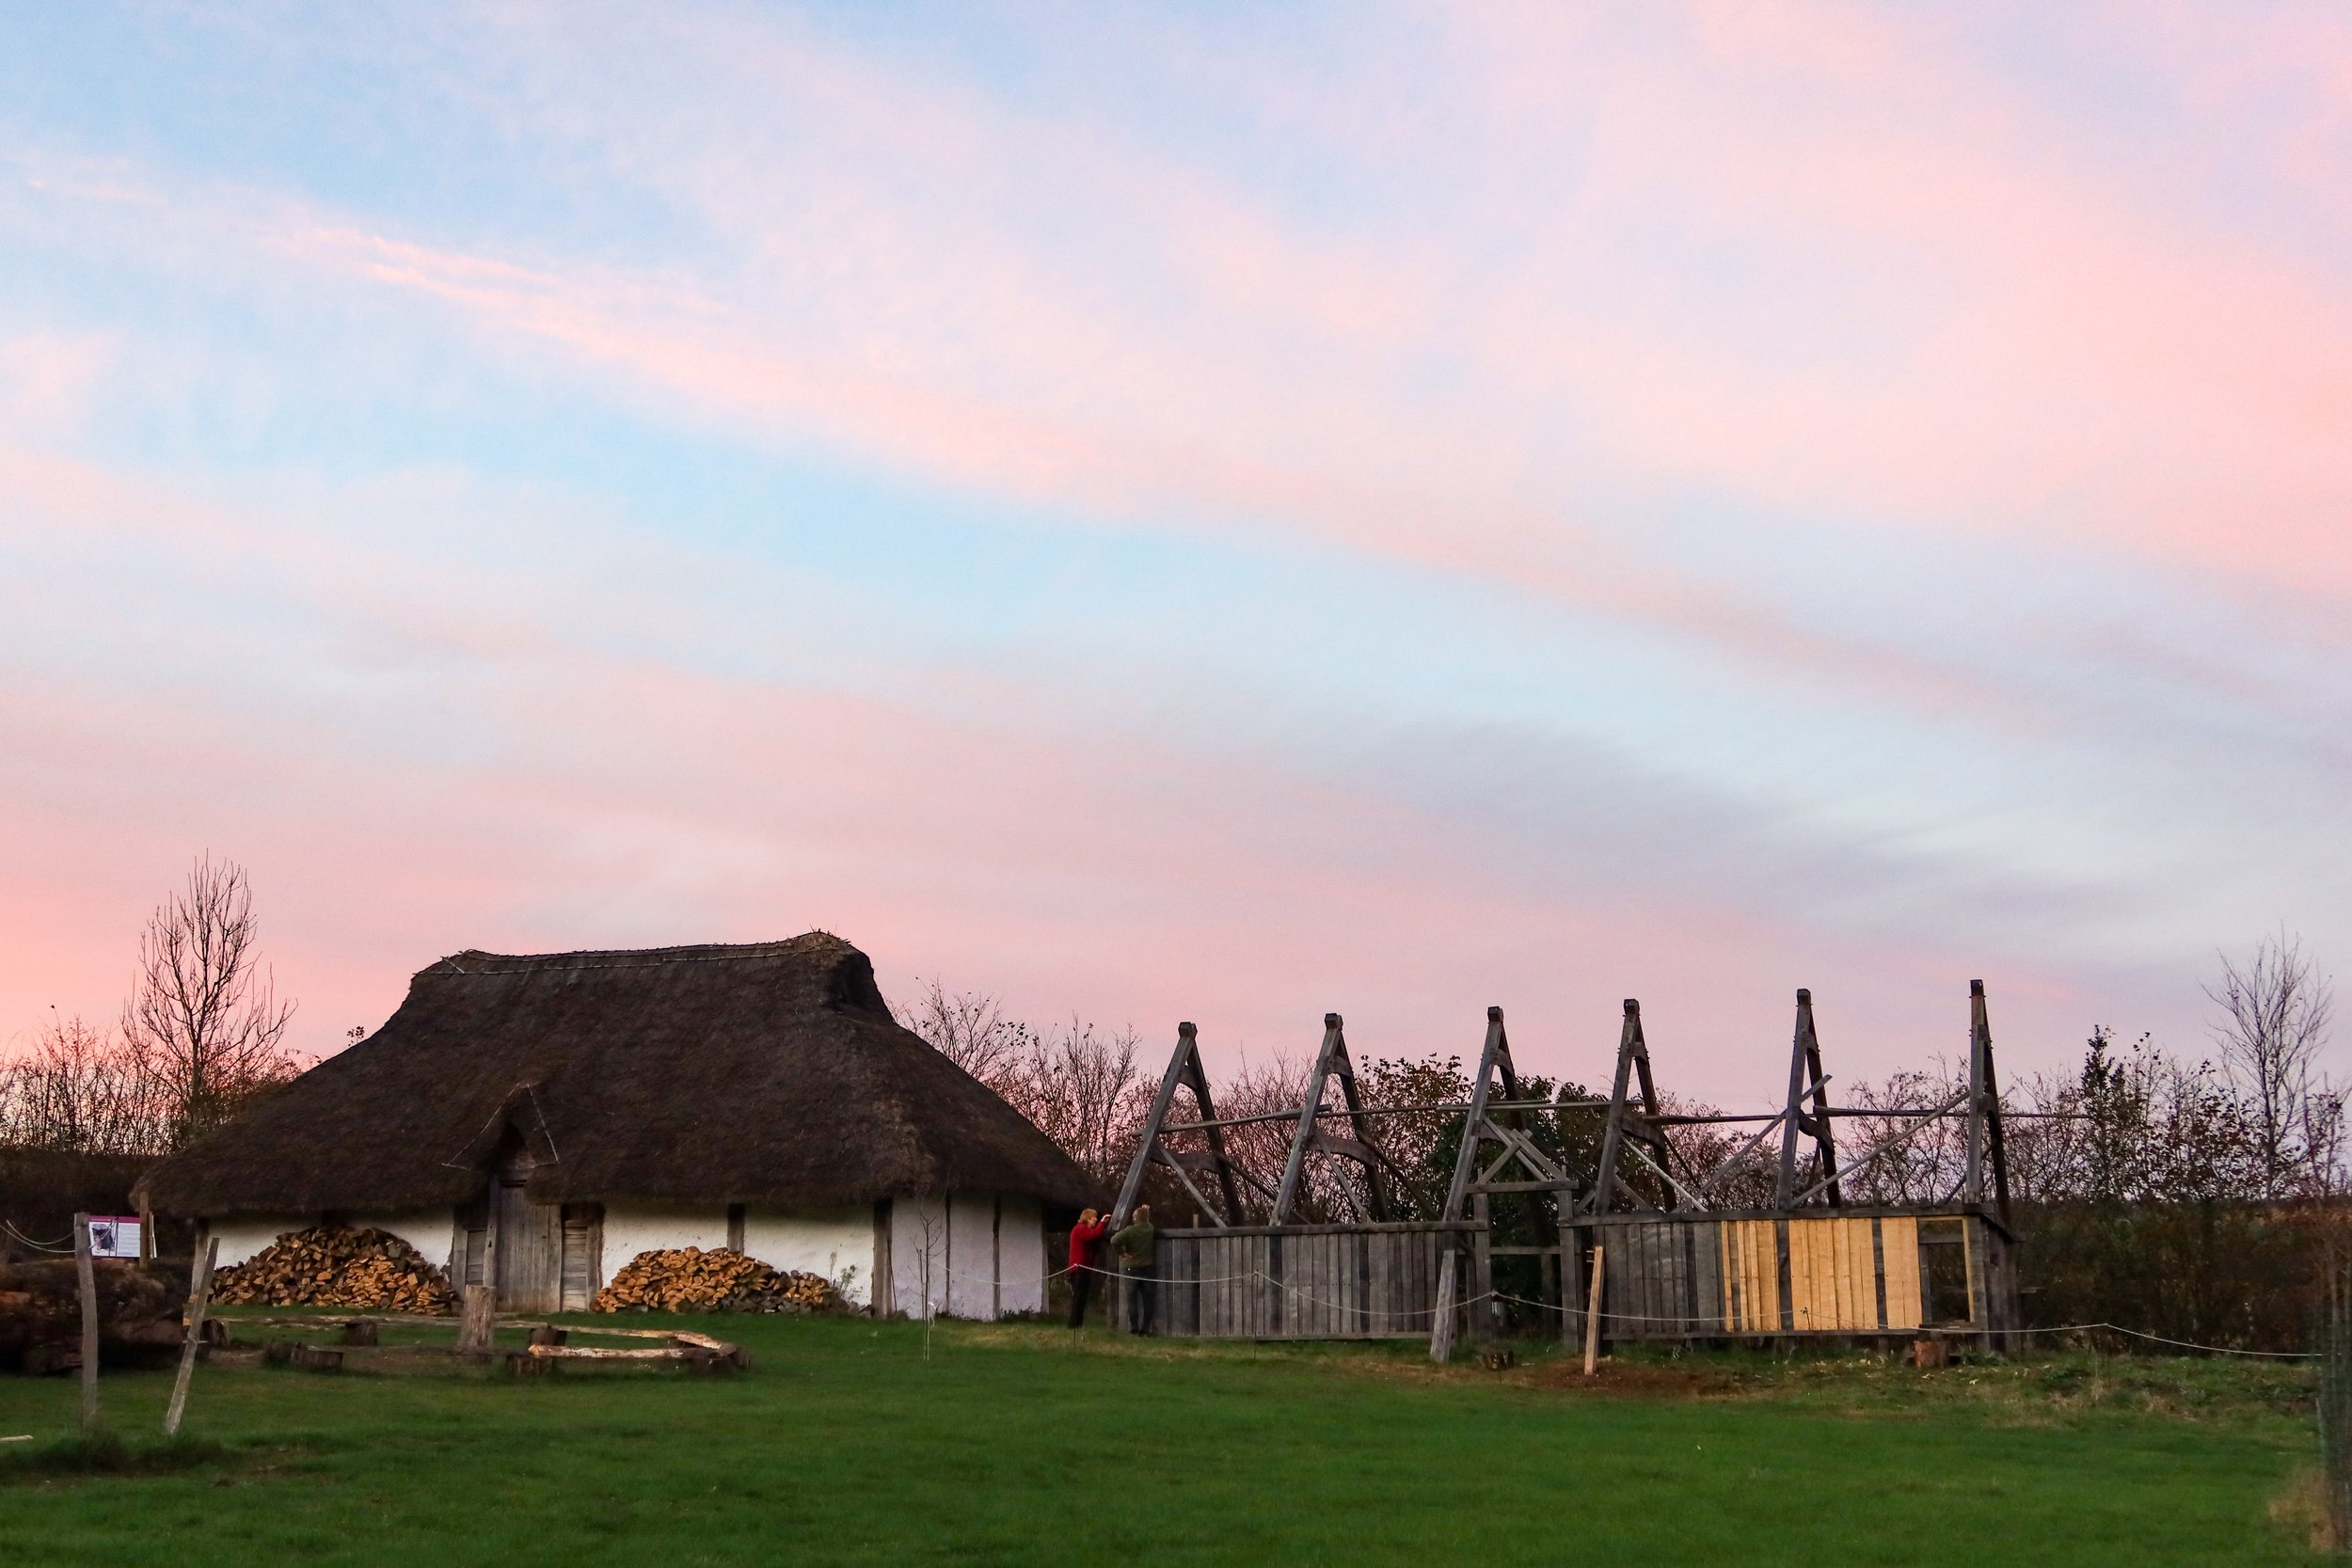
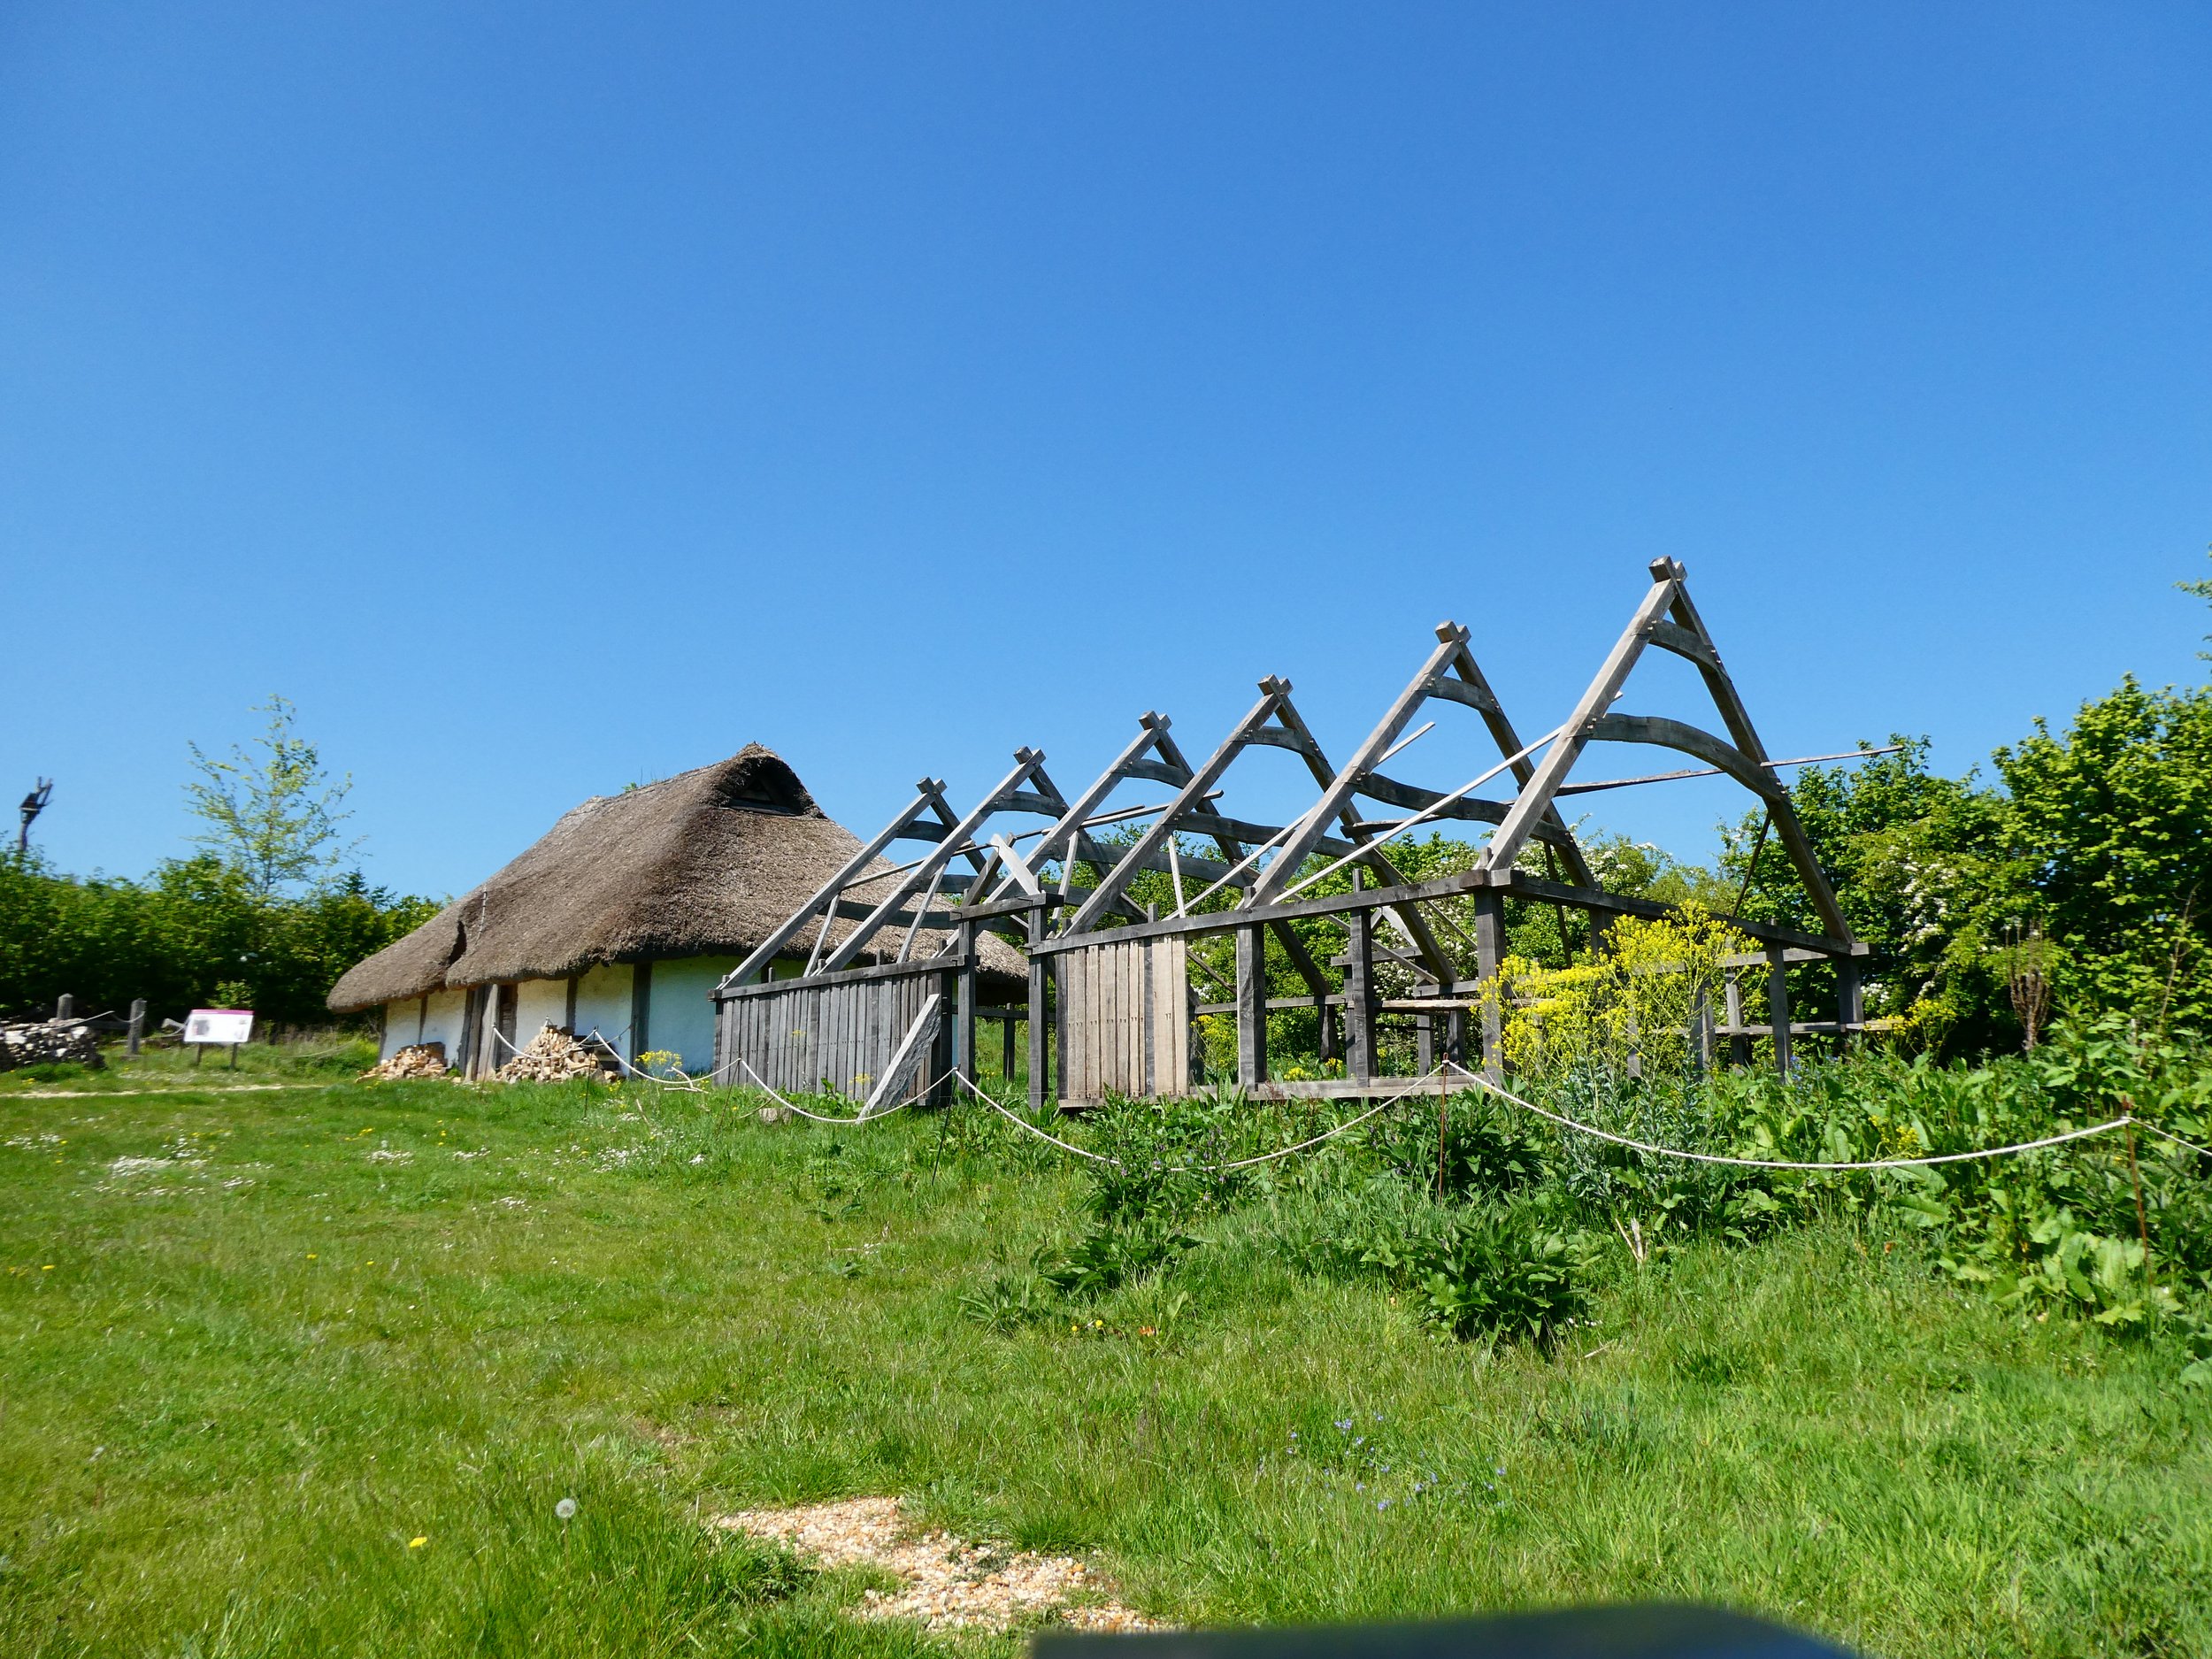
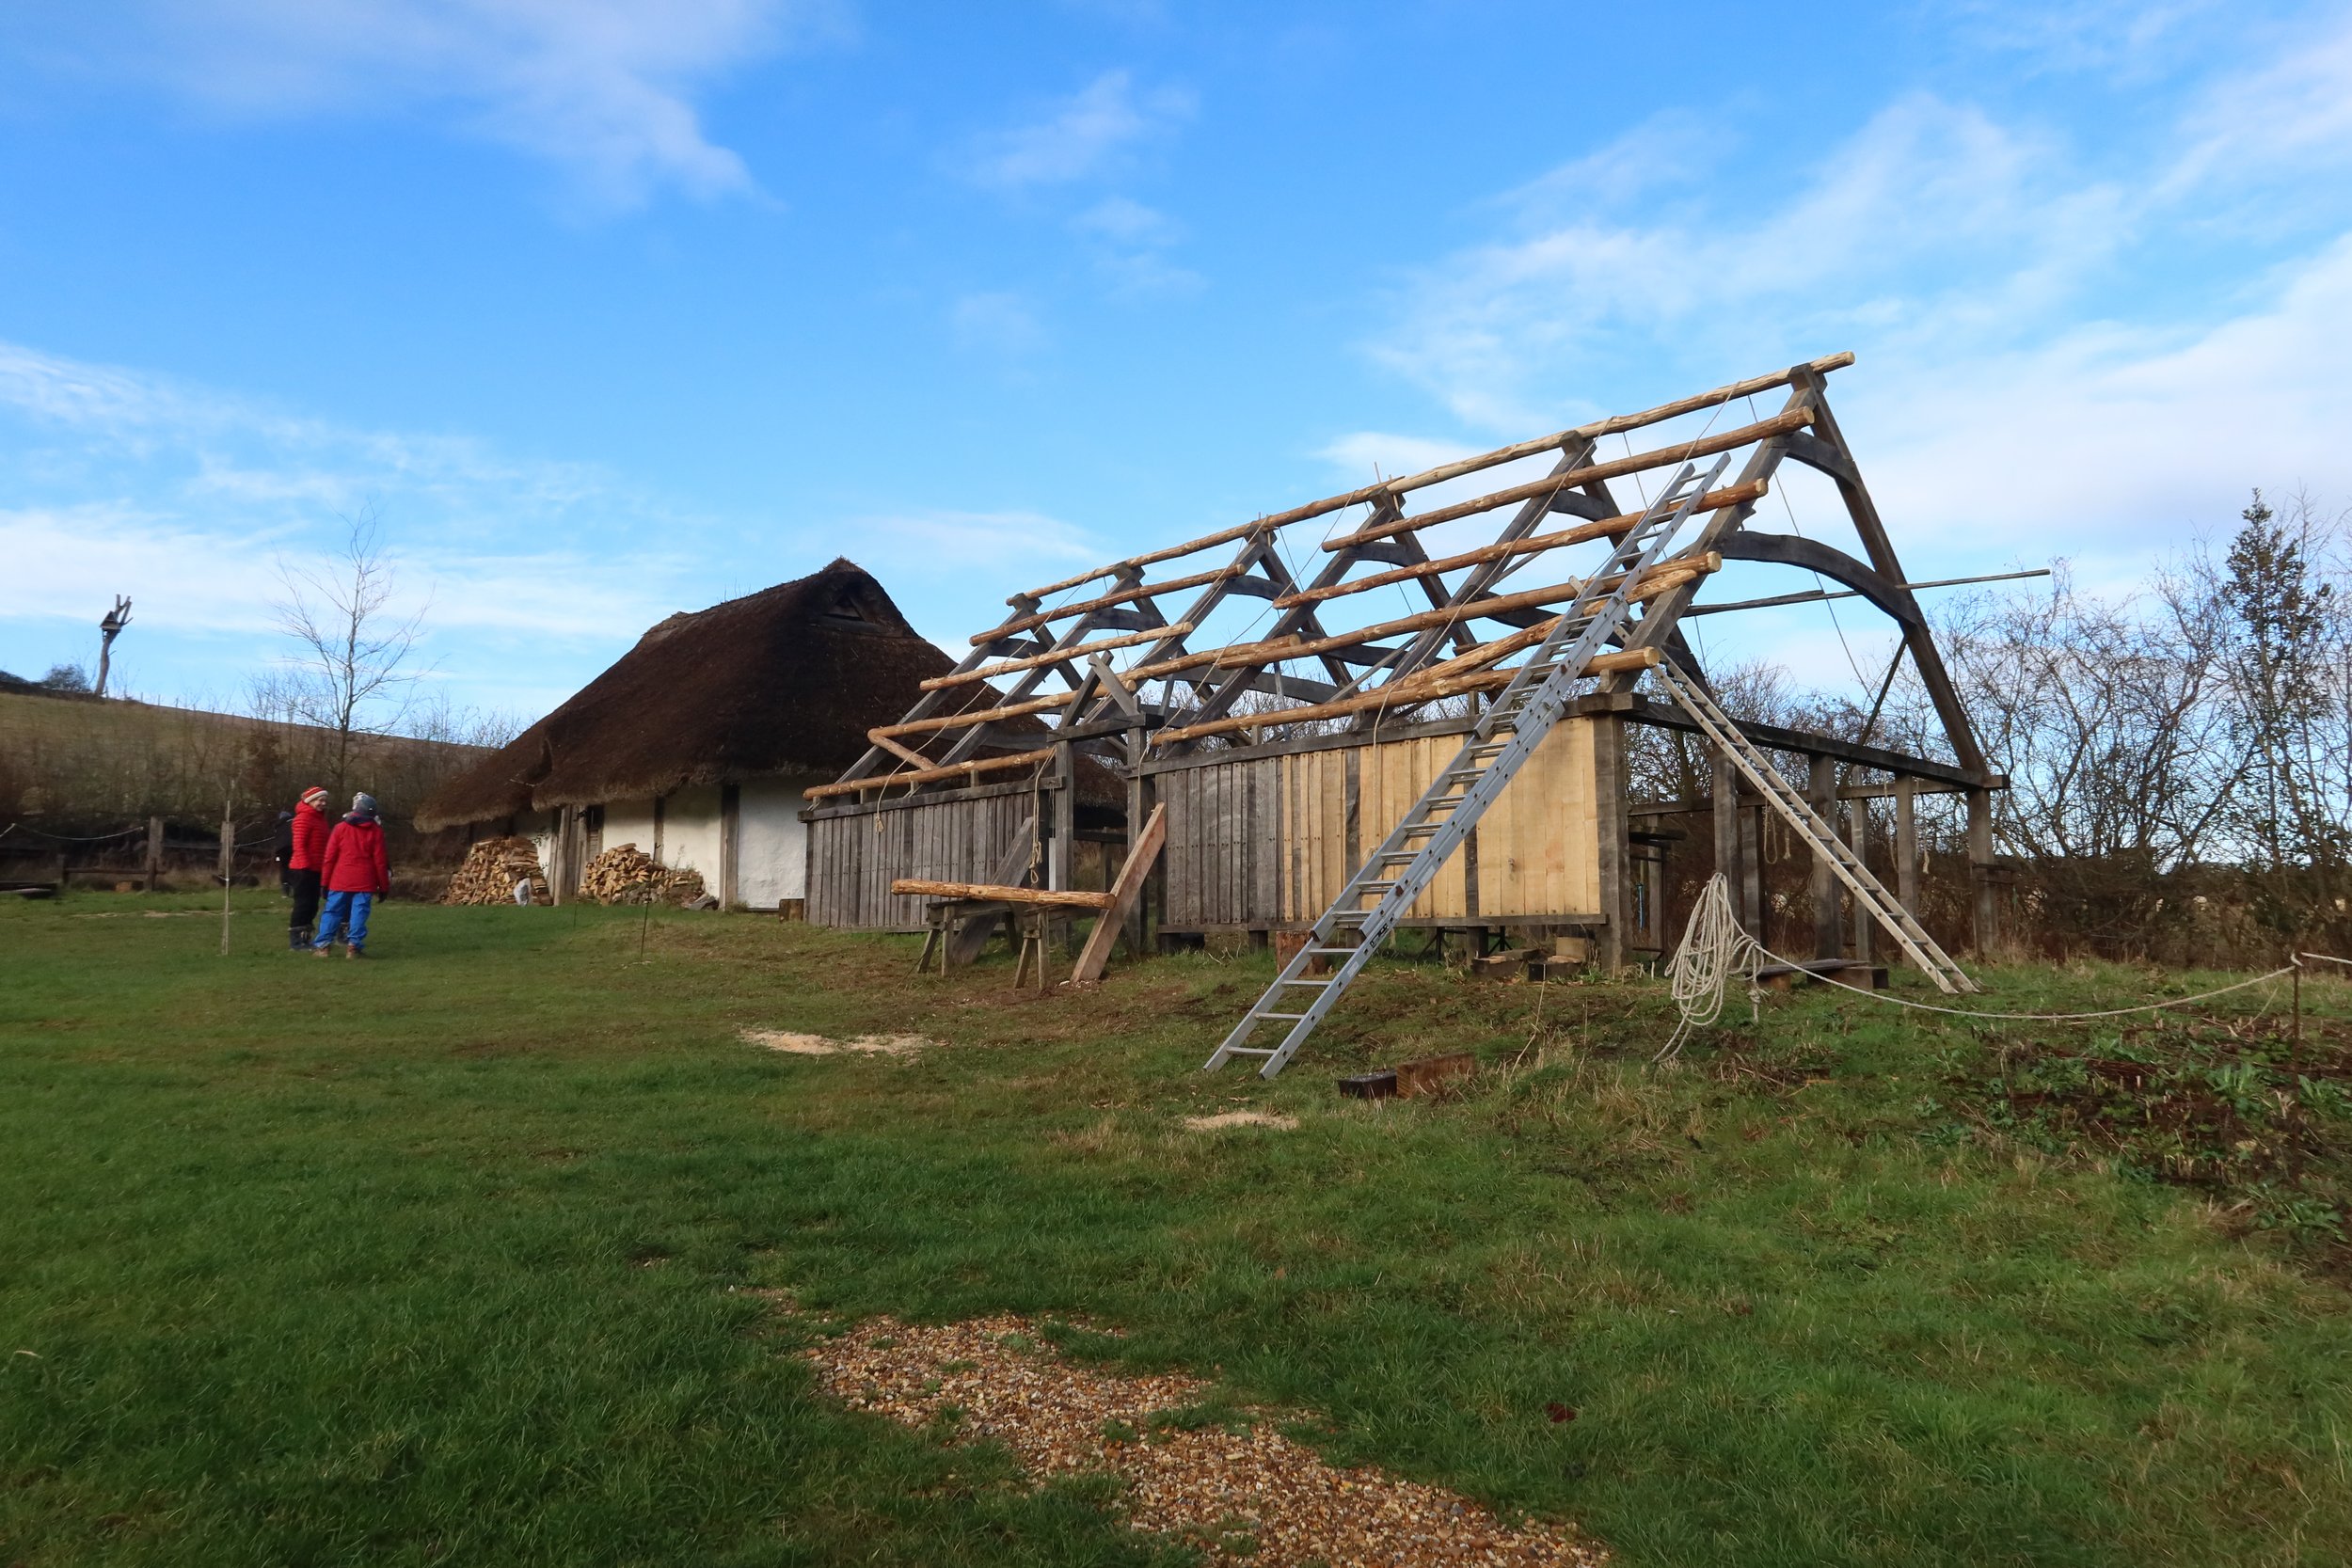
Glastonbury M74 Roundhouse - What goes up, must come down…
Experimental Archaeologist Therese reflects on the deconstruction of our Glastonbury M74 Roundhouse - soon to be replaced with another exciting building - and what we hope the lifespan and condition of this building can tell us about roundhouse construction.
Experimental Archaeologist Therese reflects on the deconstruction of our Glastonbury M74 Roundhouse - soon to be replaced with another exciting building - and what we hope the lifespan and condition of this building can tell us about roundhouse construction.
One of the really exciting things about working with experimental construction is that we get to experience the entire lifespan of a structure from its building through to its gradual decay and deconstruction.
Over the last week, we have been deconstructing our interpretation of ‘Glastonbury Mound 74’, affectionately known as the Yellow Glastonbury. Built at Butser in 2008, this structure was based on the archaeological remains of one of the best-preserved mounds at Glastonbury Lake Village in Somerset. The site was discovered by Arthur Bullied in 1892 and its subsequent study throughout the early 20th century revolutionised the understanding of the Iron Age.
We are now at the deconstruction stage of the building which gives us the opportunity to gauge how the various organic components of the structure have fared through time and we gain a unique insight into what traces are left in the ground when the structure itself has disappeared. This tells us all sorts of things about the potential life expectancy of such a structure, material choices and performance and what we might expect to find in the archaeological record.
Our original building was constructed using hazel for the upright wall posts and roof purlins, ash and birch for the rafters, willow wattle covered in daub (made with clay, dung and water), water reed thatch and a clay floor.
After nearly 14 years, the thatch was in a poor state and quite damp and cruddy, though this was at least partly because the building was without a fire for several years. The four principal ash rafters were in good condition while the birch rafters and hazel uprights and purlins showed signs of woodworm infestation and were crumbly to the touch. The daub was still really robust and as we began to remove it, it became clear that it was the main element holding the structure together. The chunks of daub retained clear impressions of the willow wattle from which the dimensions of the wattle could be discerned.
At first sight, the wattle walls appeared to be have been holding together fairly well, but on closer inspection, the interiors of the willow withies were completely rotten and just held together by the outer bark. We were able to cut through the bare wattle with a hand saw without difficulty.
We will continue with the deconstruction process this week and when the structure has been completely removed we will conduct a mini-excavation to see what remains in the ground. We hope to be able to compare the data that we collect with the original excavation records to see if there are any similarities, though, of course, we keep in mind that the site formation processes at play in our structure are very different from those at the original site. Nonetheless, the information that we collect will continue to inform our interpretations and experimental constructions and we hope our data will be useful for anyone exploring the archaeological remains of structures in the future. We look forward to sharing our findings as the process continues!

Glastonbury M74 in 2009 shortly after construction
Glastonbury M74 in March 2022

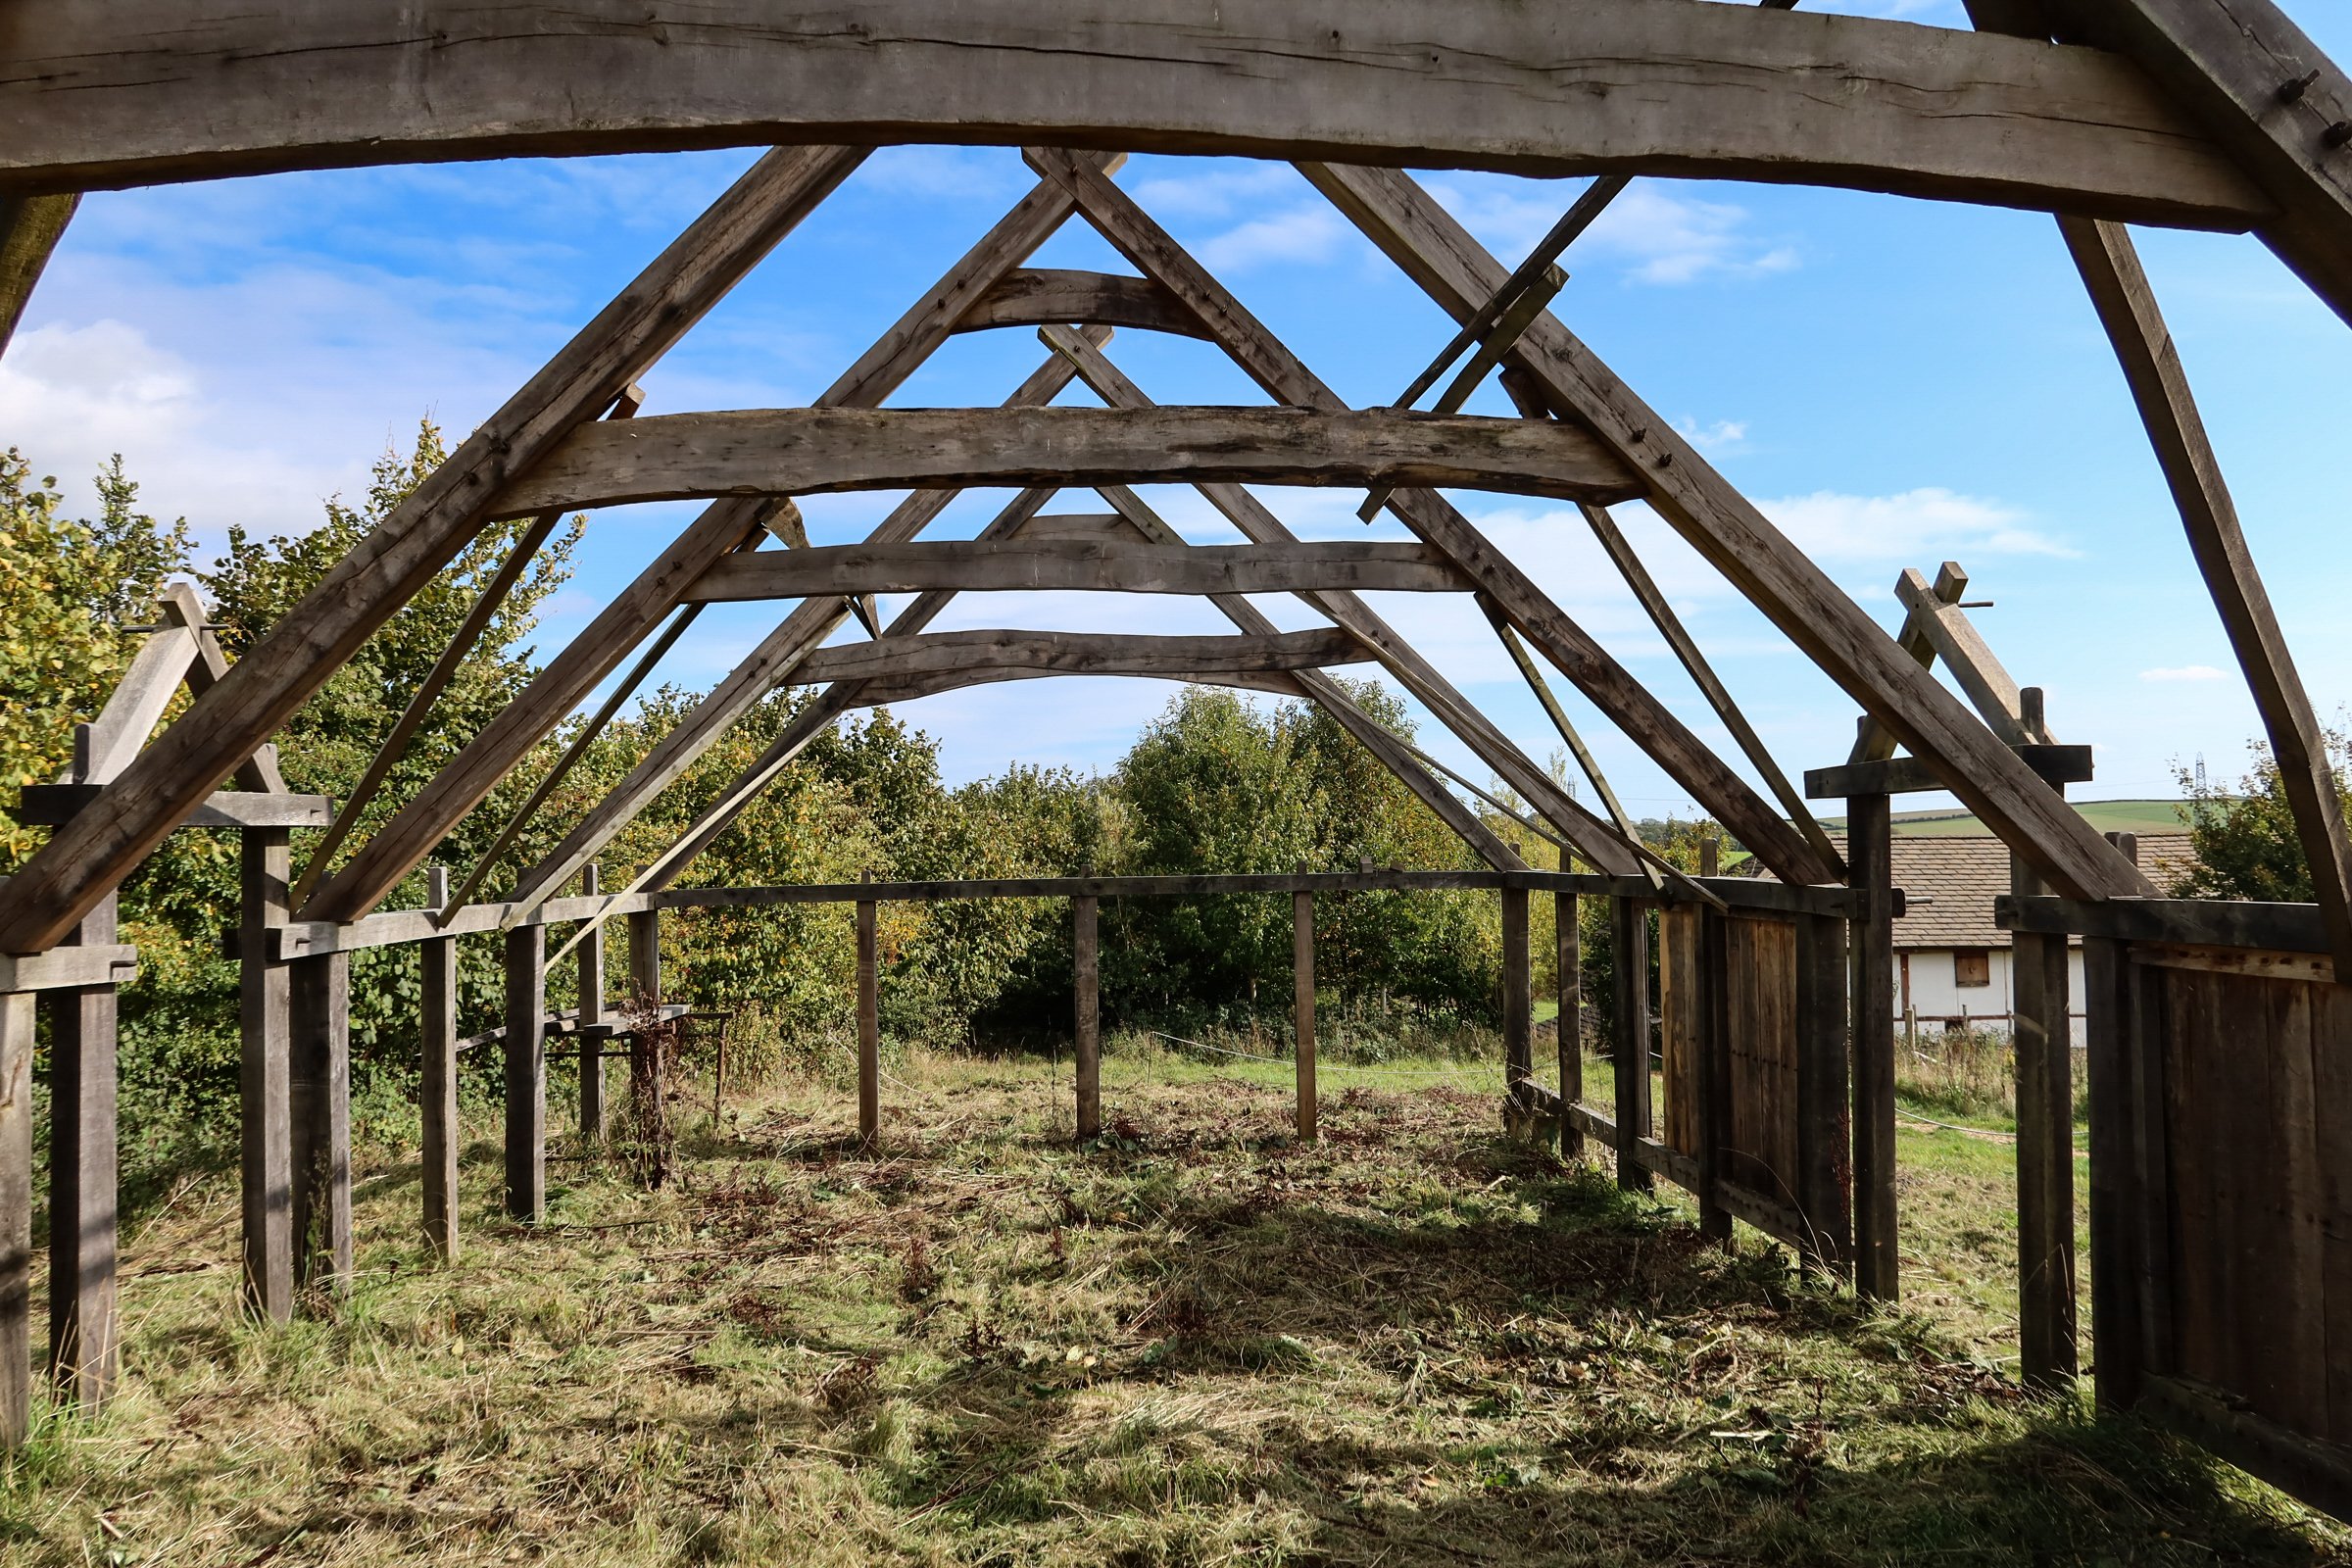
Internal roof structure (March 2022)

Birch rafters and hazel purlins (March 2022)

Removal of the interior daub begins.

Close up of the wattle structure after the internal daub has been removed

Fragments of daub with impressions of the willow wattle.
To find out more about our Glastonbury M74 project and support our ongoing archaeological research subscribe to Butser Plus where we share regular videos documenting the projects and ancient skills at the farm. Thank you!


Blog archive
- December 2025 1
- November 2025 2
- September 2025 1
- April 2025 2
- February 2025 1
- January 2025 1
- November 2024 2
- August 2024 1
- July 2024 2
- May 2024 1
- November 2023 1
- October 2023 1
- September 2023 1
- August 2023 1
- July 2023 1
- June 2023 2
- May 2023 2
- March 2023 1
- February 2023 1
- December 2022 1
- October 2022 1
- August 2022 2
- April 2022 1
- March 2022 2
- February 2022 1
- January 2022 1
- December 2021 2
- November 2021 3
- October 2021 2
- September 2021 5
- August 2021 2
- July 2021 3
- June 2021 3
- May 2021 2
- April 2021 4
- March 2021 1
- November 2020 1
- October 2020 2
- August 2020 1
- March 2020 4
- February 2020 4
- January 2020 3
- December 2019 3
- November 2019 1
- October 2019 1
- September 2019 1
- August 2019 1
- July 2019 6
- June 2019 3
- April 2019 2
- March 2019 3
- February 2019 2
- January 2019 1
- November 2018 1
- October 2018 2
- September 2018 3
- August 2018 4
- July 2018 2
- June 2018 2
- May 2018 2
- March 2018 6
- February 2018 1
- October 2017 1
- September 2017 5
- August 2017 4
- July 2017 3
- June 2017 1
- May 2017 1
- April 2017 3
- March 2017 2
- February 2017 3
- January 2017 1
- December 2016 2
- November 2016 1
- September 2016 1
- August 2016 2
- July 2016 2
- June 2016 3
- May 2016 2
- April 2016 1
- March 2016 2
- February 2016 1
- January 2016 3
- December 2015 2
- November 2015 1
- October 2015 1
- September 2015 2
- August 2015 1
- July 2015 2
- June 2015 2
- May 2015 3