Uncovering the Mysteries of the Roman Provincial Mint (sort of)
This week’s guest post is by PhD student Francesca Lam-March from King’s College London, who was awarded the Friends of Butser Ancient Farm bursary in 2025.
When you look at the humble Roman As (little bronze coin) or even the brash Sestertius (big bronze coin), do you ever think about how that coin came to be? I do. Although they don't age as well as their gold and silver cousins, these bronze coins were, in their day, every bit as shiny and very pretty to look at. These circular flashy tokens were the currency (mainly) minted by the Roman provinces, the cities with the means and the wealth to produce their own local currency. Yet, despite a hefty dataset of thousands of coin types, we know relatively little about them.
How did these coins come to be? Where were they made? And by who?
These questions have become a large branch of my PhD research and inspired me to apply for the Friends of Buster Ancient Farm bursary in 2025, to see if I could find out more. Quickly, I realised this was a multistep process.

Roman coin from Bilbilis
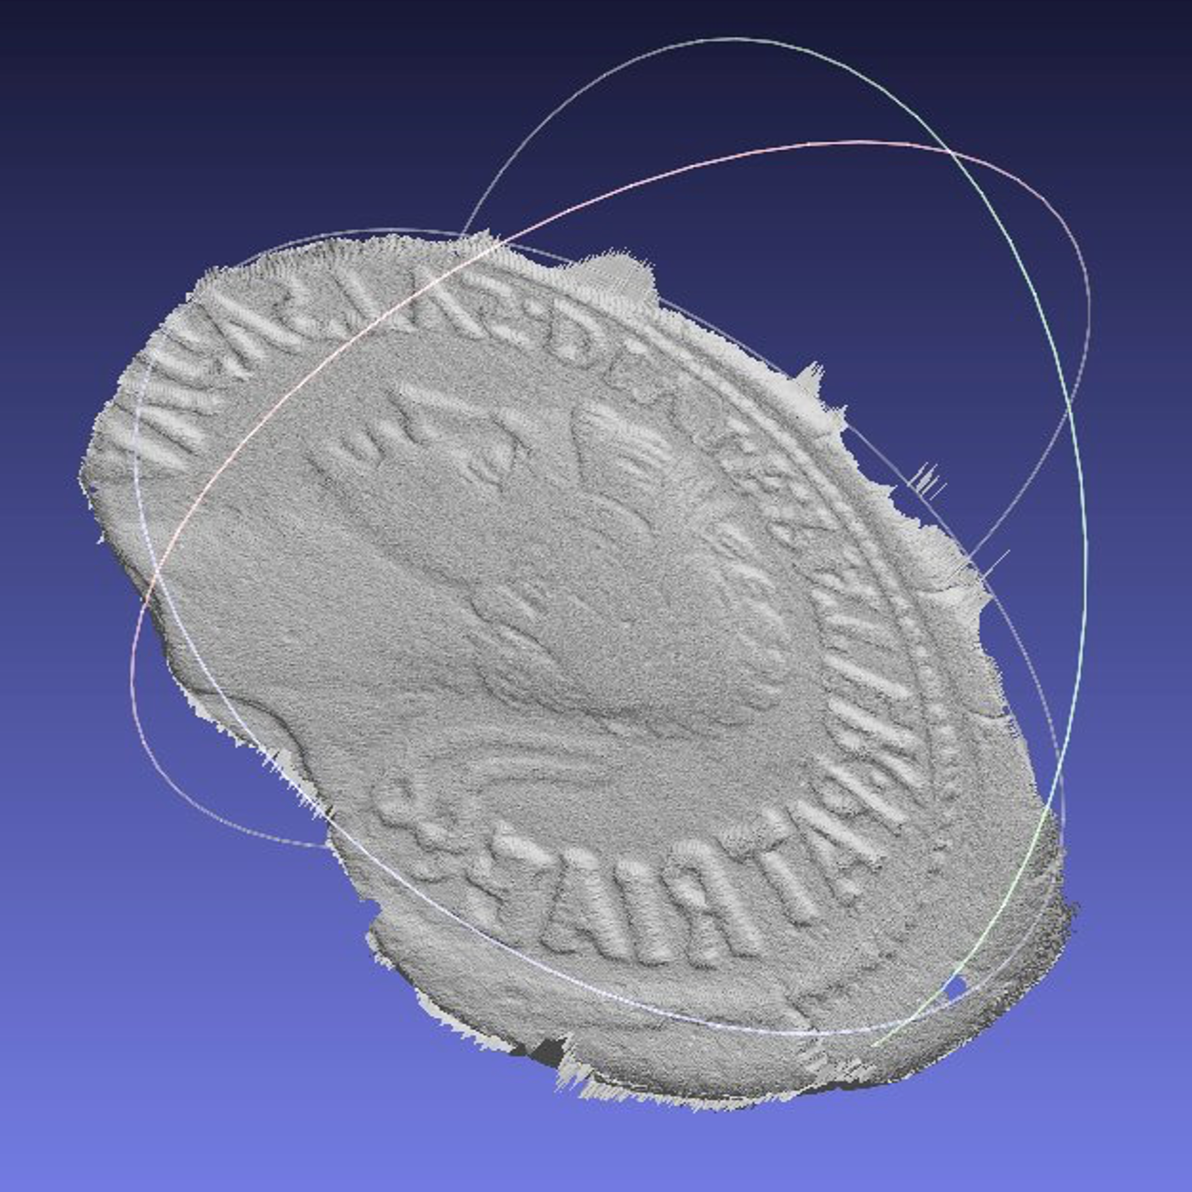
3D scan of coin
My first challenge, and the topic of this blog, was to make a bronze coin. A bronze coin is a circular pellet (generally) made from tin and copper melted together. I made mine in a modern 6kg metal melting furnace fired with propane gas. And with the generous help of the Friends of Butser Ancient Farm I was able to buy the metal and have a place to fire up the furnace and conduct these experiments.
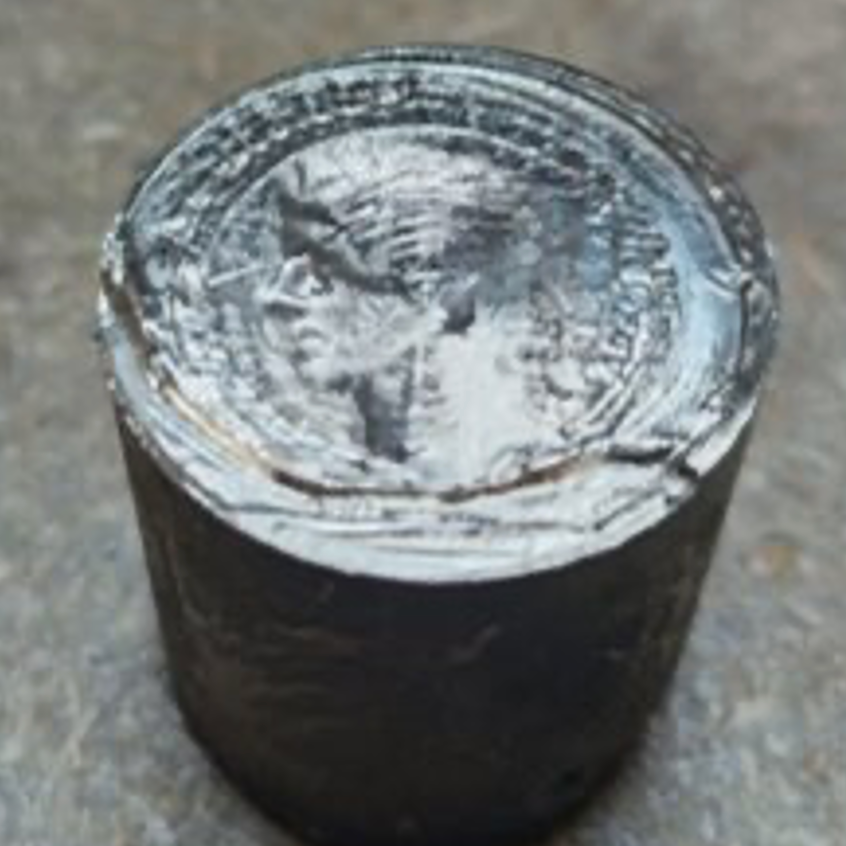
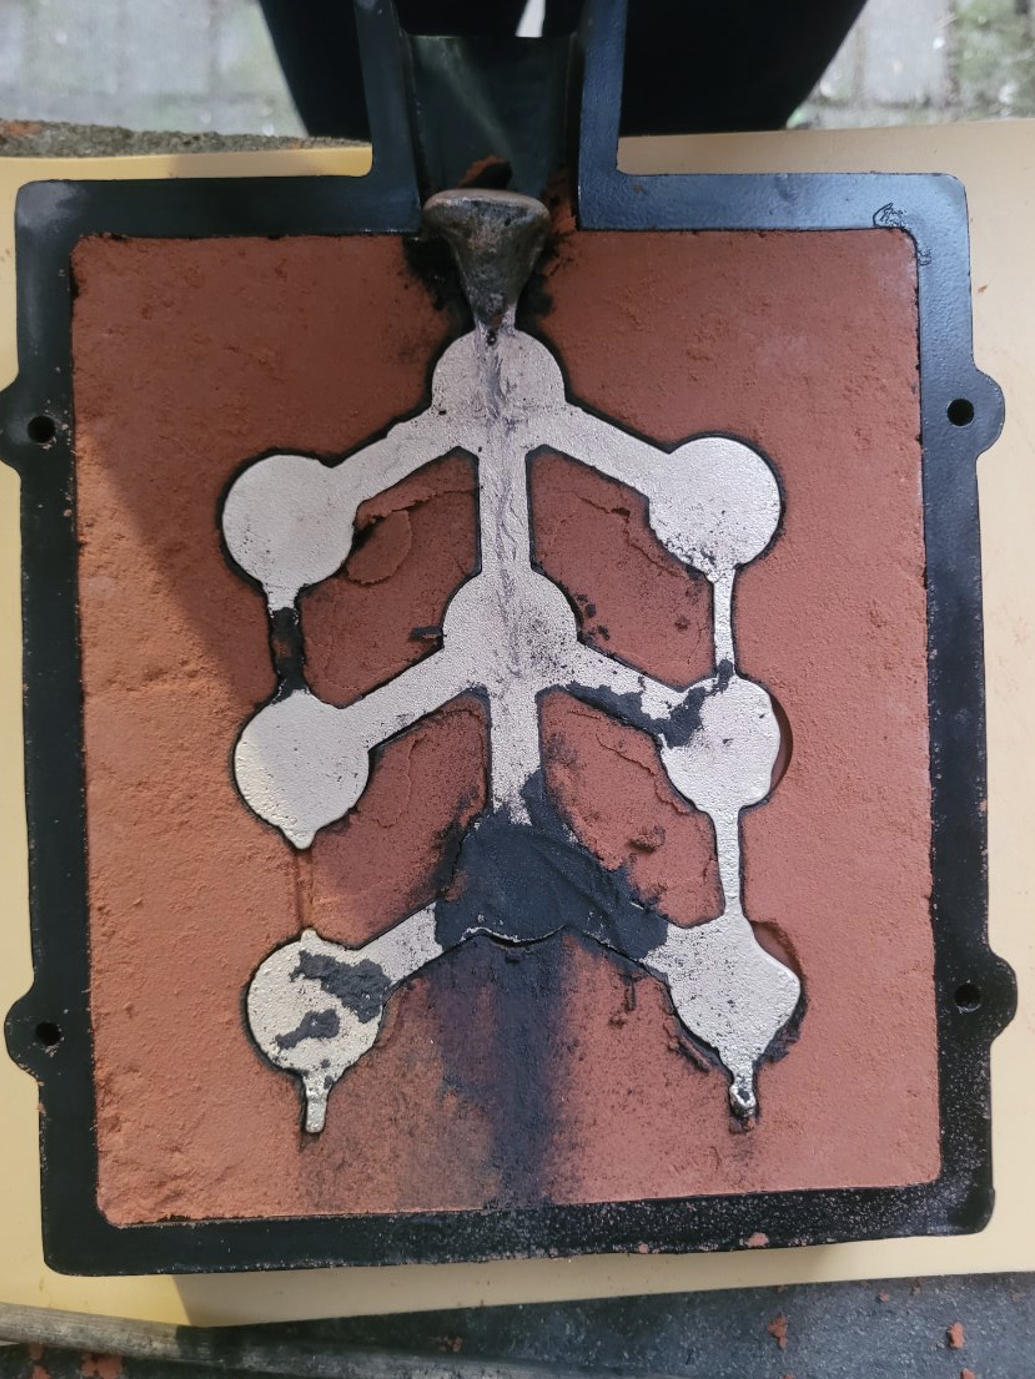
Engraved coin die
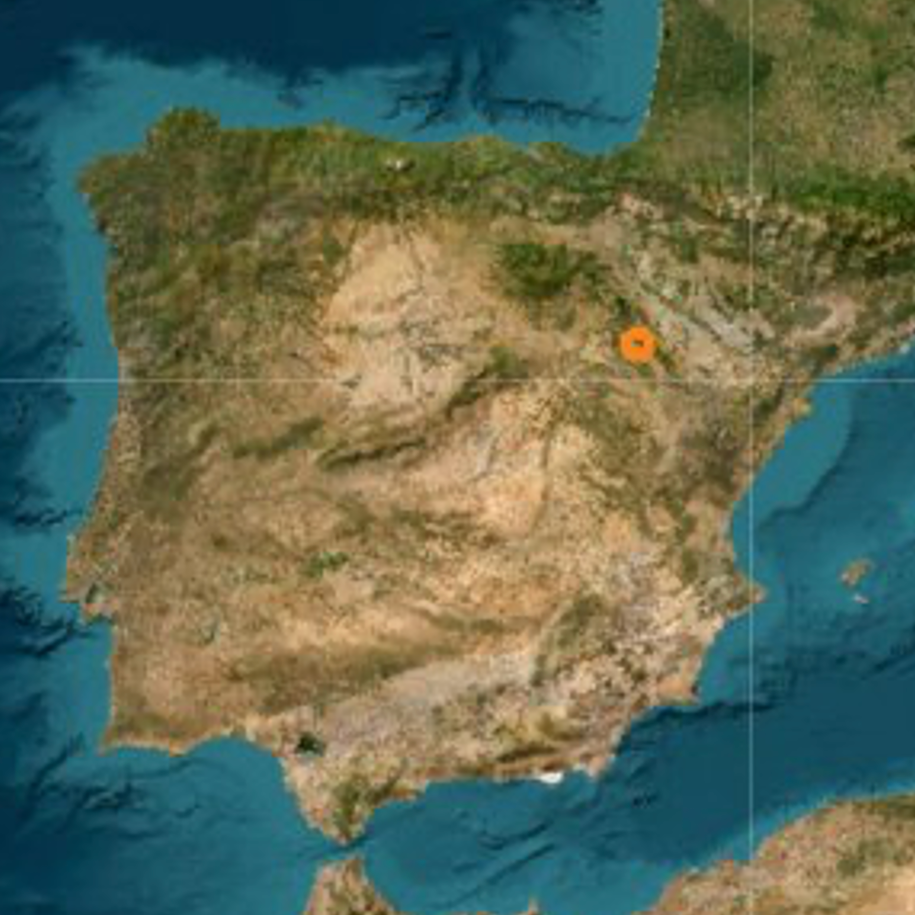
Map denoting where Bilbilis is
My chosen coin to replicate was a chunky (29mm) sestertii sized coin from Bilbilis - a municipium (city) located around 400km west of Barcelona. The Romans were adept hands in casting their blanks, as the weight disparities between the blanks was no more than 4g. Unsure of how to repeat such accuracy, I developed three types of mold: Graphite, Steel and Sand.
The graphite and steel molds were created with a CNC machine. The flan molds were 30mm in diameter and were connected with a 10mm wide channel to allow the bronze to flow through. The molds were open molds based on styles seen from Roman Paphos. The problem was that the open molds were heavily oxidising. This was the first red flag that this was a more complex business than I'd thought.
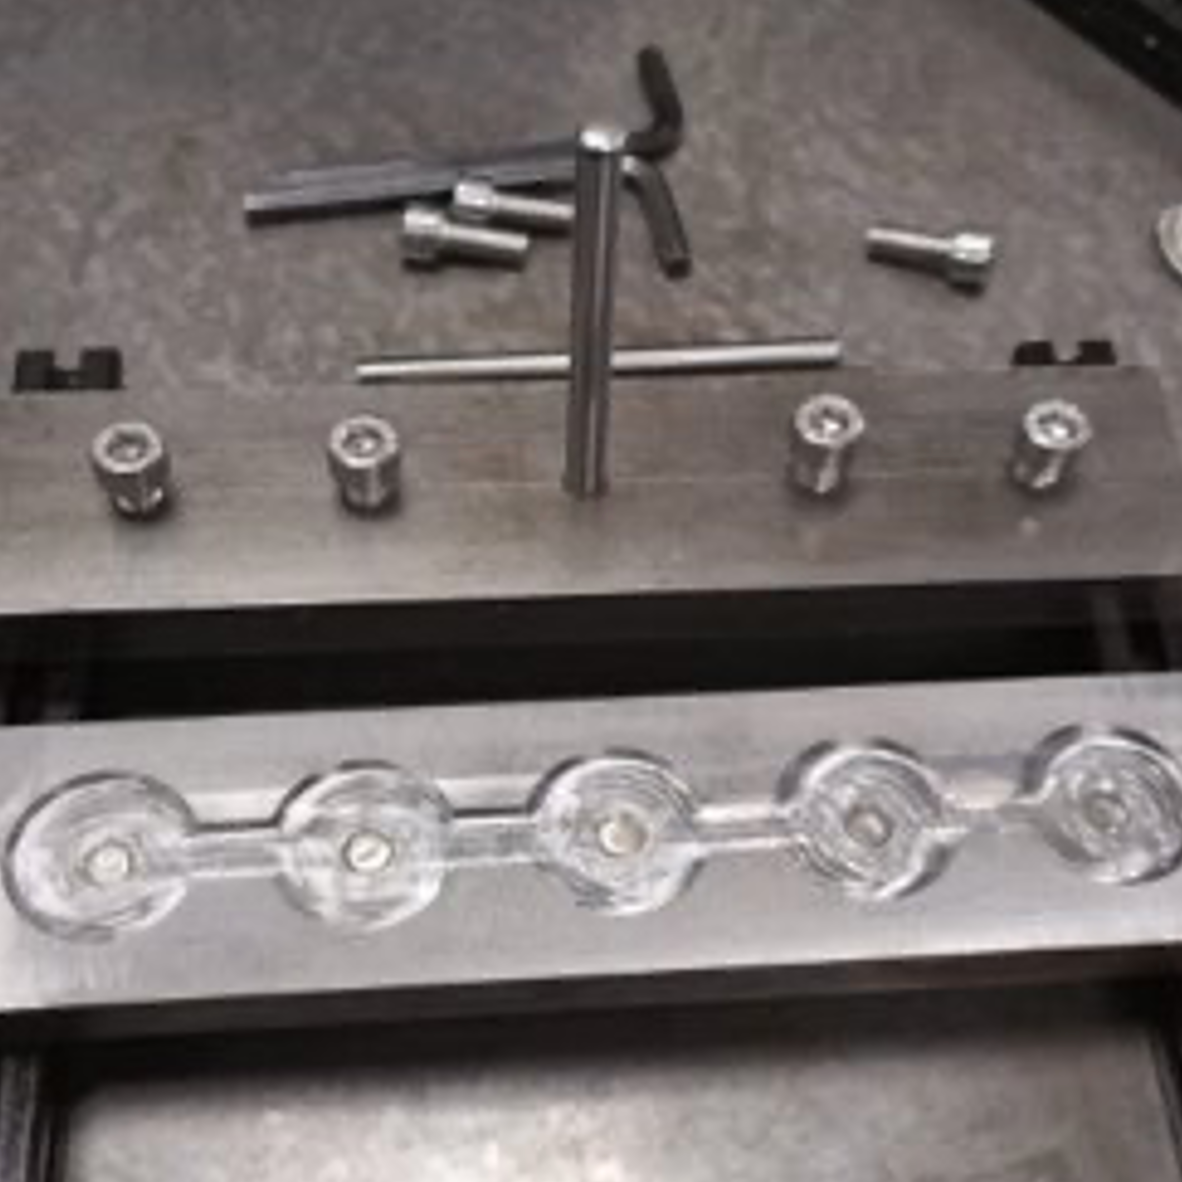
Steel molds
Graphite molds
Oxidised coin blanks
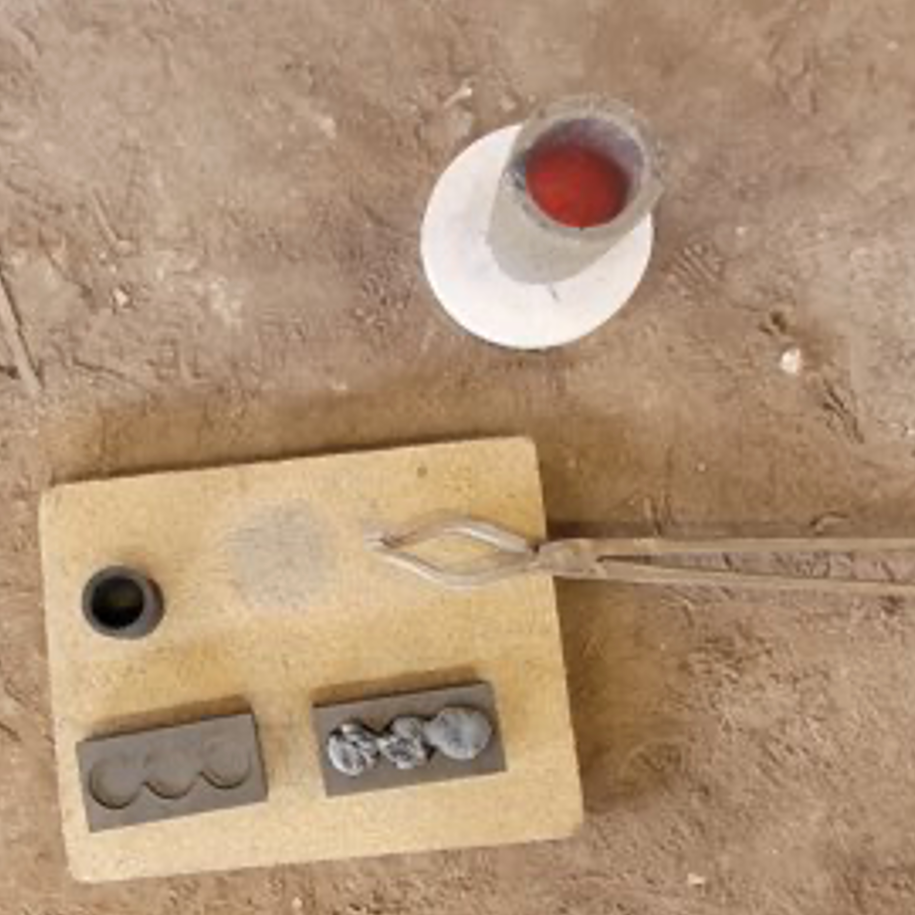
The sand casting proved much better as the mold was closed. But the pockets for the flans proved tricky to get right, because I was using a punch as a template. In the end I 3D printed a template which yielded much better results.
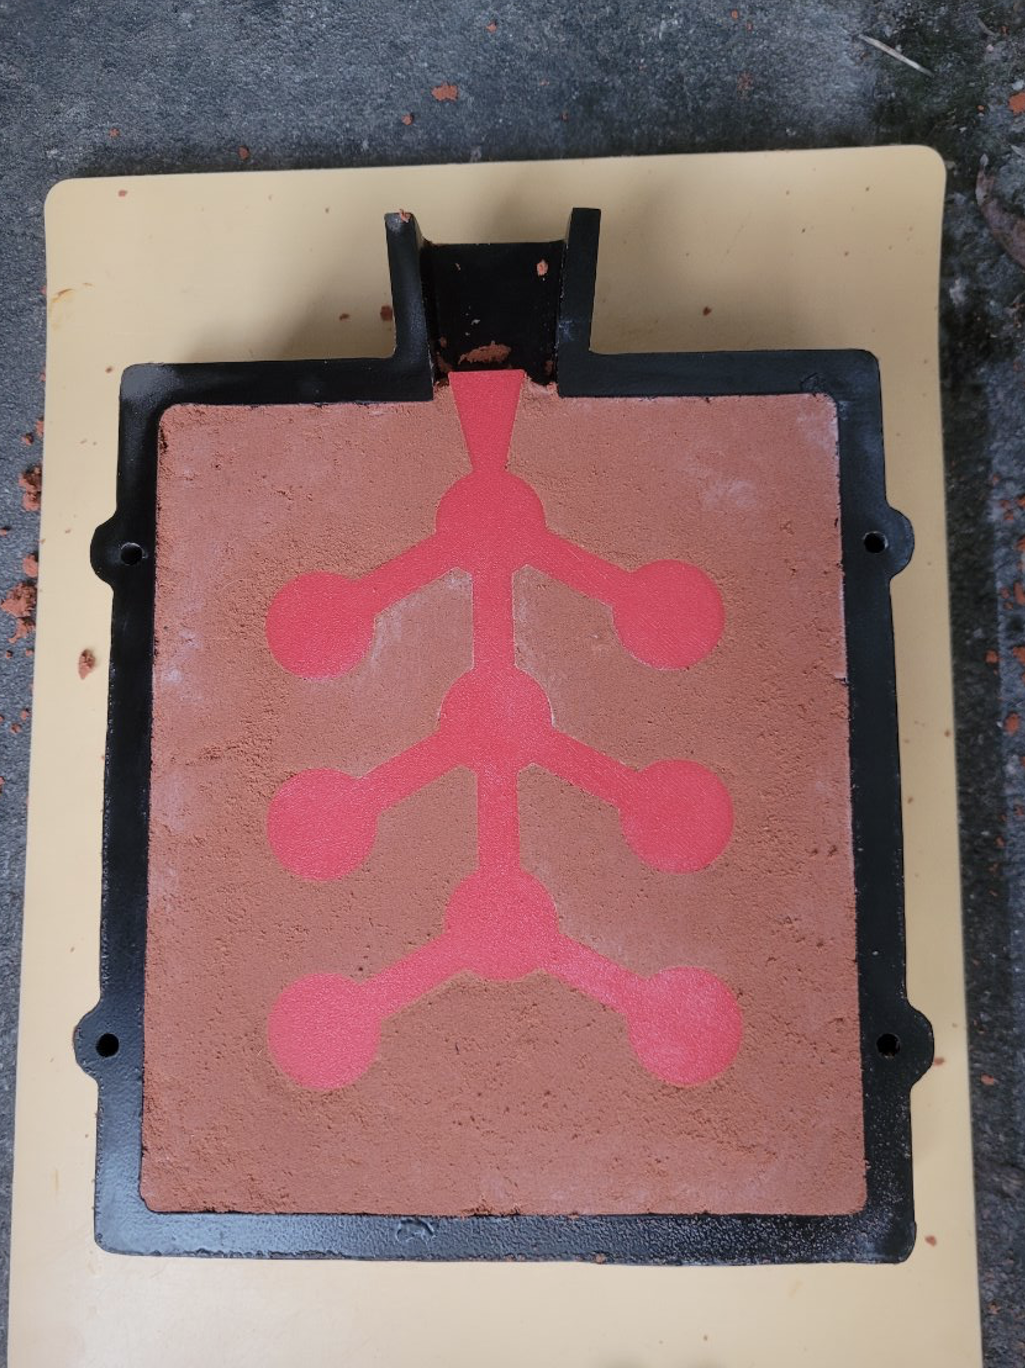
3D printed mold or sand casting
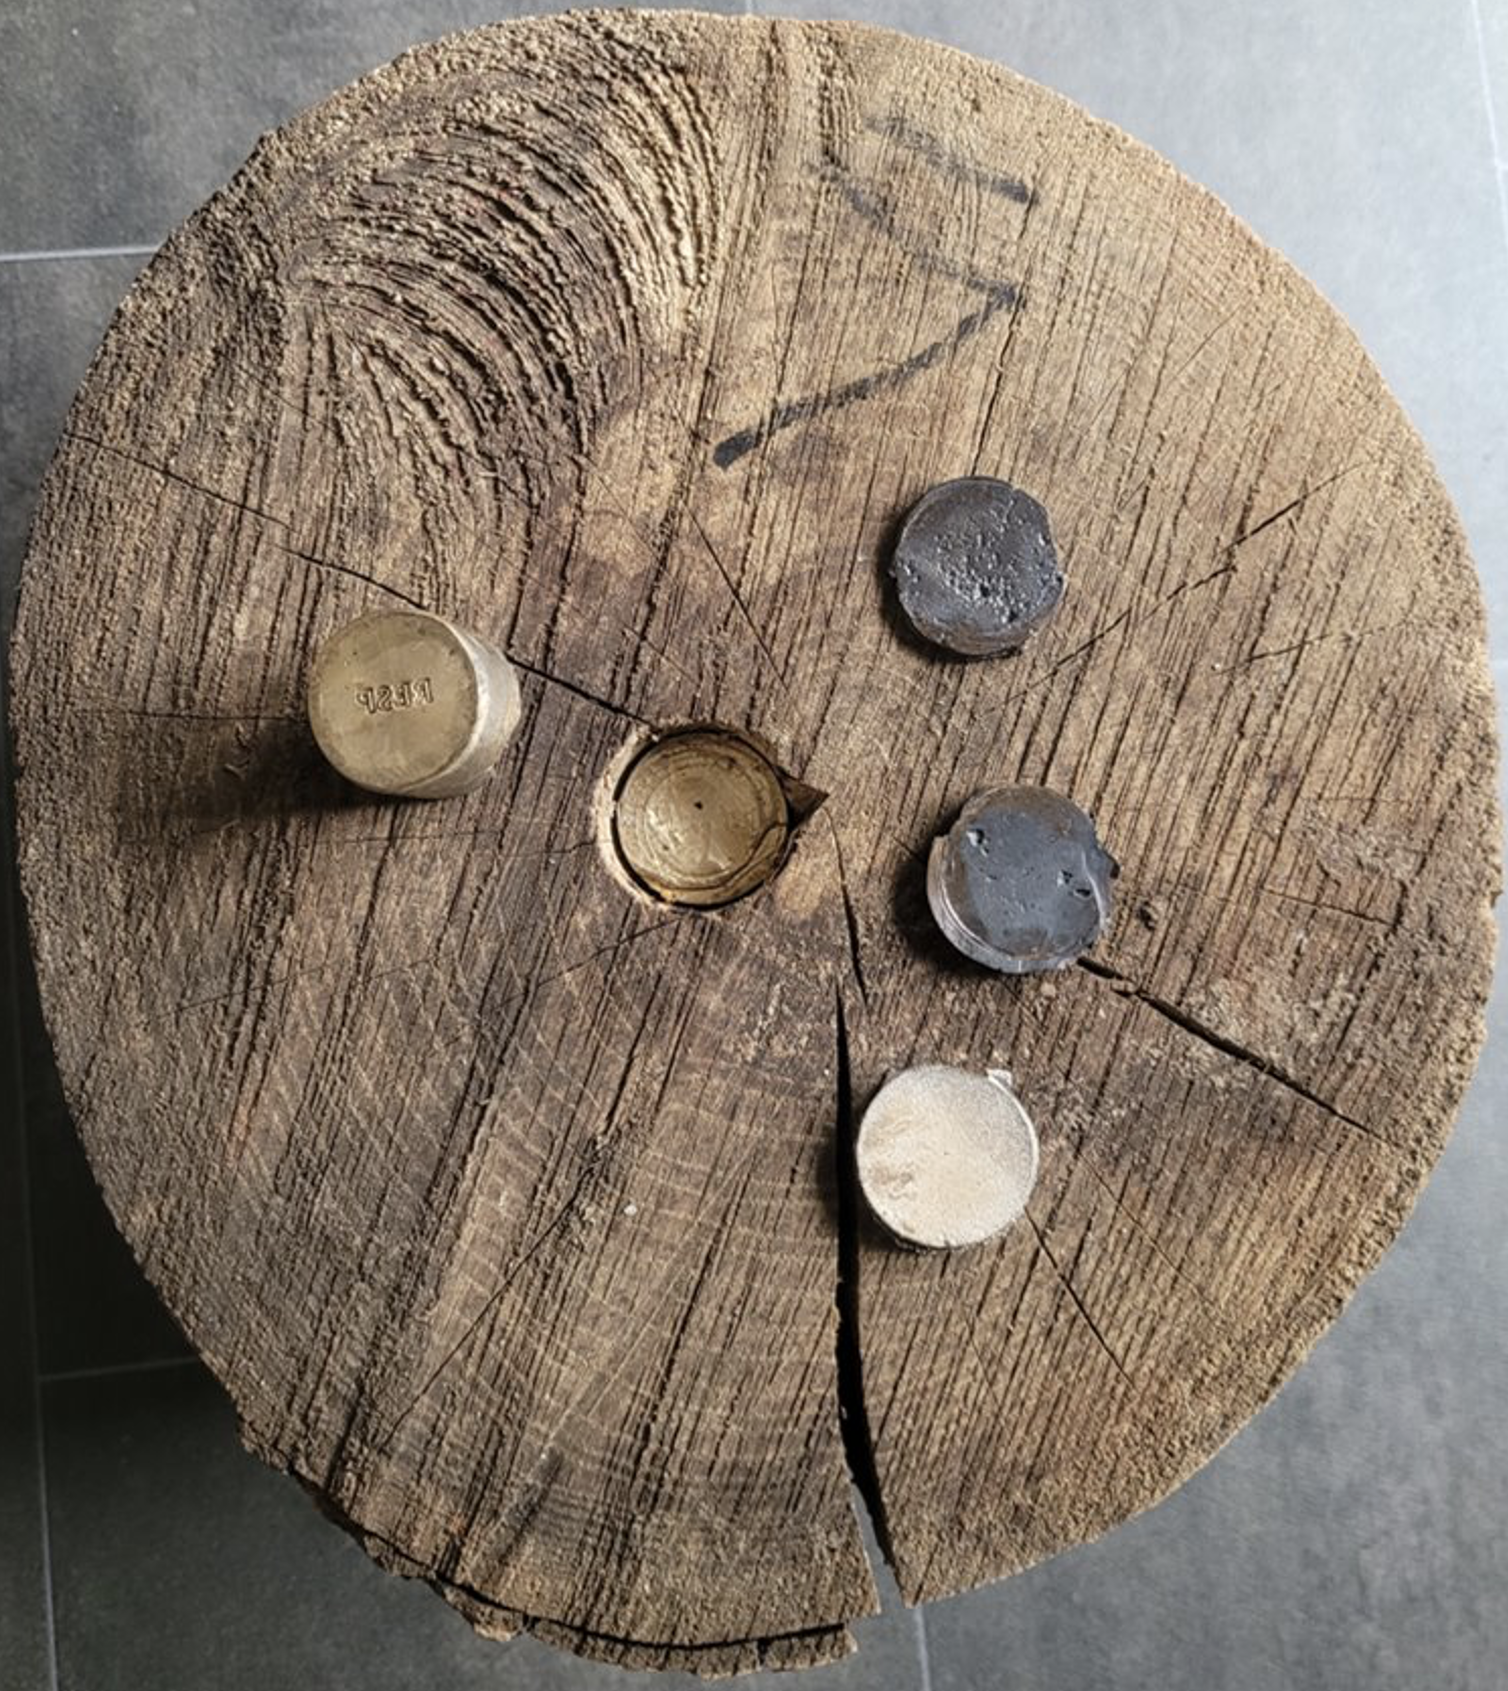
Bronze coin blanks
Next, I set about striking the coins, with the generous help of Dr Will Wootton on striking duty and Dr Katy Mortimer on temperature checking duty.
My first attempt was to strike the coin in the die, cold. This meant inserting the coin and the die into a tree stump to hold it steady and striking the coin as hard as possible. To my surprise - nothing. Not one part of the design of the die transferred.
I struck again, but this time I tried heating the coin to 100 degrees. Nothing. 200 degrees. Still nothing. A whopping cherry red hot, 400 degrees. Only the outer rim of the coin transferred.
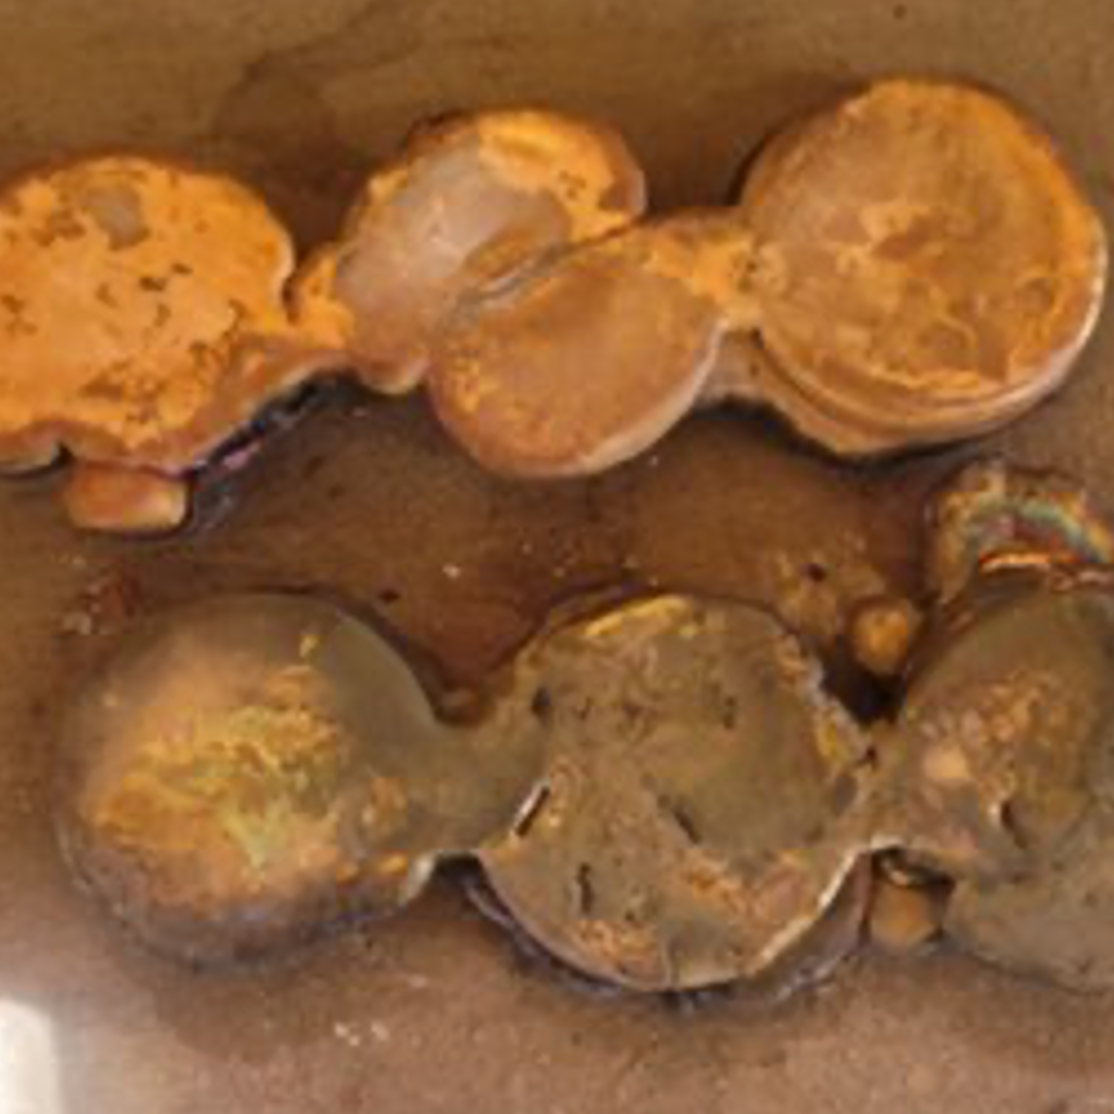
Oxidised coins - turned grey!
And what was still more confusing is that my shiney bronze coin had turned grey with oxidisation!
This left me puzzled - with even more questions than before. Why is it so hard to strike a bronze coin? What key step am I missing?
What I have no doubt of, however, is the value of experimental archaeology. We can learn so much more from experimentation, about not only the complexity of the processes but also the lives of the people behind them.
Part two on annealing, striking (again) and polishing the coins to follow soon!